

C
Cassandra SwansonSep 4, 2025
What to do if the Battery pack is almost discharged in my Samsung Camcorder?
- RRobert CollierSep 4, 2025
If the battery pack is almost discharged in your Samsung Camcorder, change to a charged one.
What to do if the Battery pack is almost discharged in my Samsung Camcorder?
If the battery pack is almost discharged in your Samsung Camcorder, change to a charged one.
Why do I see a mosaic pattern during playback search on Samsung SC-D453 Camcorder?
Seeing a mosaic pattern during playback search on your Samsung Camcorder is normal operation. However, the tape may be damaged, consider replacing it. Clean the video heads.
What to do if I see a blue screen during playback on Samsung SC-D453?
If you're seeing a blue screen during playback on your Samsung Camcorder, the video heads may be dirty. Clean the head with a cleaning tape.
Why a vertical strip appears on screen when recording dark background with Samsung SC-D453 Camcorder?
A vertical strip might appear on the screen when recording a dark background with your Samsung Camcorder because the contrast between the subject and the background is too great. Try making the background brighter to reduce the contrast, or use the BLC function while recording.
What to do if Play, FF, or REW button does not work on Samsung SC-D453 Camcorder?
If the Play, FF, or REW buttons aren't working on your Samsung Camcorder, check the Power switch and ensure it is set to PLAYER. Also, verify that you haven't reached the beginning or end of the cassette.
What to do if Start/Stop button does not operate while recording on Samsung Camcorder?
If the Start/Stop button isn't working while recording on your Samsung Camcorder, make sure the Power switch is set to CAMERA. Also, check if you've reached the end of the cassette or if the record protection tab on the cassette is enabled.
Why auto focus does not work on my Samsung Camcorder?
If the auto focus isn't working on your Samsung Camcorder, check the Manual Focus menu. Auto focus is disabled when the camcorder is in Manual Focus mode.
What to do if my Samsung SC-D453 shuts off automatically?
Your Samsung Camcorder might be shutting off automatically because it has been left in STBY mode for more than 5 minutes without use, or the battery pack is fully exhausted. Ensure the camcorder is in use or that the battery is adequately charged.
Why does my Samsung SC-D453 Camcorder charge run out so quickly?
The quick drain of your Samsung Camcorder's battery might be due to a few reasons: the ambient temperature could be too low, the battery pack might not have been fully charged, or the battery pack could be completely dead and unable to recharge. Try using another battery pack to see if that resolves the issue.
How to fix blurred image in Viewfinder of Samsung SC-D453?
If the image in the Viewfinder of your Samsung Camcorder is blurred, the Viewfinder lens may need adjustment. Adjust the Viewfinder control lever until the indicators displayed on the Viewfinder come into sharp focus.
Contains essential safety warnings and precautions for operating the camcorder.
Details the various features and capabilities of the camcorder, including OSD language and digital transfer.
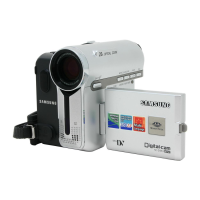
Lists the basic and optional accessories that are supplied with the digital video camera.
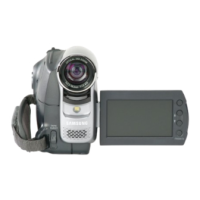
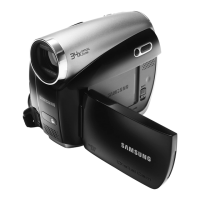
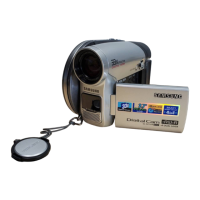
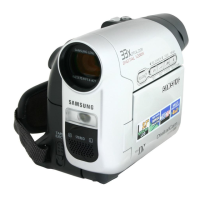
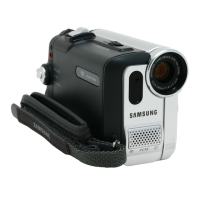
Illustrates and labels the components found on the front and left side of the camcorder.
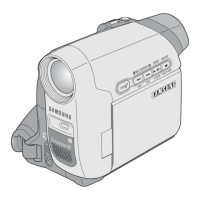
Identifies and describes the controls and ports located on the left side of the camcorder.
Details the buttons and connectors on the right and top surfaces of the camcorder.
Shows the rear and bottom panels of the camcorder, highlighting key slots and receptacles.
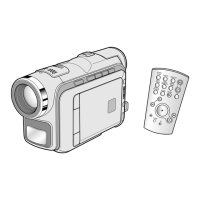
Explains the functions and layout of the remote control for the SC-D457 model.
Provides instructions on how to adjust the hand strap for a secure and comfortable grip.
Details the process for inserting or replacing the lithium battery in the remote control.
Explains how to connect the camcorder to AC power or a battery pack.
Covers attaching, charging, and maintaining the camcorder's lithium ion battery pack.
Provides approximate recording times based on battery type and recording mode.
Explains how to interpret the battery level display and its meanings.
Details the various items displayed on the camcorder's screen in camera and player modes.
Instructions on how to enable or disable the on-screen display features.
Guide to selecting the preferred language for the camcorder's on-screen display.
Instructions for setting the camcorder's internal clock and date/time.
Enables or disables the camcorder's acceptance of the wireless remote control signals.
Allows users to turn the button beep sound on or off for the camcorder.
Controls the simulated shutter click sound when taking still pictures.
Activates a demonstration mode showcasing the camcorder's main functions.
Explains how to adjust the LCD screen's brightness and color settings.
Covers how to display recorded date and time information on the tape.
Configures whether the on-screen display appears on the TV screen.
Instructions on how to use the viewfinder for recording and focusing.
Detailed steps for loading and unloading Mini DV cassettes into the camcorder.
Tips for holding the camcorder steady using the LCD screen or viewfinder.
Explores different camera angles and methods for dramatic recording results.
Step-by-step guide for setting up and starting your first recording.
Explains the automatic recording mode designed for easy use by beginners.
How to search for recorded footage using the REC SEARCH function.
Marks a point on the tape for easy return during playback.
Instructions for using the remote control to start recording automatically.
Details how to use the zoom lever for gradual or high-speed zooming.
Enables close-up recording with a specific focal distance range.
Adds professional transitions to recordings with gradual fade in or fade out effects.
Compensates for bright backgrounds to improve subject visibility.
Enhances recording in dark conditions with color night vision and LED light.
Choose between Standard Play (SP) and Long Play (LP) modes for recording.
Selects between 12-bit stereo or 16-bit high-quality stereo sound recording.
Minimizes wind noise by activating the Wind Cut function.
Manually adjust shutter speed and exposure for creative control over recordings.
Guides on using automatic focus or manual adjustments for optimal focus.
Adjusts white balance for accurate color reproduction under different lighting conditions.
Compensates for camera shake to provide stable images.
Offers various automatic exposure modes for different shooting scenarios.
Adds creative visual effects to recordings, such as ART, Mosaic, and Sepia.
Explains how to use digital zoom, up to 900x, and its effect on picture quality.
How to play back recorded tapes and view them on the camcorder's LCD screen.
Instructions for connecting the camcorder to a TV for playback.
Steps for playing back through a VCR if the TV lacks direct AV inputs.
Details functions like playback pause, picture search, slow playback, and frame advance.
Allows frame-by-frame playback of recorded video.
Magnifies the playback image starting from the center of the screen.
Enables recording from external sources or outputting video to external devices.
Adds new sound to pre-recorded tapes, compatible with SP mode and 12-bit sound.
Explains how to select and play back original, dubbed, or mixed audio tracks.
Details how to transfer data between the camcorder and other DV devices using IEEE1394.
Explains the process of transferring data to a PC using an IEEE1394 connection.
Instructions for using the camcorder to record video from another DV device.
Guides on transferring images from a memory card to a PC using a USB connection.
Choose between connecting to a computer or a printer via USB.
Configures the USB version for optimal PC communication.
Details the installation process for necessary software for PC connectivity.
Enables the camcorder to be used as a webcam for video conferencing.
Allows viewing camcorder video on a PC and storing it in file formats.
Enables transferring data from a memory card to a PC as a removable disk.
Details operations for memory sticks, including recording, viewing, and protection.
Step-by-step guide for inserting and removing memory cards from the camcorder.
Explains the organization of files and folders on the memory card.
Switching between camcorder and digital still camera modes.
Managing stored images using the camcorder's internal memory.
Choose image quality settings like Super Fine, Fine, or Normal for still photos.
Sets file numbering to Series or Reset for managing images on the memory card.
Instructions on how to capture still images using the PHOTO button.
Playback options for viewing still images: single, slideshow, or multi-display.
Prevents important images from being accidentally deleted.
Erases still and moving images recorded on the memory card.
Restores the memory card to its initial state by deleting all data.
Records video with audio onto the memory card in MPEG4 format.
Plays back moving picture images recorded on the memory card.
Copies still images from a cassette onto a memory card.
Transfers still images from a cassette to the memory card.
Copies selected or all images from memory card to internal memory.
Sets print marks on images for automatic printing via DPOF.
Prints stored images directly from the camcorder to a PictBridge printer.
Choose which images to print using the camcorder interface.
Specify the quantity of copies for each selected image.
Configures date and time display settings for printed photos.
Steps to take after completing a recording session, including power removal.
Instructions for cleaning video heads to ensure clear playback and recording.
Considerations for using the camcorder in different countries with varying power and color systems.
Guides on interpreting error displays and common camcorder problems.
Addresses issues caused by moisture condensation and provides solutions.
Troubleshooting specific error messages related to memory card usage.
Provides solutions for common camcorder problems like power, recording, and playback issues.
Details technical specifications for video, audio, cassette, and lens systems.
Covers power source, operating temperature, dimensions, and weight.
Details the warranty terms, coverage, and exclusions for Samsung products.
Outlines conditions and damages not covered by the product warranty.