Do you have a question about the Samsung SyncMaster 215TW and is the answer not in the manual?
Explains symbols indicating potential harm or damage to equipment.
Defines symbols like Prohibited, Do not disassemble, Do not touch, etc.
Covers grounding, avoiding damage, and preventing fire hazards related to plugs and cords.
Details on not overloading outlets and ensuring firm plug connections for safety.
Avoid unstable surfaces, poor ventilation, and flammable materials for safe operation.
Instructions on careful placement, avoiding drops, and wall mounting safety.
Wipe with soft cloth; avoid direct spraying of liquids to clean the monitor.
Prohibits use of specific chemicals like wax, benzene, or alcohol for cleaning.
Keep interior clean; do not remove covers to avoid electric shock or fire.
Avoid moisture, smoke, extreme temps; do not pull cables to prevent damage.
Do not cover vents; avoid placing liquids or small objects on the monitor.
Avoid metallic objects; adjust settings; take eye breaks to prevent damage.
Take breaks to reduce eye strain, especially during prolonged use.
Avoid unstable surfaces; keep out of children's reach to prevent falls.
Lists items like Quick Setup Guide, Warranty Card, User's Guide, and drivers.
Mentions D-sub Cable and Power Cord as essential for connection.
Describes MENU, Adjust, SOURCE, AUTO, PIP, and Power buttons.
Explains different picture settings for optimal viewing based on content.
Details how to adjust volume, select input, and manage Picture-in-Picture.
Includes power switch, indicator light, and power cord connection for system status.
Features a headphone output terminal for audio connections.
DVI, RGB, and Audio inputs for computer connection.
Supports S-Video, Video, and Component inputs from external devices.
Kensington Lock slot and stand stopper for height adjustment.
Connect via D-sub (RGB) or DVI (HDCP) for PC and Macintosh.
Connect DVD players, VCRs, camcorders without PC disconnection.
Connect VCRs, camcorders using RCA or S-Video cables.
Connect Component input for DVD/DTV signals.
Connect headphones to the monitor's audio jack.
Features Pivot Stand for rotation and swivel/tilt adjustments.
Rotate display 90 degrees for portrait or landscape view.
Adjust monitor height, swivel angle, and tilt angle.
Steps to detach the stand for alternative mounting.
Supports 100mm x 100mm VESA compatible mounting.
Purchase specific kit, maintain distance, use professional installer.
Install drivers from CD-ROM following on-screen prompts.
Guide for installing drivers on Windows ME.
Guide for installing drivers on Windows XP/2000.
Detailed steps via Control Panel for XP.
Specific procedures for Windows 2000.
Using the wizard to select and install drivers.
Handling messages and confirming installation.
Steps for Windows 2000, including signature warnings.
Steps for Windows Millennium.
Instructions for NT driver setup and Linux X-Window configuration.
Overview of color calibration software.
Steps to install the color calibration utility.
Procedure to remove the software.
Using the MENU button and other controls to navigate the OSD.
Adjusting viewing environments using MagicBright™ and picture modes.
Managing audio, input, auto-adjust, and Picture-in-Picture settings.
Auto adjustment for analog signals; makes picture sharper.
Locking OSD functions while allowing specific adjustments.
Locking/unlocking OSD and its implications for other controls.
Optimizing viewing for PC content through various modes.
Cycling through various picture modes for optimal viewing.
Adjusting volume and changing input signals.
Turning PIP on/off and choosing the input source.
Changing the size and location of the PIP window.
Selecting and viewing available input sources.
Customizing names for input jacks for easier selection.
Optimizing viewing environment with preset modes.
Adjusting contrast and brightness for personal preference.
Adjusting color temperature and RGB values.
Removing noise and adjusting image clarity.
Changing aspect ratio and adjusting PIP window parameters.
Choosing between Dynamic, Standard, Movie, Custom modes.
Adjusting contrast, brightness, sharpness, color, tint.
Changing color tone and aspect ratio.
Enabling film mode and selecting sound output.
Turning PIP on/off and choosing the input source.
Changing the size and location of the PIP window.
Selecting language and adjusting OSD background.
Configuring blue screen display and resetting picture parameters.
Introduction to the monitor adjustment software.
Features and benefits of the software.
Using OSD mode for easy adjustments.
Steps to start the installation from CD.
Accepting terms and proceeding through the wizard.
Selecting the folder for program files.
Clicking install and observing the status.
Completing the installation and finding the icon.
Common issues encountered during installation.
Hardware and OS requirements.
List of Windows OS versions compatible with MagicTune™.
Minimum memory and disk space needed.
How to use the OSD interface for adjustments.
Explaining the functions of OK, Reset, Cancel buttons.
Adjusting brightness, contrast, and resolution.
Details on Text, Internet, Entertain, Custom modes.
Adjusting contrast and brightness in Custom mode.
Customizing color temperature and RGB.
Adjusting saturation, hue, and resetting.
Using Coarse, Fine, Sharpness for image quality.
Setting preferences, source select, color weakness, PIP.
Accessing help and system details.
Displaying the software version.
Step-by-step process for calibrating colors.
Storing and recalling custom color settings.
Comparing calibrated and uncalibrated images.
Comparing adjusted image with the original.
Steps to remove the software via Control Panel.
Troubleshooting errors related to video card compatibility.
Resolving issues with monitor identification.
Addressing errors from improperly installed drivers.
Importance of restarting and setting optimal resolution.
Avoiding conflicts with other programs.
Checking PC compatibility and driver status.
Verifying compatibility on the Samsung website.
Addressing problems with PC changes or software updates.
Introduction to display rotation software.
Supported operating systems and core functionality.
Starting installation from CD, selecting language.
Accepting terms and choosing install location.
Clicking install and observing setup status.
Finishing installation and rebooting the system.
Common issues like display driver or application conflicts.
Minimum OS and hardware requirements.
Recommended memory, disk space, and service packs.
Using the task bar menu and automatic rotation features.
Rotating display to 0, 90, 180, 270 degrees.
Resetting orientation to the default landscape mode.
Changing orientation to portrait mode.
Rotating display to inverted or alternative portrait views.
Customizing hotkeys and accessing help/about information.
Removing the software via Control Panel.
Identifying and resolving problems related to the display driver.
Ensuring the latest display driver is installed.
Importance of restarting the system after updates.
Checking connections and rebooting.
Adjusting resolution and frequency for optimal display.
Reactivating the monitor from power saving states.
Resolving issues related to DVI connections and OSD locking.
Troubleshooting color problems and driver installations.
Adjusting display parameters and video card settings.
Ensuring compatibility for MagicTune™.
Checking connections and driver installation.
Setting display parameters and power saving functions.
Testing monitor functionality by unplugging the video cable.
Interpreting messages like 'Not Optimum Mode'.
Avoiding interference from electronic devices.
Checking for images or specific messages to diagnose issues.
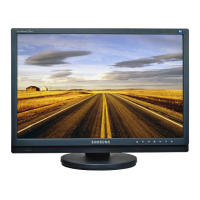
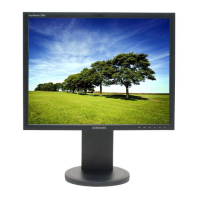
Model, size, resolution, colors, and pixel pitch.
Details on input types, video formats, and pixel clock.
Physical characteristics and VESA mounting support.
Environmental factors and compatibility.
Energy saving features and compliance.
Table of resolutions, frequencies, and pixel clocks.
Definitions of frequency parameters.
Phone numbers and websites for regional support.
Contact details for various global regions.
Explains Dot Pitch, Frequency, Resolution, etc.
Defines S-Video, External Device Input, and DVD technology.
Adjusting resolution and refresh rate.
Information on pixels and cleaning procedures.
Using auto adjustment and screen savers.
Explains how static images can cause display persistence.
Using power saving modes and screen savers.
Details on voltage differences and liquid crystal behavior.
Recommends screen saver usage.
Guidelines for responsible recycling.
| Display | LCD |
|---|---|
| Power management | Energy Star |
| Pixel pitch | 0.270 x 0.270 mm |
| Response time | 8 ms |
| Display diagonal | 21 \ |
| Display resolution | 1680 x 1050 pixels |
| Vertical scan range | 56 - 75 Hz |
| Horizontal scan range | 30 - 81 kHz |
| Contrast ratio (typical) | 1000:1 |
| Display brightness (typical) | 300 cd/m² |
| Certification | TCO'03 |
| Product color | Silver |
| Market positioning | - |
| Plug and Play | Yes |
| Panel mounting interface | 100 x 100 mm |
| I/O ports | S-Video |
| USB Type-A downstream ports quantity | 0 |
| Power consumption (standby) | 2 W |
| Power consumption (typical) | 75 W |
| Package weight | 9000 g |
| Depth (with stand) | 219.8 mm |
|---|---|
| Height (with stand) | 377 mm |
| Weight (with stand) | 7500 g |
| Depth (without stand) | 72 mm |
| Width (without stand) | 490 mm |
| Height (without stand) | 342.5 mm |