This document is a user manual for Samsung WA70F5G4 and WA80F5G4 washing machines. It provides comprehensive information on safety, setup, operation, maintenance, and troubleshooting.
Function Description
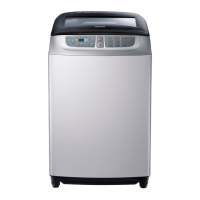
The Samsung WA70F5G4 and WA80F5G4 are top-loading washing machines designed for domestic use. Their primary function is to wash clothes automatically, offering various cycles and options to suit different laundry needs. The machines feature an automatic sensing function that detects the amount of laundry and adjusts water level, wash time, rinse cycles, and spinning time accordingly. Users can also manually select water levels and spin speeds. A key feature is the "Smart Check" function, which allows users to diagnose issues using a smartphone app, providing error codes and countermeasures. The washing machine is equipped with an Inverter motor, which allows for changes in water flow strength during washing.
Usage Features
The washing machine offers a range of cycles accessible via the "Cycle Selector" knob:
- Cotton: Suitable for most fabrics, including cottons, linens, and normally soiled garments.
- Soak: Allows for a pre-soak period, with a fixed soak time.
- Water Saving: This program is designed to reduce water consumption and is suitable for normally soiled cotton loads. It is also the program used for energy and water labelling tests.
- Delicates/Hand Wash: Ideal for sheer fabrics, bras, lingerie, silks, and other handwash-only items. Liquid detergent is recommended for best results.
- Quick Wash: For frequently used towels or lightly soiled laundry, offering a speedy wash.
- Tub Clean: A dedicated program to clean the washing tub, ensuring it remains clean and sanitary. The TUB CHECK LED illuminates to remind the user when it's time to run this cycle. It uses the pulsator's spinning force to remove contaminants and prevent odors.
- Heavy Duty: For sturdy, colorfast, and heavily soiled garments.
- Colours/Dark: For brightly or dark colored casual garments.
- Bedding: For bulky items like blankets and sheets. Liquid detergent is recommended for comforters.
- Spin: Drains water and spins at high speed.
- Rinse + Spin: For loads requiring only rinsing or for adding fabric softener.
Additional options can be selected using dedicated buttons:
- Temp. selection: Allows cycling through different water temperatures: Hot (for whites, heavily soiled, colorfast items), Warm (for colorfast items), and Cold (for brightly colored, very lightly soiled items).
- Spin selection: Offers various spin speeds: High (for underwear, t-shirts, jeans, sturdy cottons), Medium (for jeans, wrinkle-free, wash-and-wear items, synthetics), Low (for delicate items needing a slow spin), and No Spin (drains without spinning, for extremely delicate items).
- Water Level: Automatically adjusted, but can be manually selected.
- Delay End: Allows users to set a specific time for the wash to finish, ranging from 1 to 19 hours. Pressing the Power button during a delay start will cancel it.
- Select Cycle Option: Includes:
- Aqua Plus: Adds more water during wash and rinse cycles (not available with High water level).
- Power Wash: Adjusts water flow strength using the Inverter motor.
- Extra Rinse: Adds an additional rinse cycle to thoroughly remove laundry additives and perfumes.
- Sound Off: Mutes all button and washing completed sounds (error sounds will still be heard).
- Smart Check: Activates the smartphone diagnostic function.
- Start/Pause selection: Pauses and restarts cycles.
- Power button: Turns the washer on/off. The machine automatically turns off after 10 minutes of inactivity.
Child Lock Function: This safety feature protects children, the elderly, and the frail. It is activated by pressing and holding the Spin and Water Level buttons simultaneously for 3 seconds. When activated, the Child Lock icon blinks. If the door is opened while Child Lock is active, an alarm sounds, an error message ("CL" or "dE") appears, and draining begins automatically after 30 seconds to prevent drowning. To add laundry, the Child Lock must be deactivated. The function remains active even if the power is turned off and on again.
Before Washing: Users are advised to check pockets for items like hairpins and coins, close pants zippers, turn clothes with buttons or embroidery inside out, and fix long strings to prevent entanglement. Waterproof clothes (ski wear, diaper covers, etc.) are not allowed as they can cause abnormal vibrations and potential injury or damage. Dirt and soil should be shaken off clothes. Pre-washing is recommended for white socks, sleeves, and collars. Cashmilon and bulky/lightweight garments should be washed in a laundry net or separately. Curtains, floating garments, or blue jeans should be pressed down to ensure they soak in water. Inflatable items like blankets and microfibre quilts should be washed one at a time in a laundry net to prevent damage.
First-time Use: Before washing clothes, a complete cycle without clothes should be run to remove any manufacturing residue. This involves pressing Power, adding a little detergent, turning on water supply, and pressing Start/Pause.
Maintenance Features
The manual outlines several maintenance procedures to ensure the washing machine's longevity and optimal performance:
Installation and Environment:
- Maintain at least 10 cm clearance between the washer and the wall.
- Place the washer on a sturdy, flat surface (within 1° allowance for unevenness).
- Adjust the adjustable legs for even placement to prevent trembling and malfunction.
- Avoid installing near water, in steamy rooms, or where exposed to rain to prevent electric shock.
- Avoid direct sunlight or heaters, as plastic and electrical components can be damaged by heat.
Levelling:
- To check if the machine is level, open the lid, pour water just below the pulsator, and adjust the legs until the pulsator is centered in the water.
Connecting Water Supply Hose:
- Remove the adaptor from the water supply hose.
- Loosen four screws on the adaptor, then turn part (b) to create a 5 mm gap.
- Connect the adaptor to the water tap by tightening the screws, then reassemble parts (a) and (b).
- Connect the water supply hose to the adaptor, ensuring a "click" sound.
- Connect the other end of the hose to the inlet water valve at the back of the washer, screwing it in clockwise.
- If using a screw-type water tap, assemble the hose accordingly.
- Check for leaks after connection and repeat steps if necessary.
- If the faucet is square or too big, remove the spacing ring from the adaptor.
Assembling Rat Protection Panel (Option):
- Tilt the washer slightly and lift the panel until it clicks into place.
- Insert the rat protection panel into the front assembling hole. If difficult, lift the washer slightly.
Connecting Drain Hose (Option - Pump-Drained Washer):
- Remove the cap-hose and connect the outlet-hose.
- Ensure the drain hose is tightly joined to the drain outlet at the back or side of the machine.
- Install the drain hose guide to position the hose about 90-100 cm above the ground, ensuring the end is not submerged in water.
Calibration Mode:
- After installation, run Calibration Mode for accurate laundry weight detection.
- Remove all contents from the machine.
- Press Delay End and Spin buttons simultaneously, then Power. The machine will display "Cb".
- Press Start/Pause to activate Calibration Mode.
- The drum will rotate for approximately 4 minutes.
- Once "End" appears, the machine turns off and is ready for use.
Adding Detergent:
- Open the detergent drawer and add powder detergent evenly, without overflowing.
- Use a reasonable amount of detergent; excess can cause residue, discoloration, and bad odors.
- If water pressure is low, detergent may remain in the compartment; it's recommended to dissolve powder detergent in a small amount of water before adding.
- Do not spread powder detergent directly on laundry to prevent discoloration.
Adding Fabric Softener:
- Add the proper amount of softener to the softener inlet; it will be automatically dispensed during the last rinse cycle.
- Do not add detergent, bleach, or starch to the softener inlet.
- Avoid using too much softener.
- Do not open the lid during the Spin cycle if softener has already been added.
- Do not leave softener in the dispenser for long periods as it may congeal.
- If water pressure is low, add softener directly to the tub.
Cleaning the Water Supply Connector Filter:
- Pull out the filter and wash it thoroughly.
- Reinsert the filter and connect the hose tightly to the inlet water valve.
- Check for leaks and tighten the connector if necessary.
Cleaning the Hygiene Filter:
- Push the upper part of the Hygiene filter and pull it in.
- Open the cover.
- Clean the filter.
- Close the cover and insert the lower part of the filter first, then push until it clicks.
Cleaning the Pump Filter (Option):
- Place a rag or towel under the wash filter.
- Rotate the filter counterclockwise and pull it out.
- Remove any dirt.
- Return the filter by rotating it clockwise until it locks.
Cleaning the Detergent Compartment:
- Separate the detergent compartment from the washer.
- Separate and clean the Rinse-Cap from the detergent compartment.
- Reassemble the Rinse-Cap and insert the detergent compartment back into the washer.
Troubleshooting:
The manual provides a detailed troubleshooting guide for common issues such as:
- Washing machine not starting (power cut, unplugged, no water).
- Water not draining (drain hose issues, clogged hose).
- Water not supplied (tap closed, water cut off, clogged hose connection, frozen tap).
- Spinning not working (uneven laundry, unstable surface).
- Water overflow (error sign, call agency).
- Child Lock error ("CL" or "dE" display, draining to prevent drowning).
- Water leakage (loose hose connector, folded hose, strong water supply, faucet issues).
- Loud noises and vibrations during spinning (uneven laundry, unstable machine, loose leveling legs, obstructions around the machine).