What is the difference between Hi-Speed USB 2.0 and Full Speed USB 1.1?
Hi-Speed USB 2.0 supports the transfer of data up to 480 megabits per second (Mbps),
and Full Speed USB 1.1 supports data transfer up to 12 Mbps. Hi-Speed USB 2.0
provides a dramatic improvement in data transfer performance compared to Full Speed
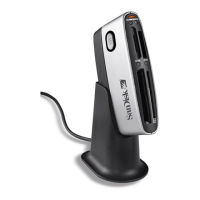
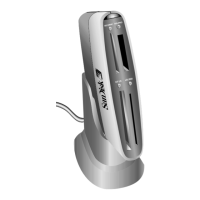
USB 1.1. USB 2.0 is backward compatible with USB 1.1 ports. The ImageMate USB 2.0
Reader/Writer supports both USB 2.0 and USB 1.1.
Installing
Before connecting the ImageMate USB 2.0 Reader/Writer to your computer, you may
need to install a device driver.
• You can skip this section if your operating system is Windows XP, ME, 2000, Mac
OS 9.2+ or Mac OS 10.1.2+ and proceed to Installing the Button Application
Install the Windows 98SE Driver
1. Insert the CD included with the ImageMate USB 2.0 Reader/Writer device into the
CD-ROM of your computer.
2. Left-click on the START menu and open the RUN menu. Click BROWSE to locate
the drive letter of your CD-ROM.
3. Select the \Win98\setup.exe file and click OK. Follow the on-screen directions.
Installing the Button Application (Media Card Companion)
1. Insert the CD included with the ImageMate USB 2.0 Reader/Writer device into the
CD-ROM of your computer.
2. Left-click on the START menu and open the RUN menu. Click BROWSE to locate
the drive letter of your CD-ROM.
3. Select the \Button Application\setup.exe file and click OK. Follow the on-screen
directions.
Connecting
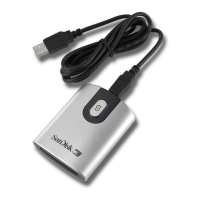
Connecting the ImageMate USB 2.0 Reader/Writer to the USB port is simple. You don’t
need to turn off or restart your computer when attaching the ImageMate USB 2.0
Reader/Writer. Since the ImageMate USB 2.0 Reader/Writer is powered by the USB
connection, an AC/DC power adapter is not needed.
• Before connecting the ImageMate USB 2.0 Reader/Writer, complete the device driver
installation. See INSTALLING.
Use the USB cable to connect your ImageMate to the computer directly.
When the ImageMate USB 2.0 Reader/Writer is connected for the first time, your
computer may display a message that the device is being installed (may vary slightly
depending on your operating system).
Windows Disk Icons
When you connect the ImageMate USB 2.0 Reader/Writer on a Windows operating
system, a newly assigned removable disk icon drive letter representing the card slot will
be shown in My Computer.
Macintosh Disk Icons
When you connect the ImageMate USB 2.0 Reader/Writer on a Macintosh operating
system, a removable disk icon labeled “untitled” representing the card slot will show on
the desktop when a card is inserted.
 Loading...