Do you have a question about the SANUS VuePoint FPA405 and is the answer not in the manual?
Confirm weight limits, read directions, check TV documentation, gather tools, and verify bracket compatibility.
Adheres to product design, wall support, and consequences of non-compliance to prevent injury or damage.
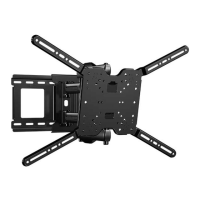
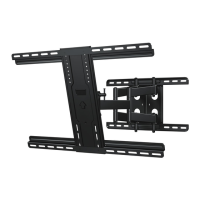
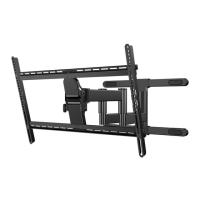
Position TV/bracket arms vertically for optimal performance and stability.
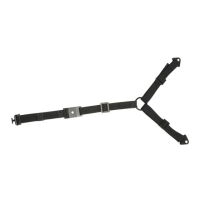
Lists Soundbar Bracket Arm, 'C' Washer, Keyhole Screw, and Knob quantities.
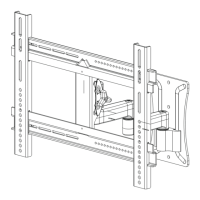
Details TV Bracket Arm (05) and Mount Spacer (06) components.
Details TV Screw Washers (07-10) for TV bracket attachment.
Ensure soundbar control buttons remain accessible after mounting bracket arms.
Use 'C' washer to ensure soundbar arms lay flat on the soundbar.
Steps to prepare a TV that is already mounted for soundbar attachment.
Follow TV manual, save original hardware, and use provided hardware.
Select correct bolt diameter (M4, M5, M6, M8) for TV attachment.
Use shortest screw/spacer to avoid damaging internal TV components.
Use larger washers (09 or 10) if they fit the TV bracket.
Soundbar must be mounted below the TV as shown.
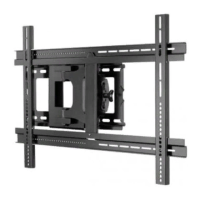
Use larger washers (09 or 10) if they fit the TV bracket.
Soundbar must be mounted below the TV as shown.
Use trial and error for correct soundbar TV bracket configuration.
Final soundbar position must be within 51 mm (2 in.) of the TV.
Instructions for hanging the assembly for Options 1 and 2.
Instructions for hanging the assembly for Option 3.
Details warranty periods for metal mounts (5 yrs), plastic mounts, stands, furniture, wood accessories (3 yrs).
Warranty policy complements, not replaces, consumer rights under Australian law.
Warranty void if product is modified, improperly installed, or misused.
| Mount Type | Full motion |
|---|---|
| Material | Steel |
| Adjustable Tilt | Yes |
| Construction Material | Steel |
| Color | Black |
| Extension Range | 20 inches |
| Swivel Range | 180° |