Do you have a question about the Sanyo ASW-A85HT and is the answer not in the manual?
Physical dimensions including width, depth, and height.
Details the AC local voltage requirement for the appliance.
Specifies the power consumption in Watts.
Outlines the acceptable water pressure range in MPa and kgf/cm².
Critical warning about the necessity of earthing the appliance.
Guides on connecting plug wires (Green/Yellow, Light Blue, Brown) to terminals.
Cautions for using double-core cords and proper grounding methods.
Avoid injury by keeping hands out of the moving wash tub.
Keep flames and volatile materials away from the appliance to prevent fire risk.
Avoid installing the washer in humid locations like bathrooms to prevent damage.
Do not wash clothes stained with flammable solvents to prevent explosion risk.
Prevent children from playing on or inside the washer to avoid serious injury.
Protect the control panel from water splashes to prevent malfunction or electric shock.
Ensure proper connection of the power plug and cord to prevent fire or shock.
Lists all components included with the washing machine.
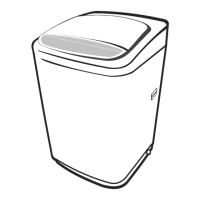
Identifies the main lid of the washing machine.
Locates the dispenser for fabric softener.
Points out the filter for collecting lint.
Highlights the user interface for operating the machine.
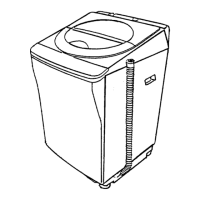
Identifies the structural support of the machine.
Shows the adjustable feet for leveling the washer.
Indicates the hose for connecting water supply.
Locates the main tub for washing and spinning clothes.
Points out the part that agitates clothes during wash.
Shows the plug that connects the machine to the power outlet.
Indicates the cord connecting the plug to the machine.
Locates the hose for draining water.
Identifies the support legs of the washing machine.
Steps for attaching the bottom cover to the washer.
Guidance on choosing a suitable and stable location for the washer.
Instructions for connecting the "Magic" Hose Joint to a water faucet.
Detailed steps for securely connecting the hose joint to the faucet.
Procedure for connecting the water supply hose to the washer.
Steps for safely disconnecting the water supply hose.
Instructions for fitting and securing the drain hose.
Guidance on altering the drain hose's orientation.
Information on extending the drain hose's length and height.
Explains the spoon indications for detergent volume.
Shows indicators for washing time, presets, and abnormal conditions.
Details the soft spin feature to prevent clothes creasing.
Instructions for starting, pausing, and managing the operation.
Allows selection of appropriate water levels for washing/rinsing.
Information on how to activate and deactivate the child lock.
Used to set wash time, rinse type, and spin time.
Enables selection of different washing courses.
Controls turning the washer on and off.
Ensures correct setup before starting the washing process.
Provides guidance on appropriate detergent amounts based on load size.
Helps select the appropriate washing course based on clothing type.
Guides on selecting wash cycle steps like SOAK, WASH, RINSE, SPIN.
Details on setting SOAK time, WASH time, RINSE times, and SPIN time.
Instructions for choosing water level and adding detergent.
Steps to start the washing machine after setting parameters.
Ensures pockets are empty to prevent damage to clothes or machine.
Advice on turning clothes inside out, using laundry nets, and closing fasteners.
Guidance on separating clothes for optimal washing results.
Allows setting a future time for the washing cycle to finish.
Customizes water levels for both wash and rinse cycles.
Specific instructions for washing blankets.
Enhances cleaning with higher detergent density.
Activates safety lock to prevent unintended operation.
Stores and recalls the last used wash program settings.
Details the shower rinse option and how to use/cancel it.
Procedure to disable the end-of-cycle buzzer.
Function to drain residual water, useful in cold temperatures.
Normal operation where water is added if level decreases.
Spin tub stopping and starting for better balance.
Conditions like no drainage due to low water level or pressure.
Automatic adjustment for unevenly distributed laundry.
Sound from balance liquid for vibration reduction.
Control panel remaining warm due to memory circuitry.
Need to reset program if power is lost during operation.
Instructions for wiping the exterior and avoiding harsh chemicals.
Guide to cleaning the mesh filter in the water inlet valve.
Procedure for weekly cleaning of the lint filter.
Checks for issues when the washer is unresponsive.
Troubleshooting for no water flow or slim water flow into the tub.
Steps to resolve issues with water not draining from the tub.
Checks for problems when the washer does not spin.
Troubleshooting for problems when the washer does not wash.
Guidance for other error indications like EA and EC.