Do you have a question about the Sanyo C1271 and is the answer not in the manual?
Safety precautions and procedures for electrical wiring of the unit.
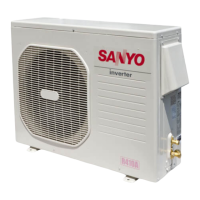
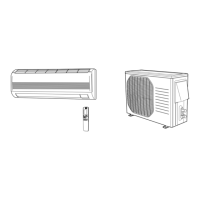
Guidance on proper installation locations and methods for the indoor and outdoor units.
Instructions and cautions for connecting refrigerant tubing using the flare method.
Safety measures to take before performing any servicing or repair on the unit.
Detailed specifications for indoor and outdoor units, including capacity, electrical ratings, and airflow.
Specifications for key internal components like the compressor, fan motor, and heat exchanger.
Specifications for sensors and other components, including resistance charts.
Illustrates the path of refrigerant through the system components during operation.
Charts showing performance characteristics against temperature variations.
Tables detailing cooling capacity at various indoor and outdoor conditions.
Cooling capacity data specific to low ambient outdoor temperatures.
Electrical ratings, running amperes, and power input details.
Schematic diagrams showing internal and external electrical connections.
Procedure for setting remote control addresses to prevent interference.
Instructions for safely handling electrical connectors on the outdoor unit.
Step-by-step guide for disassembling the indoor unit for service.
Explanation of various operational modes and features like Sensor Dry.
Details on built-in protective mechanisms to prevent damage.
Essential safety precautions before beginning any troubleshooting or repair work.
Guide on how to use the self-diagnostics function to identify errors.
Basic checks for both indoor and outdoor units to diagnose operational problems.
Specific steps to diagnose issues with the indoor and outdoor fan motors.
Information on identifying and resolving noise and EMI issues.
Procedure for testing insulation resistance of electrical parts.
Steps to check the continuity of the fuse on the main control board.
Details on the properties and composition of R410A refrigerant.
Essential checklist and precautions before servicing R410A systems.
List of tools required for R410A servicing and their specific usage.
Guidelines for proper installation and connection of refrigerant tubing.
Procedure for replacing a compressor, including refrigerant handling.
Steps for repairing refrigerant leaks and recharging the system.
Instructions for adding refrigerant, especially for extended tubing lengths.
Guidance on retrofitting older systems with R410A, emphasizing new tubing.
Features related to remote control use and basic operation modes.
Timer functions, Night Setback, Air Sweep, and Auto Flap for comfort and energy saving.
Options for adjusting fan speed, including automatic and manual settings.
Requirements for proper electrical installation and grounding.
Important safety warnings for users and installers regarding appliance operation.
Basic steps for operating the air conditioner using the remote.
How to set fan speed manually or automatically.
Procedures for setting various timer functions.
Instructions for cleaning the ceiling panel, flaps, and main unit.
Guide on how to remove and clean the air filter for optimal performance.
A table listing common troubles, possible causes, and remedies.
Information about the optional wired remote controller.
List of tools needed for installation that are not included with the unit.
List of parts included in the unit's package.
Specifications for copper tubing and insulation material required for installation.
Guidelines for selecting an appropriate location for the indoor unit installation.
Recommendations for selecting a suitable installation site for the outdoor unit.
Information on installing baffle plates for outdoor units exposed to strong winds.
Steps for preparing the ceiling and unit for suspension.
Detailed instructions on securely suspending the indoor unit in the ceiling.
Procedures for correctly installing the drain pipe to prevent leaks.
Method to verify that the drain system functions properly after installation.
Steps for fitting and securing the ceiling panel to the indoor unit.
General guidelines and precautions for wiring the unit.
Instructions for connecting power and inter-unit wiring to the outdoor unit.
Explanation of the flaring method for connecting refrigerant tubes.
Detailed steps for creating flares on copper tubes using a flare tool.
Instructions for securely connecting the tubing between indoor and outdoor units.
Guidance on insulating refrigerant tubes to prevent heat loss and condensation.
Procedure for taping refrigerant tubes and other connections for protection.
Procedure for removing air and moisture using a vacuum pump.
Recommendations for mounting the remote controller for optimal performance.
How to switch between the remote and indoor unit sensors.
Step-by-step instructions for installing the remote controller unit.
| Brand | Sanyo |
|---|---|
| Model | C1271 |
| Category | Air Conditioner |
| Language | English |