(4) Replacement of Air Pump and
PCB (Transformer)
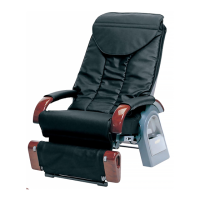
1, Take off the cover (back cover) and the arm
rest (right). Photo-1,2,3
2, Take off the cover (front upper), the cover
(front lower) and the cover (arm rest lower)
right.
Photo-2,4
3, Take off the cover (PCB) and the cover (air
pump). Photo-5,7
4, Take off the cord processing of an air pump.
Photo-8
5, Remove four fixing rubbers of the air pump
and take off the air pump. Photo-8
(5) Replacement of PCB (Transformer)
* HIGH Voltage only
1, Take off the cord processing of a PCB
(transformer). Photo-8
2, Unfix five stoppers (PCB) from the bottom
side of the main body and take off the PCB
(transformer). Photo-8
(6) Replacement of Reclining Motor
1, Take off the cover (back cover) and the arm
rest (left/right). Photo-1,2,3
2, Take off the cover (front upper), the cover
(front lower) and the cover (arm rest lower)
right. Photo-2,4
3, Remove two cover assembly (back rest) set
screws on the back of foot rest. Photo-9
4, Unzip the fastener of the cover assembly
(back rest) and uncover the part of foot rest
of cover assembly (back rest). Photo-9
5, Disconnect each cord processing and cords.
Photo-10
6, Lay down the main body with its left side
facing downward. Photo-10
7, Each reclining motor is fixed at two places
on both ends. Therefore, remove E rings
on both ends and pull out fixing pins.
Photo-10
Photo-8
PCB (transformer)
Air pump
Fastener
Stopper (PCB)
Fixing rubber
Photo-9
Cover set screws
Cover assembly (back rest)
Reclining motor
(back rest)
Reclining motor
(foot rest)
Photo-10
E rings & fixing pins
E rings & fixing pins
 Loading...