Thehoseendisequippedwitha3/8”flarefitting.Thiswillmatchtothe
fittingonthegrillvalve.(Ensurethathoseisnotincontactwithbottom
ofgrill)Tightenandtestforleaksimmediatelyafterassemblyofthe
hoseiscomplete.Totightenthehoseassemblytothevalve,youwill
need(1)5/8”wrenchand(1)3/4”wrench.
NATURAL GAS CONNECTIONS
Allnaturalgasmodelscomeshippedwithavalveanda#43orifice.It
isthesoleresponsibilityoftheownerofthegrilltocontacttheirlocal
gasservicetechnicianforhook-uptothesupply.Remindtheservice
techniciantotestforleaks.
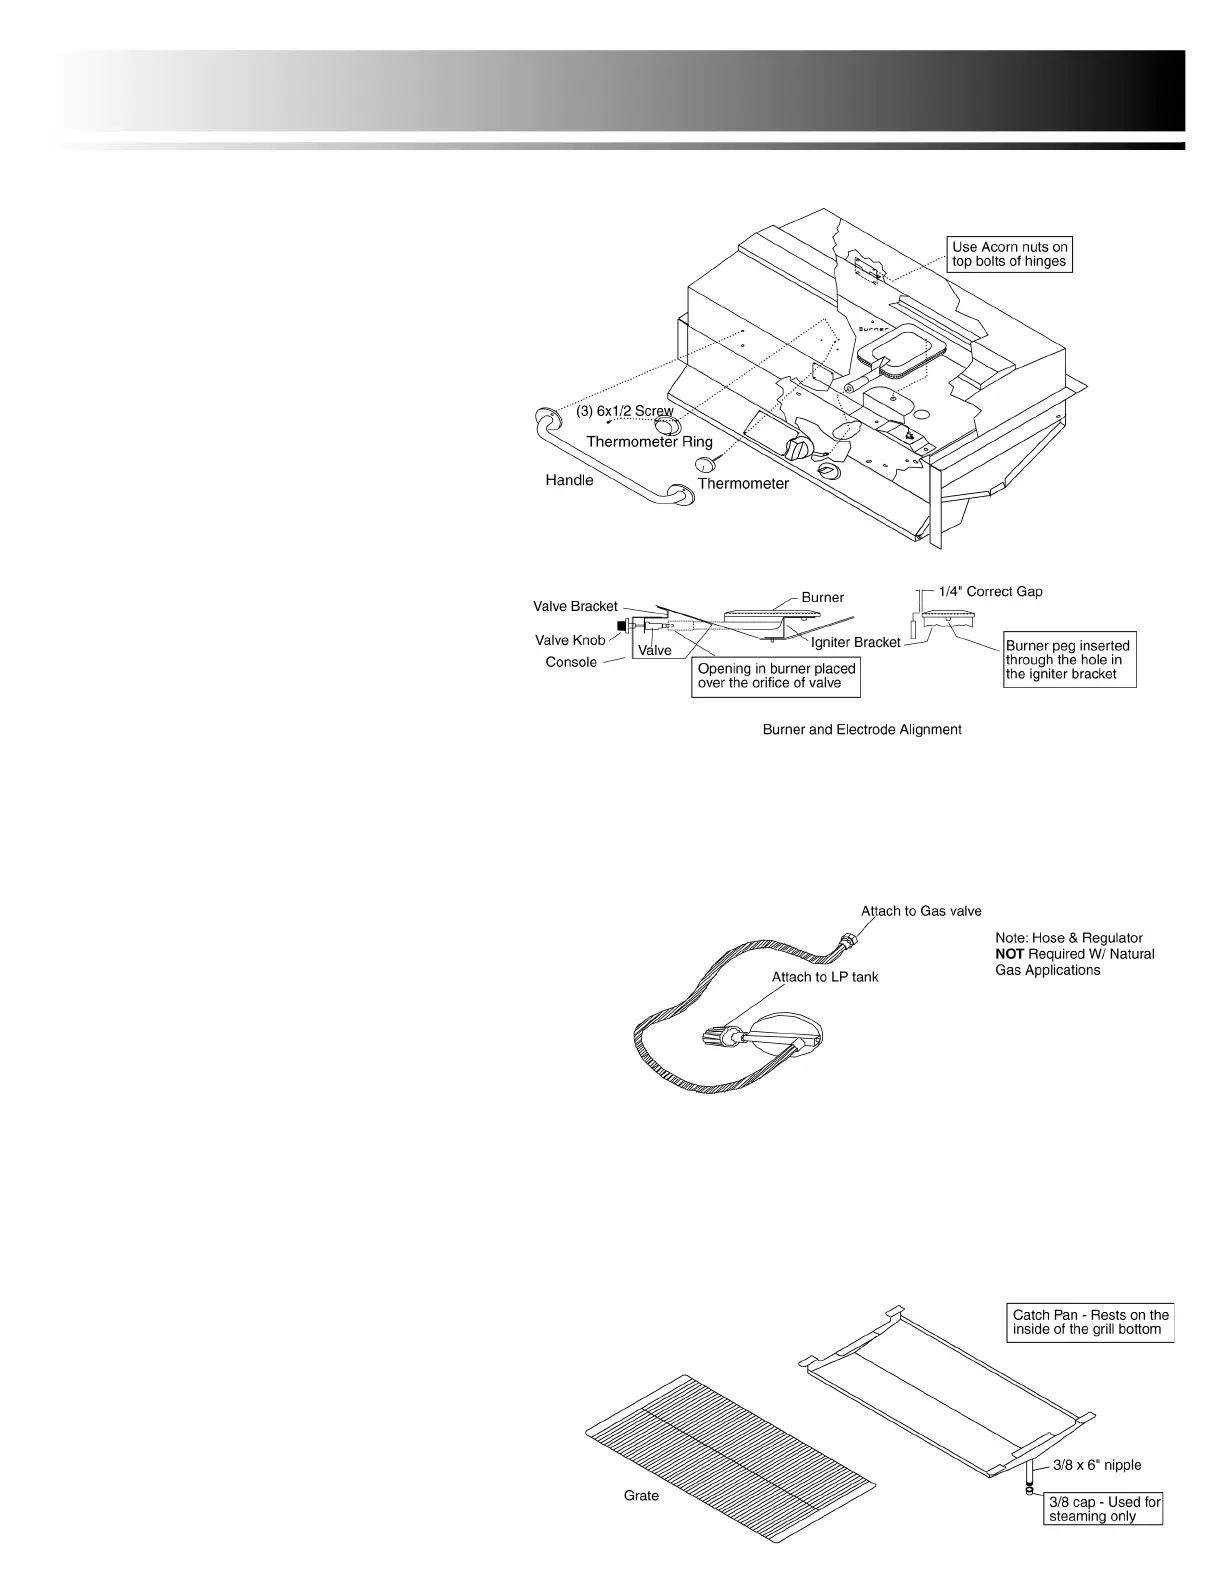
STEP 3 - Grill Top & Burner Assembly
COMPONENTS REQUIRED:
(1)Top-(4)1/4-20bolts.lockwashersandacornnuts
(1)Burner
(1)Handle-(4)1/4-20bolt,lockwasherandnut
(1)ThermometerandThermometerring-(3)#6x1/2selftapping
screws
Assembly Tips:
1.Thermometerisinsertedthroughthegilltopfirst.Theringis
placedinpositionoverthethermometerandfastenedinplaceusing
the screws.
2.Insertbolts,lockwashersandacornnutsthroughthetopholesof
thehinges.
3.Venturiofburnershouldbeinsertedthroughtheopeninginthe
bottomofthegrillfirst.TheVenturislidesovertheorificecaponthe
valve.Theburnerpegshouldbeinsertedintotheholeintheigniter
bracket.Itisimportantthattheburnerbealignedproperly.See
illustrationforpropergapbetweenburnerandelectrode(1/4”).
STEP 5 - Gas Connection
Insertcatchpaninbottomofgrillaligningnipplethroughholeinbottom
ofthegrill.Catchpanshouldrestontheliparoundtheinsideofthe
bottom.Usecapforsteamingonly.Installgrateontopofcatchpan.
STEP 6 - Catch Pan & Grate Installation
 Loading...