Operation
Break-Down
The machine can be divided into two main parts.
1. Chassis/Frame section – This comprises the handle bars, body
panels, Propane tank, Steel frame and wheels.
2. Head – this comprises the motor, cover, grinding/satellite/
planetary heads and internal components
The machine has been manufactured to allow movement between the chassis
and head via the connection point. This movement is important during the
grinding process as it creates a “floating” effect for the head. The floating gives
the head a self leveling effect, negating the need to adjust the height of the
head as the machine passes over floor areas with different slopes or
undulations.
Set-Up
Position the grinder in the working area. Make sure there are diamonds
underneath the machine, and that the head locks are tight.
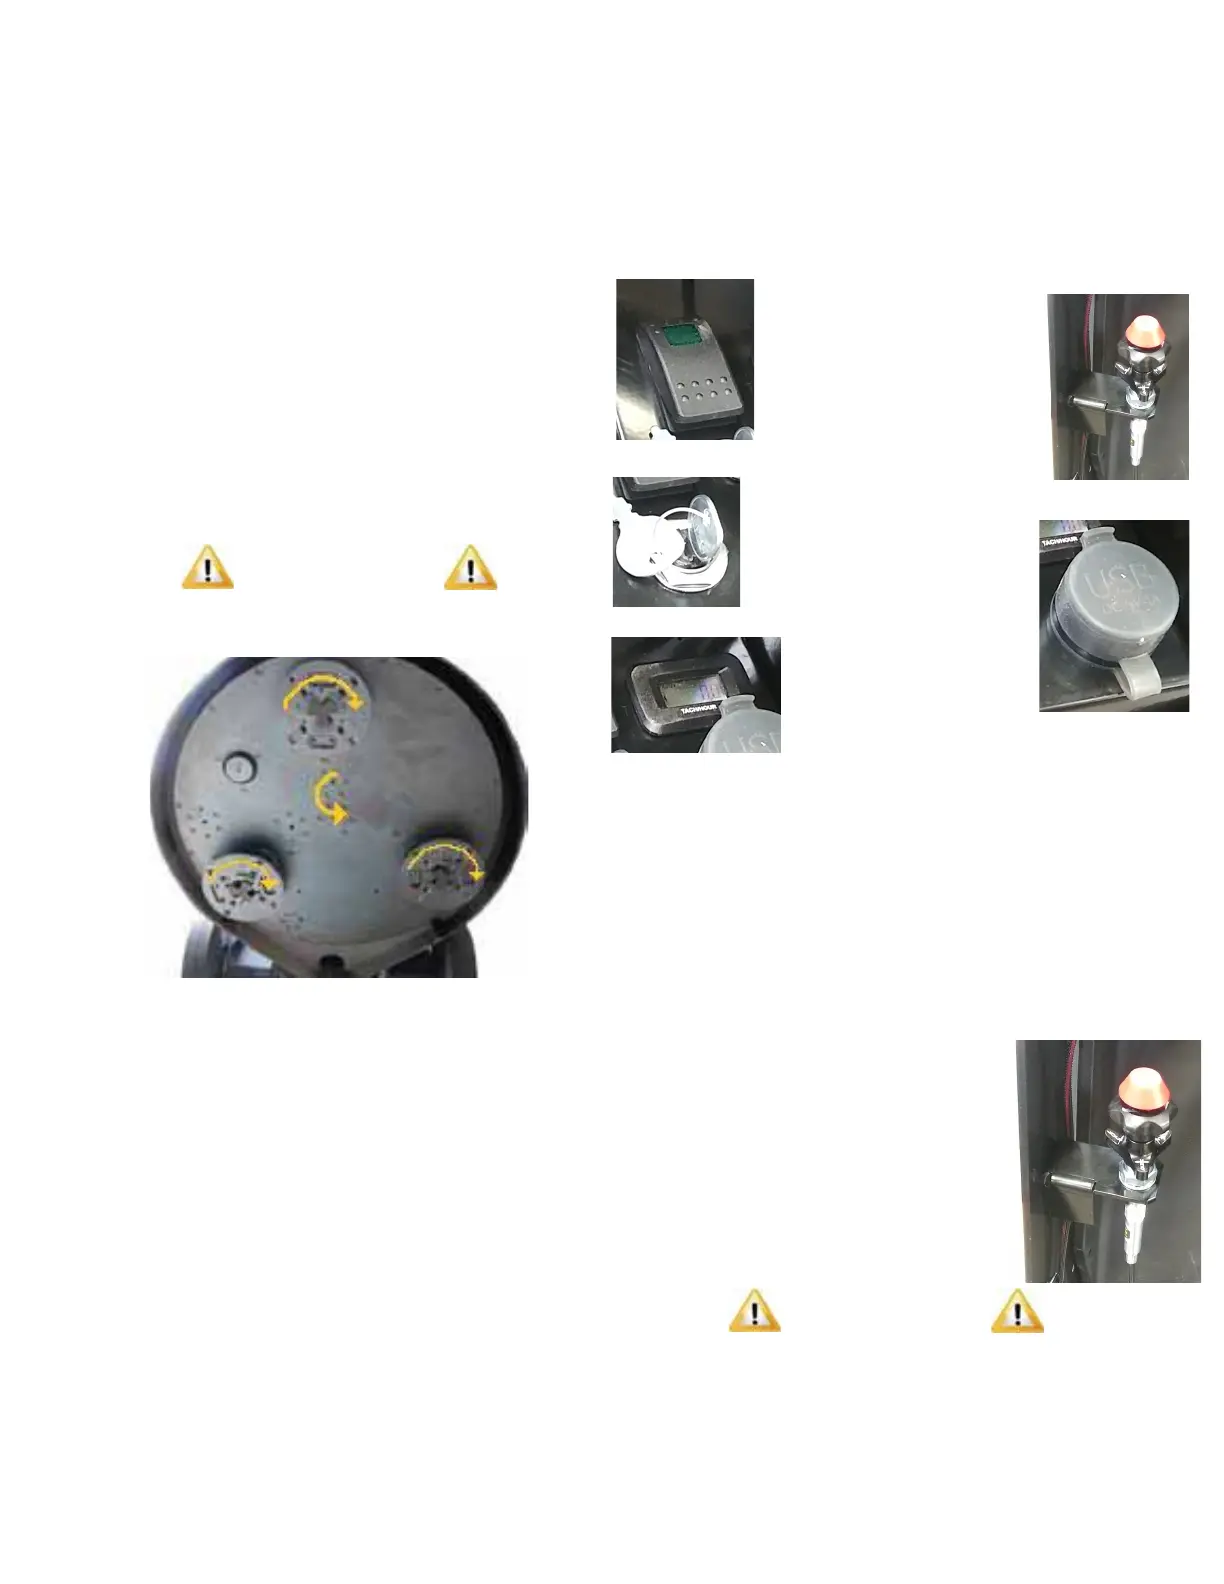
IMPORTANT
Planetary head and grinding heads are set to turn in opposite directions of each
other.(as shown in this depiction)
When using the machine, each grinding head must always have the
same diamond type and number of diamonds as the other heads.
Each diamond must also be the same height as the next.
The Rubber skirt must be adjusted so that a good seal is established,
between the floor and the drum.
When setting the height of the handle, the operator is the guide. The comfort of
the operator during grinding is key. The handlebar should rest right at the
operator’s hip bone. When the machine is running, there will be a grinding force
to one side that can be felt through the handlebars. Use the hip to resist this
force instead of the arms.
Transportation
When transporting, it is important to ensure the machinery is properly
secured at all times to eliminate “bouncing”. Ensure the chassis or frame section
of the machine is secured down at all times when in transit. The machine should
always be transported under cover limiting the exposed to natural elements – in
particular rain and snow. The machine should not be lifted by handle, motor,
chassis or other parts. Transportation of the machine is best done on a
pallet/skid to which the machine must be firmly secured. Do not attempt to slide
the tines/forks from a fork lift under grinding heads unless on a pallet/skid.
Failure to do so can cause extreme damage to grinding heads of machine and
internal parts.
Control Panel
The operator controls consist of a number of toggles and switches, giving 4
separate controls.
Ignition
Speed Control
Clutch
Engage/disengage
the drum rotation
NEVER ENGAGE/
DISENGAGE CLUTCH
ABOVE 2000 RPM!
Machine Power-Up
Connect battery harness & propane tank.
Turn Key to “START” position for a moment
Turn Key to “ON” position
Drum Rotation
The green switch controls the electric clutch.
Do not engage the clutch above 2000 RPM’s
Speed / Throttle
The grinding speed should start low and increase as
the operator becomes more comfortable with the
application. Be sure that the RPM’s do not exceed 2000
when starting and stopping the drum rotation. The
machine should be running and the drum rotating
before speed selection is fine tuned.
IMPORTANT
It is recommended that machinery be transported with a set of diamonds
attached at all times to ensure protection of locking mechanism for diamond
plates.
In case of emergency stop, disengaging the clutch above 2000 RPM’s could be harmful
to the motor. As some situations are more important than the service life of your
machine, we recommend you use your discretion.
Tachometer
USB charging ports
Turn to “START” until
motor starts, leave in
“ON” until finished.
Turn to “OFF”, for
motor stop.
The motor is
connected to a
throttle cable for
speed control.
Twist to lock/
Unlock, Pull for
fast, push for
slow.
Reads current
motor speed or
total hours of
operation.
Push button
toggles display.
USB ports, to use
for charging a
2.1A device.
Such as a phone
or headset.
 Loading...