Tilting of lightbar brackets
is available in 2.5 degree
increments. Plus or minus 10
degrees. Examples shown below.
-2.5°
10°
L8 Lightbar Installation Guide 875-3006-000 Rev A1
3
Step One
Assemble Lightbar
Mounting Brackets
Do not hit any wires or
hydraulics while drilling. Check
both sides of the aircra before
drilling.
L8 Lightbar Installation Instructions
Do not obstruct the view of, or access to, other instruments or the flying or driving visibility of the operator.
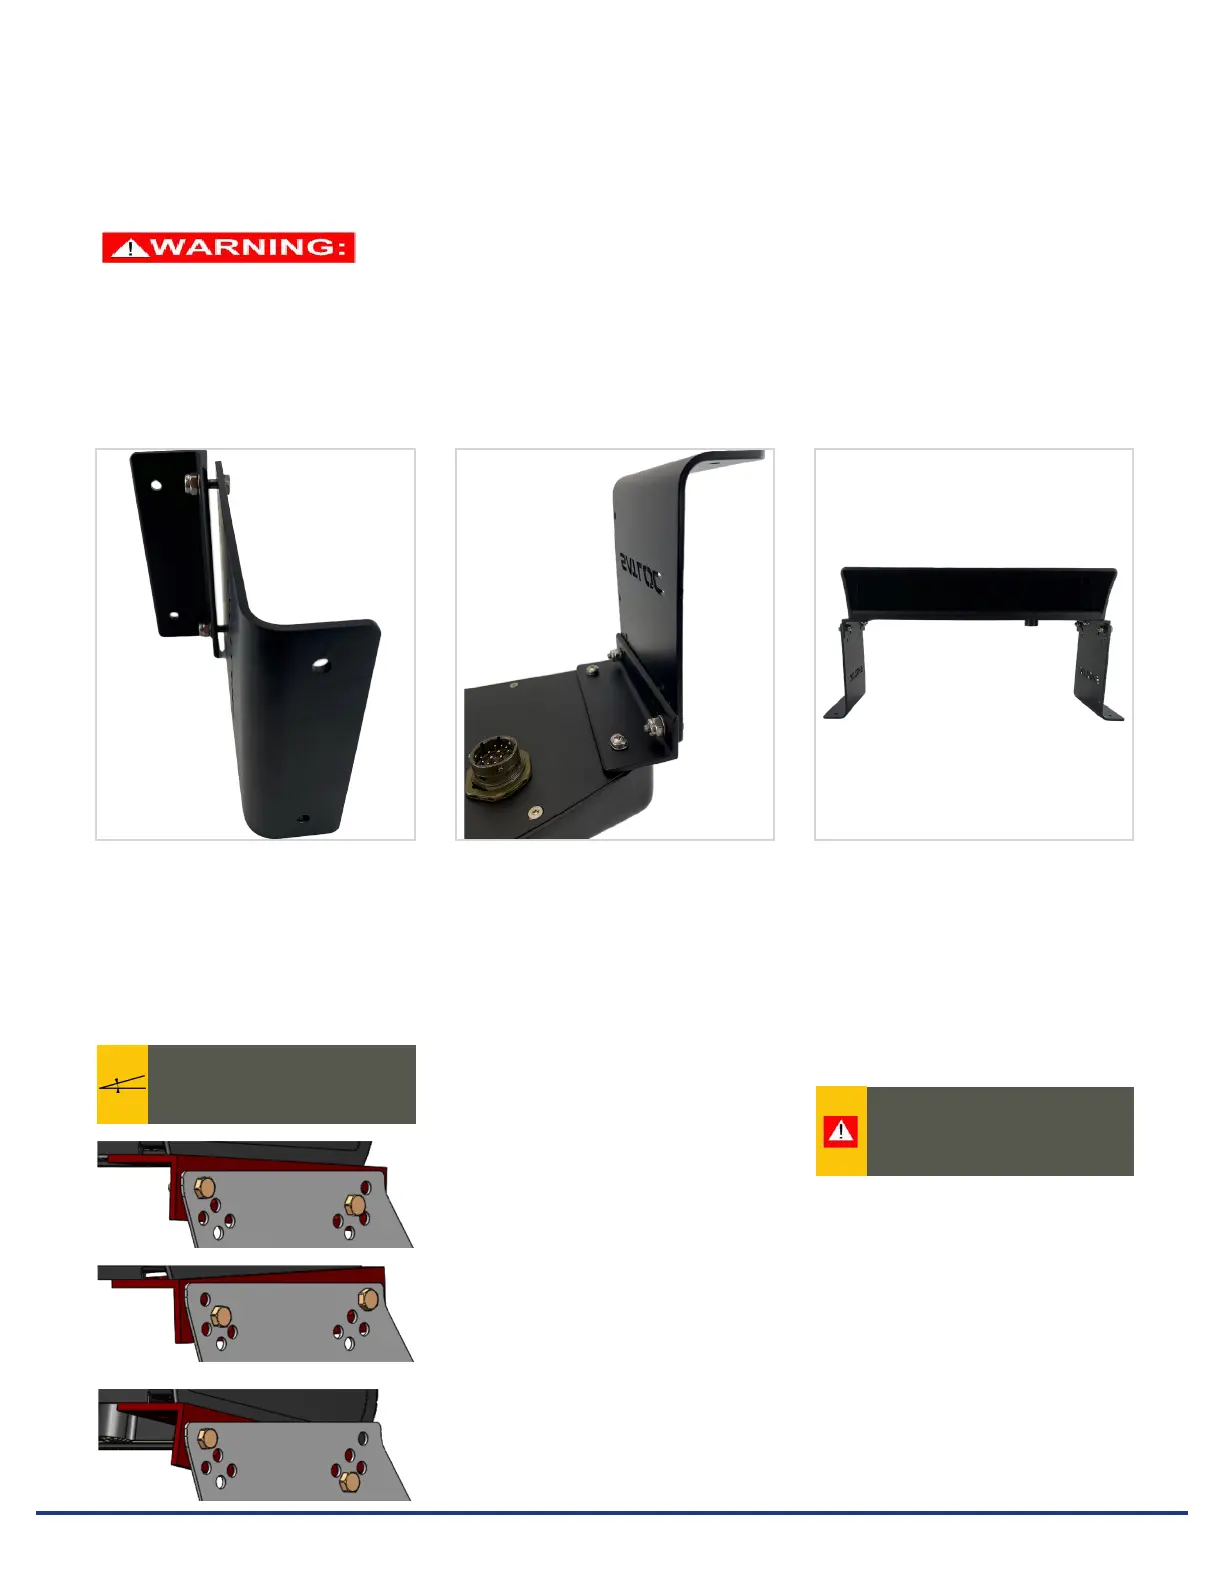
Using hardware D, assemble two
mounting brackets using parts B
and C.
Note: There are three size options
for the mounting brackets.
Using the assembled lightbar and
brackets as a template, mark the
four mounting hole positions on
a suitable surface/location on
the aircraft. Using a 1/4" drill bit,
carefully drill the four holes.
Using hardware E, attach the
two mounting brackets to the
Lightbar.
Step Two
Attach Mounting Brackets
to Lightbar
Step Three
Marking Holes for Drilling
Unpack the kit and identify the required parts as shown. Kit items are referenced A, B, C, etc. The references are used in the
installation steps and pictures. Be sure to mount the lightbar in front of the cockpit at a comfortable viewing distance.
2.5°