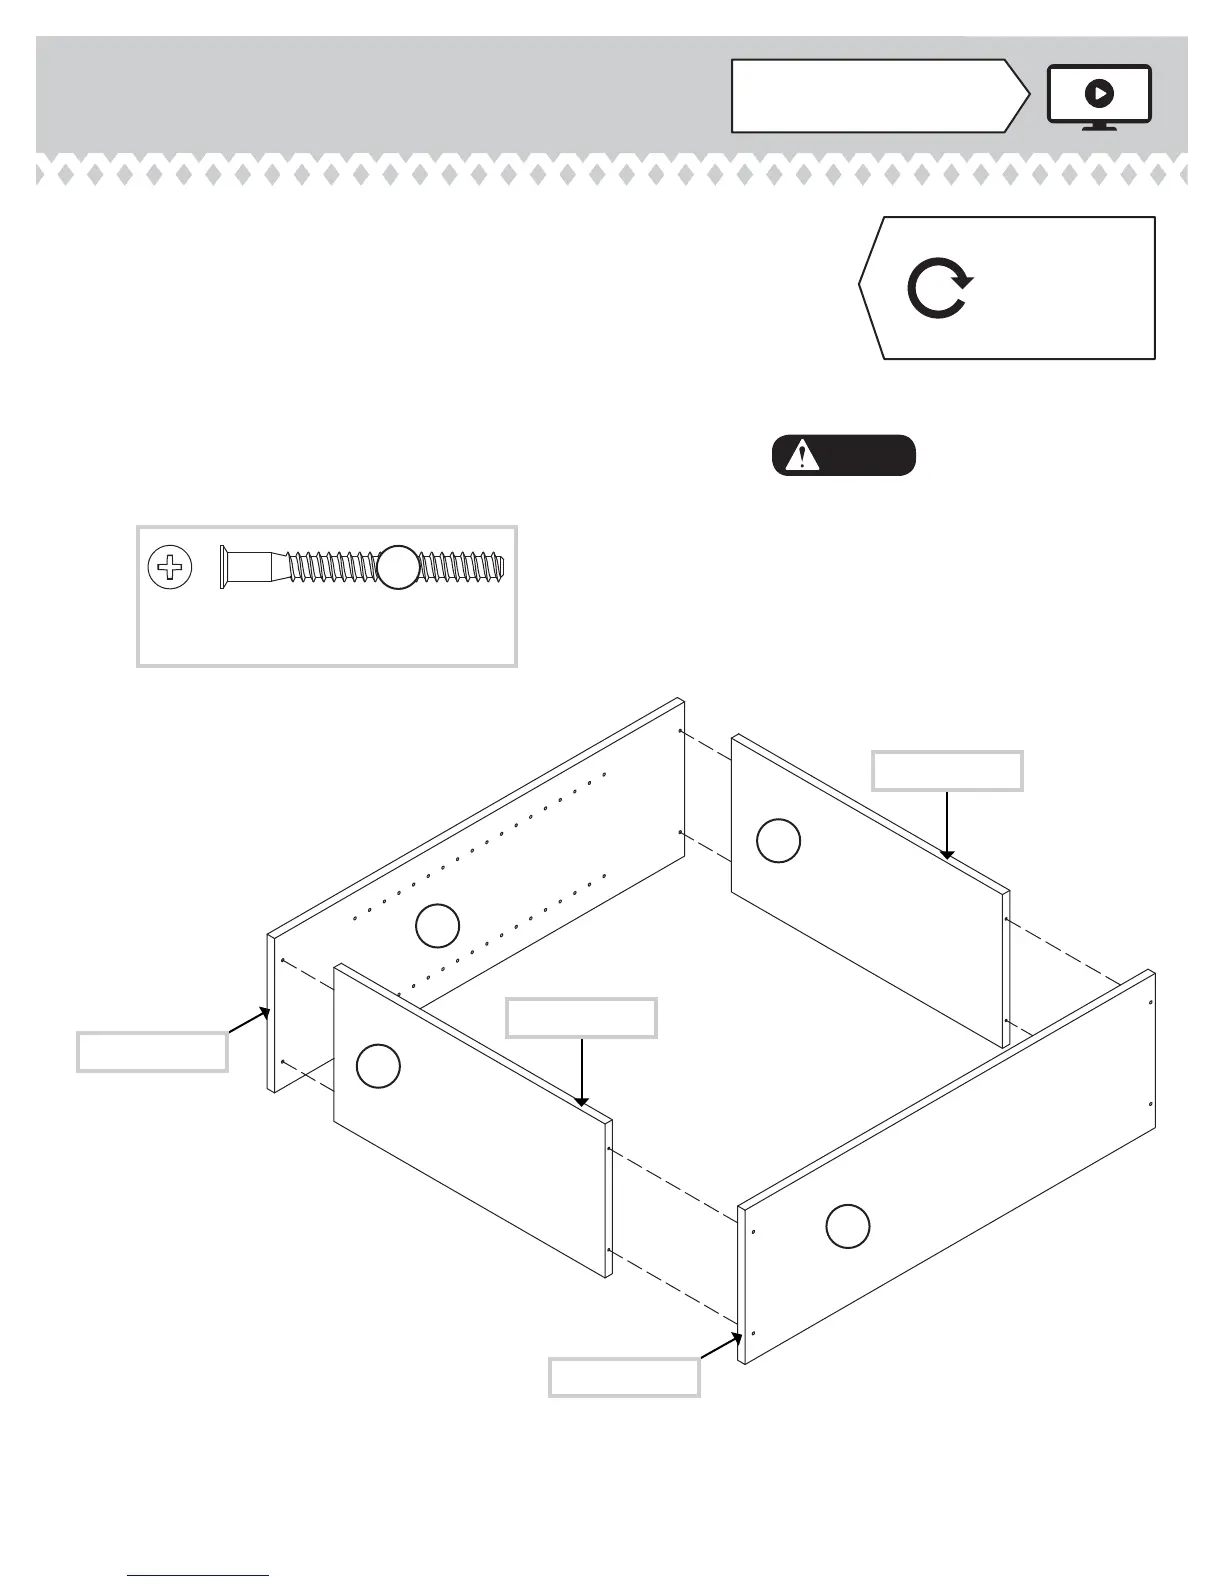
Step 1
Look for this icon. It means a
video assembly tip is available at
www.sauder.com/services/tips
å
Assemble your unit on a carpeted fl oor or on the empty
carton to avoid scratching your unit or the fl oor.
å
Fasten the ENDS (A3) to the TOP/BOTTOMS (B). Use
eight BLACK 1-15/16" FLAT HEAD SCREWS (H).
413322www.sauder.com/services
Page 5
A3
B
B
A3
H
BLACK 1-15/16" FLAT HEAD SCREW
(8 used in this step)
Unfi nished surface
Unfi nished surface
Unfi nished edge
Unfi nished edge
Unfi nished edge
Unfi nished edge
Surface with
fewer holes
Surface with
more holes
Remember:
Righty tighty.
Lefty loosey.
Do not stand the unit upright without the
BACK fastened. The unit may collapse.
Caution