7. Deploying SmartAudio
This section requires the use of RacePoint Blueprint for layout of the system so that control can be established and UIs
created. While you have used Blueprint before, it is a good idea to review the basic actions that will be used during the
deployment process. See Appendix A - Blueprint Basics for a refresher on Blueprint basics.
IMPORTANT! Deploying a SmartAudio matrix within a Savant system is different than other Savant components.
Follow all instructions, and warnings carefully to ensure a successful deployment of SmartAudio.
7.1. Add the System Backbone (Savant Controller and Switching)
1. Create the rooms for the system
To make placement of components a smooth and quick process, we recommend that all rooms be created as a first
step. This will allow for components to be placed in the rooms as they are added to the layout.
2. Add a Savant Controller to the Layout
The SmartAudio matrix does not contain connections for the control of other devices. If any IR or RS-232 controlled
devices exist in the layout, a Savant controller must be added to the configuration.
Tip: If the SmartAudio matrix is the only switching component in the system, choose a controller that does not
have any switching that would add unnecessary overhead.
Tip: Select a controller that has sufficient control connections for all the components in the system. This will
eliminate the need to add controllers for more connections.
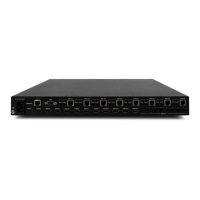
3. Add the SmartAudio Matrix to the Layout
Note: The SmartAudio matrix can be controlled via RS-232, however UID control via the LAN connection is the
preferred method within a Savant system as it allows access that is not available via RS-232. See section 6
SmartAudio Web UI for more information.
While not shown in BP, the LAN must be physically connected to a switch.
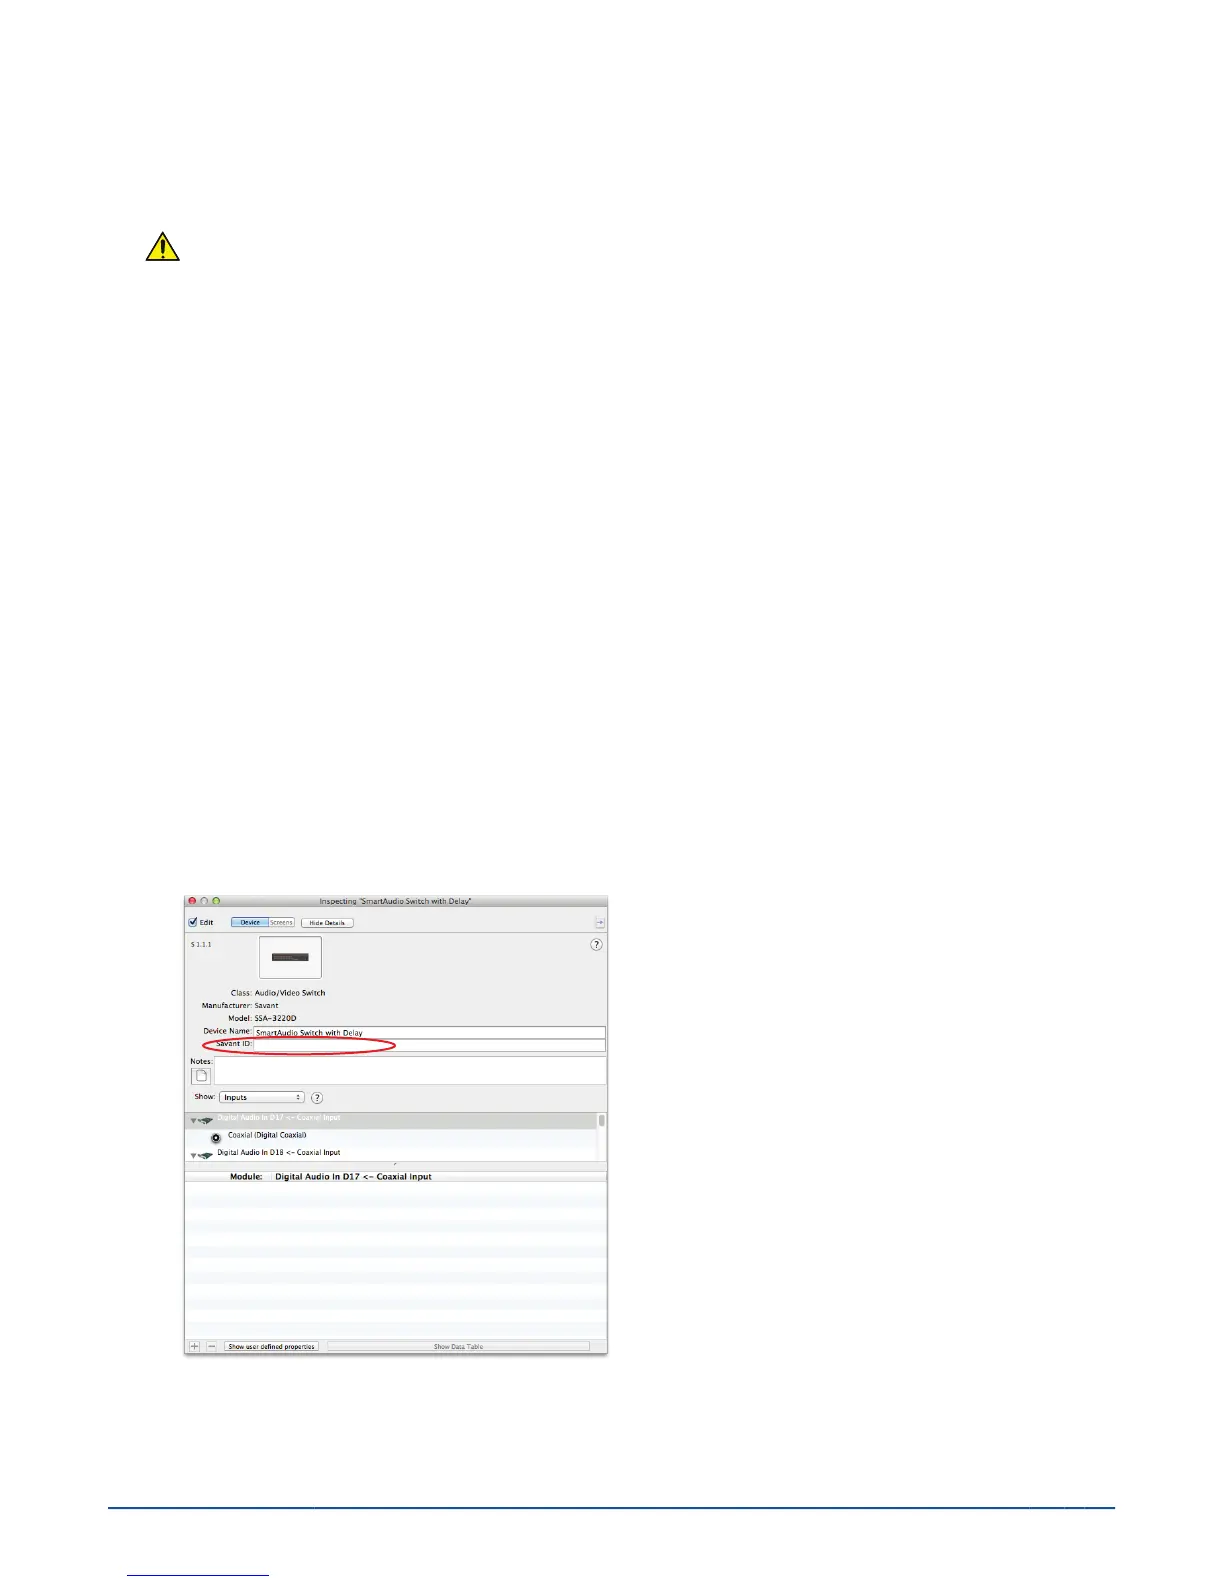
3.A. Select the appropriate matrix in the Component Library based on the need for output channel delay.
3.B. Enter the UID for the matrix by selecting the matrix in the config, and opening the inspector.
Toolbar: View > Show Inspector
Note: The inspector must be closed from the previous step, and reopened for the matrix in order for the Savant ID
box to appear.
4. Add an Amplifier to the Layout
The SmartAudio matrix connects to an amplifier (or Powered Speakers) to send audio to the speakers. Up to 8
stereo pairs can be connected to the SmartAudio matrix.
Savant
®
SmartAudio Matrix Switch Blueprint Deployment Guide
Savant
®
SmartAudio Matrix Switch Blueprint Deployment Guide
Savant
®
SmartAudio Matrix Switch Blueprint Deployment Guide
Savant
®
SmartAudio Matrix Switch Blueprint Deployment Guide
Savant
®
SmartAudio Matrix Switch Blueprint Deployment Guide
Savant
®
SmartAudio Matrix Switch Blueprint Deployment Guide
 Loading...