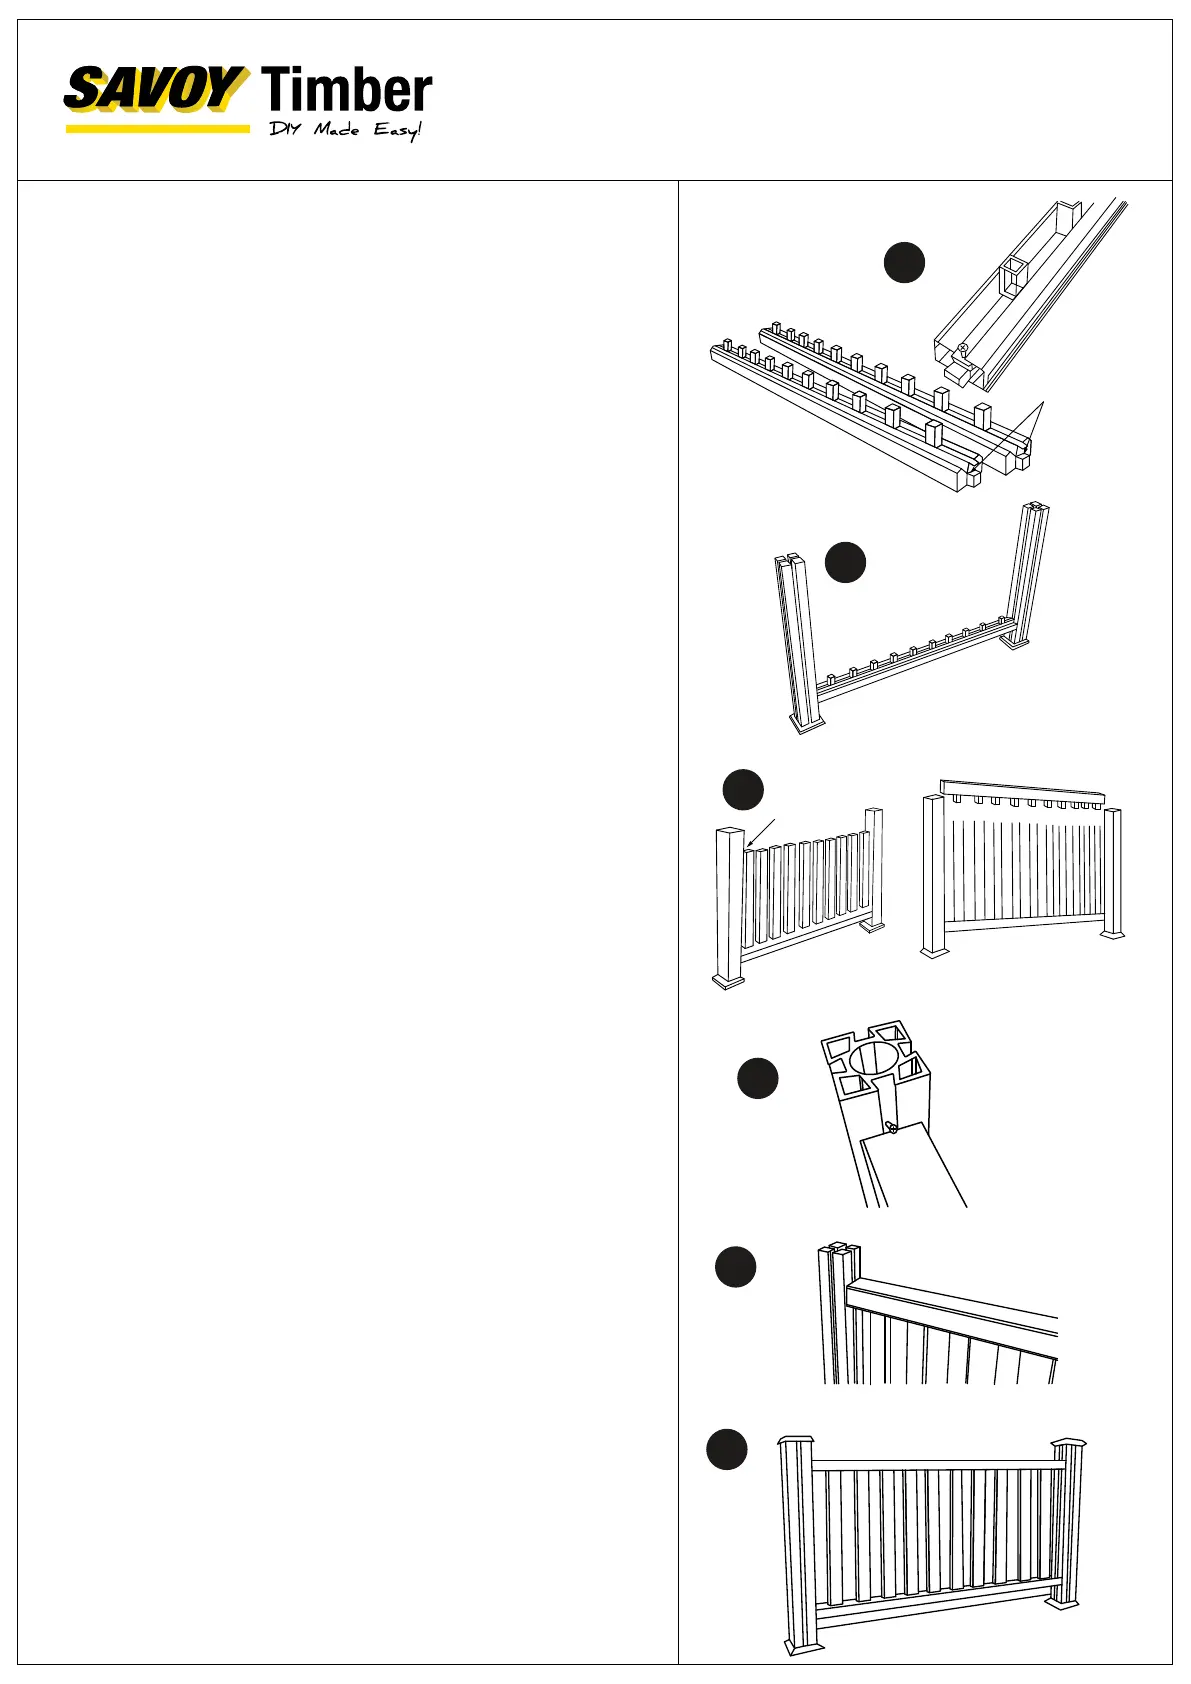
STEP 7
Once prepared, slide the bottom rail (6) into the channels on the
post (2) using the rail supports (8) until it sits securely on the infill
95mm from the finished floor level.
STEP 8
Position the 10 spindles (5) over the rail supports (8). Prepare the
top rail (4) in the same way you prepared the bottom rail, but do
not add the rail supports (5). Slide a piece of infill (3) into each side
of the post (2) where the rails fit. This needs to be cut to a standard
length of 845mm. Slide the prepared top rail (4) into position, taking
care to ensure the connectors (8) fit within the spindles (5).
STEP 9
After pre-drilling a hole in the post (2), use a screw sitting directly
on top of the rail connector (8) to hold the top rail (4) in position
and to add stability to the whole system.
STEP 10
Slide a piece of infill (3) into the post (2). Repeat the process on
the other post (2).
STEP 11
Once you're satisfied with the appearance of all the infill pieces and
you've ensured they are all level, you can then place the post caps
(1) on the posts to finish your new balustrade.
6
7
8
9
10
11
BALUSTRADE
INSTALLATION GUIDE
STEP 6
Slide in the first infill (3) piece, which is 105mm long, into the
bottom rail (6). Then, add a rail connector (8) and repeat this
process until the entire rail is complete. The first and last
dimensions may vary depending on the distance between
composite posts (2). Before inserting the final infill (3) piece at
the end of each rail, make sure that the rail connector (8) is
securely fastened to the bottom rail (4). You can do this by
drilling a pilot hole 30mm in from the end and in the centre of the
channel. Confirm that the rail connector (8) is in the correct
position before screwing it in place. The pilot hole should not be
larger than the screw. For a standard length of 1486mm, you
would need 10 spindles.
CUT
845 MM
 Loading...