1
2
3
4
5
1600 MM
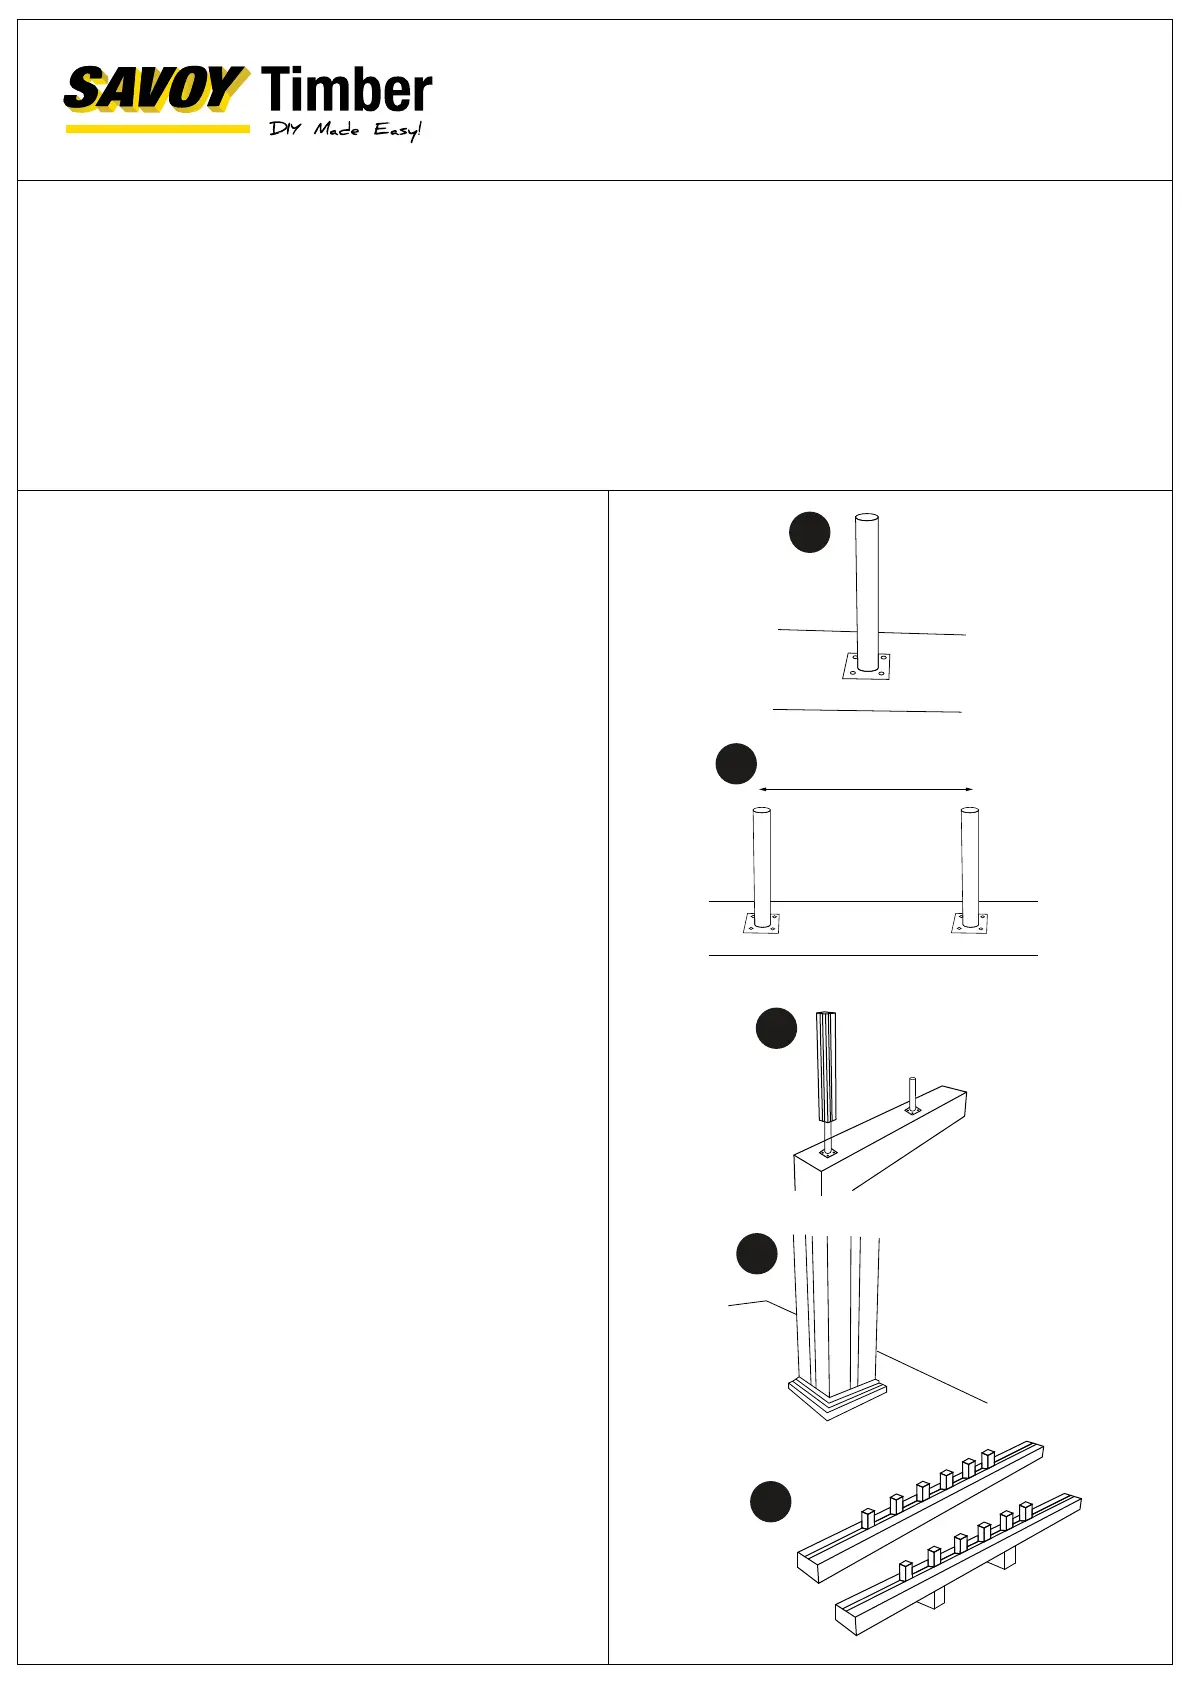
STEP 1
STEP 2
STEP 3
The next step is to choose the installation method for your Savoy Timber composite balustrade. You have
two installation options.
1. Surface Mounting: After the decking is built using steel posts, the balustrades are placed directly on top
of the decking boards and fixed directly to the subframe.
2. Through Post System: This is where the posts are installed as part of the subframe (please note that
Savoy Timber’s balustrades are not intended for use as columns, support posts, beams, joist stringers, or
other primary load-bearing members). The posts are built directly into the subframe and secured by using
coach bolts in several directions. A double-beam construction provides the best composite post housing.
Position the first post (2) in place ensuring they are
straight vertically. Mark the hole positions and drill
holes to the appropriate size for your fixing bolts.
Position the second post (2) in place, ensuring that it’s
vertically straight, and the maximum distance between
your post centres is no more than 1600mm. Mark the
hole positions and drill holes to the appropriate size of
your fixing bolts.
Slide the composite newel posts over the steel insert
posts and ensure they are straight.
Note: You can cut your composite posts to length if
necessary.
STEP 4
Once the composite post is in place over the steel
insert. Slide the post skirt (7) over the top of the post,
this will then hide the fixing bolts.
STEP 5
Fix two rail supports (6) to the underside of the bottom
rail (4) with the square plastic connectors provided.
BALUSTRADE
INSTALLATION GUIDE
 Loading...