EasyManua.ls Logo

Sawyer S3 - User Manual

Default Icon
2 pages
Print Icon
To Next Page IconTo Next Page
Loading...
CLEANING INSTRUCTIONS SAWYER FILTERS
For best results, clean your filter on a daily basis. Regularly clean the white push-pull cap and your buckets/containers with soap or bleach.
BACKWASHING WITH THE CLEANING PLUNGER
BACKWASHING WITH THE CLEANING COUPLING
2 3 4 5 6
Reserve a quart of clean water.
Find a clean plastic bottle
that will thread onto the
cleaning coupling.
Disconnect the filter
from the hose.
Fill the bottle with
clean, filtered water.
Fill the cleaning plunger
with clean water.
Remove the push pull cap
and screw the coupling onto
the filter threads.
Remove the white push pull cap
and place the cleaning plunger
on the output end of the filter.
Screw the filter with
the attached coupling onto
the plastic bottle.
Forcefully backwash the filter a
couple times with clean water.
Squeeze forcefully and
repeat as necessary until
Fill the cleaning plunger and
push water forwards through the
filter to loosen up any dirt.
Repeat backwashing
(forwards and backwards)
until filter is fully cleaned.
REPEAT
UNTIL
CLEAN
1
2 3 4 51
MORE CLEANING TIPS
SANITATION
Sawyer recommends occasionally sanitizing your filter. To do this, backwash the
filter with a standard bleach solution (fragrance free and no more than one cap of
bleach per quart of water). Let air dry and in a cool dry place before using.
CLOGGED FILTERS
If your filter is still flowing slow after backwashing, soak the filter in hot clean
water (not hotter than you can put your hand into) for about an hour and then back
flush using hot clean water. REMEMBER to backwash FORCEFULLY! When using
the syringe, do not be gentle, it will only form paths of least resistance instead of
blowing out the particulates that may be trapped in your filter.
CALCIUM BUILD UP
If after above steps your filter still seems to be clogged, it could be dried calcium.
Soak the filter in vinegar for 1/2 hour and then flush with hot clean (not hotter
than you can put your hand into) water. Repeat until the flow is restored – it may
take several times.
Question and Answer IconNeed help?

Do you have a question about the Sawyer S3 and is the answer not in the manual?

Summary

Backwashing With The Cleaning Plunger

Prepare Clean Water

Prepare a reserve of clean water for the backwashing process.

Disconnect Filter

Detach the filter from any attached hose before cleaning.

Fill Cleaning Plunger

Load the specialized plunger tool with clean water.

Attach Plunger

Connect the plunger to the filter's output end after removing the cap.

Initial Backwash

Apply forceful water pressure using the plunger to backwash the filter.

Dislodge Dirt

Push water through the filter to dislodge accumulated particles.

Repeat Cleaning Cycle

Continue backwashing until the filter is thoroughly clean.

Backwashing With The Cleaning Coupling

Select And Prepare Bottle

Find a clean plastic bottle that threads onto the cleaning coupling.

Fill Water Bottle

Fill the selected bottle with clean, filtered water.

Attach Coupling

Remove the push-pull cap and screw the coupling onto the filter threads.

Connect Filter Assembly

Screw the filter with the attached coupling onto the plastic bottle.

Perform Backwash

Squeeze the bottle forcefully to backwash the filter until clean.

More Cleaning Tips

Filter Sanitation

Periodically sanitize the filter using a bleach solution for deep cleaning.

Clogged Filter Troubleshooting

Soak and backwash with hot water for stubborn clogs.

Calcium Buildup Removal

Use vinegar to dissolve calcium deposits, then flush with hot water.

Overview

The Sawyer Filter is a portable water filtration system designed for outdoor use, providing clean drinking water by removing harmful bacteria and protozoa. It is a versatile device that can be cleaned in two primary ways: using a cleaning plunger or a cleaning coupling with a plastic bottle. The manual emphasizes daily cleaning for optimal performance and recommends regular sanitization of the filter and associated containers.

Function Description:

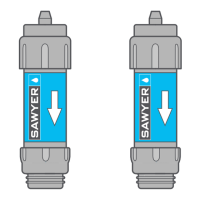
The Sawyer Filter is engineered to provide safe drinking water from various natural sources. It operates by physically filtering out contaminants, specifically bacteria and protozoa, through its hollow fiber membrane. Water is forced through the filter, leaving impurities behind. The device is designed for ease of use in the field, allowing users to connect it to water sources via hoses or directly to bottles for filtration. The primary function is to transform untreated water into potable water, making it suitable for hikers, campers, and emergency preparedness.

Important Technical Specifications:

While specific flow rates or micron ratings are not explicitly stated in the provided manual, the design implies a robust filtration capability suitable for removing microscopic pathogens. The filter's effectiveness is maintained through a backwashing process, which reverses the flow of water to dislodge trapped particulates. The materials used, such as the plastic for the filter housing, plunger, and coupling, are designed for durability and compatibility with water. The filter's compact size and lightweight nature are implied by its portable design, making it suitable for backpacking and travel. The filter is designed to be used with standard bleach solutions for sanitization and vinegar for calcium buildup, indicating material compatibility with these common cleaning agents.

Usage Features:

Backwashing with the Cleaning Plunger:

  1. Reserve Water: Users are instructed to reserve approximately one quart of clean water for the backwashing process. This water is used to flush the filter.
  2. Disconnect Filter: The filter must be disconnected from its hose or other connections to prepare for cleaning.
  3. Fill Plunger: The cleaning plunger is filled with the reserved clean water.
  4. Attach Plunger: The white push-pull cap is removed from the filter, and the cleaning plunger is placed onto the output end of the filter. This connection allows for the reverse flow of water.
  5. Forceful Backwash: The user then forcefully pushes water through the filter using the plunger. This action dislodges trapped dirt and particulates from the filter's membrane. The manual recommends backwashing a couple of times with clean water.
  6. Forward Flush: After backwashing, the cleaning plunger is filled again, and water is pushed forwards through the filter to further loosen any remaining dirt.
  7. Repeat: The backwashing process (both forwards and backwards) should be repeated until the filter is fully cleaned, indicating that water flows freely and without resistance.

Backwashing with the Cleaning Coupling:

  1. Find Bottle: Users need a clean plastic bottle that can thread onto the cleaning coupling. This bottle will serve as the reservoir for backwashing water.
  2. Fill Bottle: The plastic bottle is filled with clean, filtered water.
  3. Attach Coupling: The push-pull cap is removed from the filter, and the cleaning coupling is screwed onto the filter threads. This coupling provides an interface between the filter and the plastic bottle.
  4. Screw Filter to Bottle: The filter, with the attached coupling, is then screwed onto the plastic bottle filled with clean water.
  5. Squeeze Forcefully: The user squeezes the plastic bottle forcefully, pushing water through the filter in reverse. This action backwashes the filter, clearing out trapped particulates.
  6. Repeat: This squeezing action should be repeated as necessary until the filter is clean and water flows freely.

Maintenance Features:

Daily Cleaning:

The manual explicitly states, "For best results, clean your filter on a daily basis." This highlights the importance of routine maintenance to ensure optimal performance and longevity of the filter.

Regular Cleaning of Components:

Users are advised to "Regularly clean the white push-pull cap and your buckets/containers with soap or bleach." This prevents the buildup of contaminants on these surfaces, which could reintroduce impurities to the filtered water.

Sanitation:

Sawyer recommends "occasionally sanitizing your filter." This involves backwashing the filter with a standard bleach solution. The specific concentration is "fragrance free and no more than one cap of bleach per quart of water." After sanitization, the filter should be allowed to air dry and stored in a cool, dry place. This process helps to kill any remaining bacteria or viruses that might have accumulated in the filter over time, ensuring a higher level of hygiene.

Addressing Clogged Filters:

If the filter's flow rate remains slow even after backwashing, additional steps are provided:

  • Hot Water Soak: The filter should be soaked in hot clean water (not hotter than one can comfortably touch) for about an hour. This helps to loosen stubborn particulates.
  • Hot Water Backflush: Following the soak, the filter should be backflushed using hot clean water. The manual emphasizes to "backwash FORCEFULLY!" and not to be gentle when using the syringe (plunger), as gentle pressure may only create paths of least resistance rather than dislodging all trapped particulates.

Addressing Calcium Build Up:

If clogging persists after the above steps, it might be due to dried calcium deposits.

  • Vinegar Soak: The filter should be soaked in vinegar for 1/2 hour. Vinegar is effective at dissolving calcium.
  • Hot Water Flush: After the vinegar soak, the filter should be flushed with hot clean water (again, not too hot to touch).
  • Repeat: This process should be repeated multiple times if necessary until the flow is fully restored.

The Sawyer Filter is designed for user-friendly operation and maintenance, with clear instructions for both routine cleaning and troubleshooting common issues like clogging and calcium buildup. Its emphasis on regular cleaning and sanitization ensures the continuous delivery of safe drinking water in various outdoor and emergency scenarios.

Sawyer S3 Specifications

General IconGeneral
BrandSawyer
ModelS3
CategoryWater Filtration Systems
LanguageEnglish

Related product manuals