EasyManua.ls Logo

Sawyer SP160 User Manual

Sawyer SP160
2 pages
To Next Page IconTo Next Page
Page #1 background imageLoading...
Page #1 background image
SAWYER 1 GALLON GRAVITY SYSTEM
Use & Maintenance
YOUR KIT
INCLUDES:
HOW TO USE YOUR GRAVITY FILTER
Step 1
Assemble the gravity tube and tube
adapters by inserting the adapters on both
sides of the tube.
Step 2
Screw the Mini filter onto to the gray adapter on the gravity
tube. You’re now ready to collect water in the bladder.
(1) 0.1 Micron Absolute
Dual-Threaded Mini
(2) 1 Gallon
Water Bladder
(3) Gravity
Hose
(4) Tube
Adapters
(5) Cleaning
Plunger
(6) Cleaning
Coupling
(7) Hose
Guide
Step 3
Unscrew the large blue cap
and fill the water bladder with
fresh water. When done filling,
screw the blue cap back onto
the bladder.
Step 6
Hang the bladder from
the handle or set it on
a flat surface.
Step 7
Open the white push-pull
cap on the filter to begin
the flow of water.
Tip: The greater the distance between the
bladder and the filter, the faster water will flow.
Tip: The hose guide can be used to prevent the
hose from kinking. Attach it to the neck of the
blue adapter if you wish to use it.
Step 5
To purge the air from the tube, lower
the filter below the bladder and slightly
untwist the filter until water fills the tube.
Re-tighten the filter and wipe o any drips
that may be on the filter.
Important: Before filtering, all air must be purged from
the gravity tube or else the flow rate will be very slow.
Step 4
Holding the bladder upsidedown,
unscrew the small white cap and
screw on the assembeled gravity
tube and Mini filter.
Question and Answer IconNeed help?

Do you have a question about the Sawyer SP160 and is the answer not in the manual?

Sawyer SP160 Specifications

General IconGeneral
BrandSawyer
ModelSP160
CategoryWater Filtration Systems
LanguageEnglish

Summary

How to Use Your Gravity Filter

Step 1: Assemble Gravity Tube and Adapters

Assemble the gravity tube and adapters by inserting them on both sides of the tube.

Step 2: Attach Mini Filter to Adapter

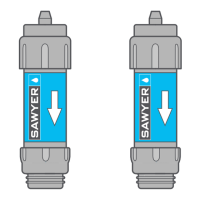
Screw the Mini filter onto the gray adapter on the gravity tube.

Step 3: Fill Water Bladder

Unscrew the blue cap and fill the water bladder with fresh water.

Step 4: Connect Filter Assembly to Bladder

Hold bladder upside down, unscrew white cap, screw on filter assembly.

Step 5: Purge Air from Filter Tube

Lower filter below bladder, untwist to fill tube with water, then retighten.

Step 6: Position Water Bladder

Hang the bladder from the handle or set it on a flat surface.

Step 7: Start Water Flow

Open the white push-pull cap on the filter to begin the flow of water.

Cleaning Instructions with Cleaning Plunger

Step 01: Remove Mini Filter

Remove the Mini Filter from the tube.

Step 02: Fill Cleaning Plunger

Fill the Cleaning Plunger with clean, filtered water.

Step 03: Forceful Backwash

Forcefully backwash the filter a couple times with clean water.

Step 04: Complete Cleaning Process

Push water through filter to loosen dirt; repeat backwashing forwards and backwards.

Cleaning Instructions with Cleaning Coupling

Step 01: Prepare Bottle and Coupling

Fill a clean plastic bottle with clean, filtered water and remove filter's push-pull cap.

Step 02: Attach Cleaning Coupling

Screw the Cleaning Coupling onto the filter threads.

Step 03 & 04: Backwash with Bottle

Screw filter with coupling onto bottle, squeeze forcefully to backwash.

More Cleaning Tips

Sanitation Method

Backwash filter with a standard bleach solution (fragrance-free) and let air dry.

Clogged Filters Troubleshooting

Soak slow-flowing filters in hot water or vinegar, then backwash forcefully.

Calcium Buildup Removal

Soak filter in vinegar for 1/2 hour, then backwash with hot clean water.

Related product manuals