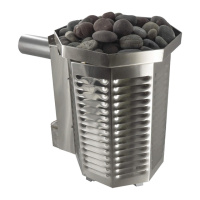
Ultra Gas Sauna Heaters
Installation Instructions
• Heat must be installed by a certified professional
• Heater must be installed according to local codes
• Do not touch the heater
• Do not cover the heater
• Never hose down the sauna
• Sauna door must always open outward
• Sauna door can never include a lock
• Do not install more than one heater in a room
• Only use an aroma-stone when using fragrances
• Never leave children unattended
• Sauna bathing is not suitable for those with health problems.
• Consult a doctor before using
Sauna Room Venting Guidelines
Sauna room should be vented according to manufacturers
specifications or Scandia sauna room specification found in
the Scandia sauna installation instructions. Improper ventila-
tion is dangerous for the health.
Heater should be positioned near the door or on close to the
door as possible without impeding traffic flow.
The inlet vent should be below the heater or near the base of
the heater.
Outlet vent should be just below the top bench on the oppo-
site side or near the opposite side of the heater.
Sauna Room Venting Guidelines
The sauna should not include a drain.
The sauna should be constructed of cedar.
Do not treat of varnish the sauna wood.
Fill the heater only with Scandia high-density rocks
Check rock tray once a year cleaning all dirt and rock pieces.
The warning signs and sauna usage plaque must be dis-
played near the sauna.
Models Heater Max Room Size A B C D E F G H I J K L
240 & 245
40,000 8x11x7 28" 4" 18 1/2" 2 1/2" 21" x 33" 8 1/4" x 13 1/4 3 1/2 24 1/2 14" 7" 4" 10 1/4"
280 & 285
80,000 12x20x7 40" 6" 29" 4" 33" x 45" 8 1/4" x 16 1/4 5 1/2 32 20" 12" 6" 12 1/4"
0.515625" x 0.515625"
0.41129032258065" x 0.41129032258065"
0.20564516129032" x 0.20564516129032"
C
E
D (back panel
assembly)
A
B
K
K
B
G
F
L
H
J
Cedar wall
lining
Wall to
inside
0.515625" x 0.515625"
0.41129032258065" x 0.41129032258065"
0.20564516129032" x 0.20564516129032"
C
E
D (back panel
assembly)
A
B
K
G
F
L
H
Cedar wall
lining
Wall to
outside
N
Superior Sauna & Cabin Mfg LLC 26865 State Hwy 118, Ashland, WI 54806 USA
Superior Sauna & Cabin Mfg LLC 26865 State Hwy 118, Ashland, WI 54806 USA
www.SuperiorSaunas.com superiorsauna@cheqnet.net Tel: 715.746.2268 Fax: 715.746.2168