EasyManua.ls Logo

SCC Z-CHAIN User Manual

SCC Z-CHAIN
2 pages
To Next Page IconTo Next Page
Page #1 background imageLoading...
Page #1 background image
To secure the free ends of the cable, slide
the plastic spirals over them with a twisting
motion. If insufficient cable is available
for plastic spirals to secure, “tuck”
the short end up next to the
crossmember anchor points,
as shown here.
Park vehicle on firm, level ground and
away from the flow of traffic. Set the
emergency brake. Chains should be
installed on drive wheels. Lay the cable
chain on the ground with smooth side
(TIRE SIDE) of the crossmember hooks up.
Move the chain in a sweeping motion
under the vehicle so the open mid-section
is positioned up against the backside of
the tire. This sweeping motion can best
be done while kneeling in front of the tire.
Reach around each side of the tire and
grasp both ends of the non-split side
cable (that is furthest away from you).
Pull both ends to the top of the tire so the
fasteners can be seen and manipulated
more easily. Connect the inside fastener.
Grasp the outside cable with both hands
and pull it toward you to create as much
slack as possible. Connect the top fastener
(the red one) as tightly as possible by
inserting the silver “beads” on the cable
through the keyhole.
Repeat this process with the gold
adjustment fastener. Ensure that both
fasteners are adjusted within one bead
of each other.
Move the vehicle a few feet.Remove cable
“slack” by retightening both adjustment
points as equally as possible.
This is how a properly installed chain
should appear on your tire.Your vehicle may
now be driven without further adjustment.
Chain tighteners or adjusters should
never be used with Z-Chain.
1
2
INSTALLATION INSTRUCTIONS
2 3
3
4
5
6
7
8
Question and Answer IconNeed help?

Do you have a question about the SCC Z-CHAIN and is the answer not in the manual?

SCC Z-CHAIN Specifications

General IconGeneral
BrandSCC
ModelZ-CHAIN
CategoryAutomobile Accessories
LanguageEnglish

Summary

Z-Chain Installation Steps

Prepare Vehicle and Ground

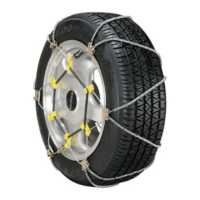
Park vehicle on firm, level ground, set emergency brake. Install chains on drive wheels. Lay chain on ground.

Position Chain Under Tire

Move chain under vehicle, positioning open mid-section against tire backside. Best done kneeling.

Connect Inside Fastener

Reach around tire, pull non-split cable ends to top. Connect inside fastener easily.

Connect Top Fastener

Pull outside cable to create slack. Connect top fastener tightly by inserting silver beads through keyhole.

Adjust Fasteners Equally

Repeat for gold fastener. Ensure both fasteners adjusted within one bead of each other.

Remove Slack and Retighten

Move vehicle a few feet. Remove slack by retightening both adjustment points equally.

Secure Free Ends

Slide plastic spirals over free ends with twisting motion. Tuck short end if spirals insufficient.

Final Check and Usage

Verify proper installation. Vehicle can now be driven. Do not use chain tighteners.

Product Information and Warnings

SAE Clearance Requirements

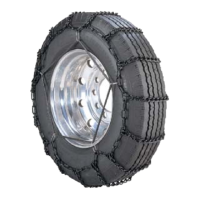
Product meets SAE Class "S" clearance requirements. Tire size variations may affect necessary clearance.

Maximizing Chain Lifespan

Avoid speeds over 30 mph, spinning tires, and locking brakes. Clean and lubricate after use for longevity.

Product Wear and Liability

Traction products wear out and can break. Security Chain Co. not responsible for injury or damage due to misuse.

Installation Verification Checks

Verify chain drape, secured excess cable, equal adjustments, and snug fit without extra tighteners.

One Year Limited Warranty

Surviving Winter Weather

Winter Driving Preparedness

Know road conditions, check forecasts, and prepare a vehicle survival kit. Keep windows and lights clear.

Driving Safely in Winter

Maintain safe distance, avoid quick maneuvers, and be aware of icy spots on bridges and overpasses.

Related product manuals