EasyManua.ls Logo

Schacht BABY WOLF LOOM User Manual

Default Icon
13 pages
To Next Page IconTo Next Page
Page #1 background imageLoading...
Page #1 background image
- 1 -
Find out more at schachtspindle.com
Schacht Spindle Company 6101 Ben Place Boulder, CO 80301
p. 303.442.3212 f. 303.447.9273
© 2017 Schacht Spindle Company, Inc.
04.17
BABY WOLF LOOM
Assembly InstructIons for KnocKed-down looms
TOOLS
#2 Phillips screwdriver
5/16" or adjustable wrench
Flat screwdriver
HARDWARE LIST
Note: Parts pictures are not to scale. Listed part quantities
are what is needed for assembly. There may be extras of
some parts. Parts may not be pictured in every listed size.
HARDWARE BAG A STEPS 1-3
4 Fold bars
4 3/16" x 1-1/4" carriage bolts
4 3/16" lock nuts
8 3/16" washers
2 1/4" washers
2 5/16" lock nuts
2 Black knobs w/ 1" threaded shaft
2 Plastic bearings
HARDWARE BAG B STEPS 4-8
6 1/4" x 2" machine screws
6 1/4" barrel nuts
1 – Ratchet advance lever
2 – 3/8" USS washers
4 #8 x 1-1/2" screws
BEFORE YOU BEGIN
Please read through the directions before beginning to
assemble your loom.
Unpack the loom parts carefully. Do not throw away
the carton or any of the packing material until you have
checked to see that all of the parts and hardware have been
received
All hardware is sized in inches. Illustrations of the vari-
ous hardware and an inch scale are provided to aid you in
determining the correct piece of hardware to use.
Before starting the assembly, read the instructions com-
pletely and familiarize yourself with the drawings and parts.
Follow the exact order of assembly. Take care and work
slowly. If you have someone to help you, the assembly will
be easier.
The wood parts have a removable label on them to iden-
tify each part. We recommend that you leave the labels in
place until the loom is fully assembled.
When you nish assembling the Wolf loom, go back over
all of the screws and make sure they are tight. It is a good
idea to re-tighten the screws every few months. Remember
not to tighten those screws and bolts which are supposed
to allow their parts to pivot.
All wooden parts of the loom have been nely sanded
and nished with hand-rubbed Danish oil. From time to
time you may wish to apply more nish to the loom. Use a
Danish oil (tung oil and polyurethane mixture) and hand
rub the wood with a soft, lint-free cloth. Be sure to follow all
the manufacturer’s instructions.
Fold bar
Knob w/ 1" shaft
Plastic bearing
1-1/4" carriage bolt
Lock nut
2" machine screw
Barrel nut
1-1/2" machine screw
2-1/2" carriage bolt
Slim lock nut
Lock nut from top
Wing nut
Ratchet advance lever assembly
1-1/2" screw
Question and Answer IconNeed help?

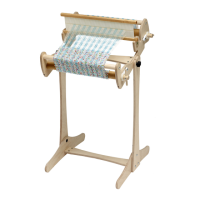
Do you have a question about the Schacht BABY WOLF LOOM and is the answer not in the manual?

Schacht BABY WOLF LOOM Specifications

General IconGeneral
BrandSchacht
ModelBABY WOLF LOOM
CategorySewing Machine
LanguageEnglish

Summary

Introduction and Preparation

Before You Begin

Read through assembly directions, unpack parts, and verify all components are received before starting.

Tools and Hardware

Lists the necessary tools and provides a detailed hardware list with illustrations for loom assembly.

Initial Assembly Steps - Legs and Castle

Attach Fold Bars to Legs

Connects fold bars to the loom legs using carriage bolts, washers, and lock nuts as per Figure 1.

Attach Castle Sides to Legs

Secures the castle sides to the legs using washers and lock nuts, ensuring proper orientation.

Intermediate Assembly - Fold Bars, Treadle, Brace

Attach Fold Bars to Castle

Connects fold bars to the castle sides using plastic bearings and knobs for adjustable leg spread.

Attach Treadle Assembly

Mounts the treadle assembly to the loom legs using machine screws and barrel nuts.

Install Rear Leg Brace

Attaches the rear leg brace to the outside legs using machine screws and barrel nuts.

Beam and Brace Installation

Install Cloth Beam and Ratchet Advance Lever

Mounts the cloth beam and ratchet advance lever to the cloth beam supports.

Attach Front Castle Cross Brace

Secures the front castle cross brace to the front edge of the castle sides.

Attach Front Beam

Connects the front beam with its extension to the tops of the outside legs.

Beater Assembly

Assemble the Beater

Assembles the beater sides, top, and race using screws, bolts, nuts, and washers.

Install the Beater Assembly

Mounts the completed beater assembly onto the loom's inside legs using slim lock nuts.

Jacks and Carriage Bolts

Install Jacks and Lamms

Inserts jack pivot rods and sequentially mounts jack assemblies onto the front castle cross brace.

Install Rear Castle Cross Brace

Attaches the rear castle cross brace to the castle.

Install Carriage Bolts

Installs carriage bolts through front and rear castle cross braces, securing loosely with washers.

Shafts and Castle Insertion

Install Heddles on Shafts

Slides heddles onto heddle bars and installs these into the shaft frames.

Insert Shafts into Castle

Places harness frames into castle channels and secures jack pins with hex nuts and O-rings.

Warp Beam and Brake Setup

Install Upper Rear Castle Cross Brace

Attaches the upper rear castle cross brace to the castle sides using screws.

Install Treadle Aid

Attaches the treadle aid bar and cords to the rear castle cross brace for loom operation.

Install Warp Beam

Mounts the warp beam onto the inside legs using washers and a threaded rod.

Brake System Components

Install Brake Barrel Nut

Secures the long brake barrel nut to the inside right leg using a machine screw.

Install Brake Bar and Cable

Attaches the brake bar and wraps the brake cable onto the brake drum.

Install Brake Cord

Connects the Texsolv brake cord from the brake bar S-hook to the brake pedal.

Install Brake Eyebolt and Spring

Attaches the brake spring and eyebolt to adjust the warp beam's friction brake tension.

Final Components and Operation

Install Warp Beam Crank Handle

Mounts the warp beam crank handle and secures it with a cap nut.

Install Removable Back Beam

Attaches the back beam to the inside legs using fender washers and black knobs.

Install Beater Pin

Installs the beater pin and holder on the right leg to support the beater upright.

Tie-ups and Loom Folding

Install Tie-ups on Lamms

Connects tie-up cords from the lamms to the treadles, ensuring proper loom function.

Install Apron Bars

Attaches apron bars to the cloth and warp beams using Texsolv apron cords.

Folding the Loom

Instructions for safely folding the loom by loosening knobs and adjusting slide locks.

Unfolding the Loom

Instructions for safely unfolding the loom, including brake pedal use with a warp.

Related product manuals