- 1 -
Find out more at schachtspindle.com
Schacht Spindle Company 6101 Ben Place Boulder, CO 80301
p. 303.442.3212 f. 303.447.9273
© 2017 Schacht Spindle Company, Inc.
06.17
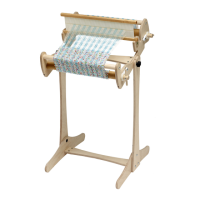
MIGHTY WOLF LOOM
Assembly InstructIons for DIsAssembleD looms
TOOLS
#2 Phillips screwdriver
5/16" or adjustable wrench
Flat screwdriver
HARDWARE LIST
Note: Parts pictures are not all to scale. Listed part quanti-
ties are what is needed for assembly. There may be extras
of some parts.
HARDWARE BAG A – STEPS 1-3
4 – Fold bars
4 – 3/16" x 1-1/4" carriage bolts
4 – 3/16" lock nuts
8 – 3/16" washers
2 – 1/4" washers
2 – 5/16" lock nuts
2 – Black knobs w/ 1" threaded shaft
2 – Plastic bearings
HARDWARE BAG B – STEPS 4-8
6 – 1/4" x 2" machine screws
6 – 1/4" barrel nuts
1 – Ratchet advance lever
2 – 3/8" USS washers
4– #8 x 1-1/2" screws
Fold bar
Knob w/ 1" shaft
Plastic bearing
1-1/4" carriage bolt
Lock nut
2" machine screw
Barrel nut
1-1/2" machine screw
2-1/2" carriage bolt
Slim lock nut
BEFORE YOU BEGIN
■ Please read through the directions before beginning to
assemble your loom.
■ Unpack the loom parts carefully. Do not throw away
the carton or any of the packing material until you have
checked to see that all of the parts and hardware have been
received
■ All hardware is sized in inches. Illustrations of the vari-
ous hardware and an inch scale are provided to aid you in
determining the correct piece of hardware to use.
■ Before starting the assembly, read the instructions com-
pletely and familiarize yourself with the drawings and parts.
■ Follow the exact order of assembly. Take care and work
slowly. If you have someone to help you the assembly will
be easier.
■ The wood parts have a removable label on them to iden-
tify each part. We recommend that you leave the labels in
place until the loom is fully assembled.
■ When you nish assembling the Wolf loom, go back over
all of the screws and make sure they are tight. It is a good
idea to re-tighten the screws every few months. Remember
not to tighten those screws and bolts which are supposed
to allow their parts to pivot freely.
■ All wooden parts of the loom have been nely sanded
and nished with a hand-rubbed Danish oil. From time to
time you may wish to apply more nish to the loom. Use a
Danish oil (tung oil and polyurethane mixture) and hand
rub the wood with a soft, lint-free cloth. Be sure to follow all
the manufacturer’s instructions.
Lock nut from top
Wing nut
Ratchet advance lever assembly
1-1/2" screw
3/4" screw