©2010
Quick Release Wheels
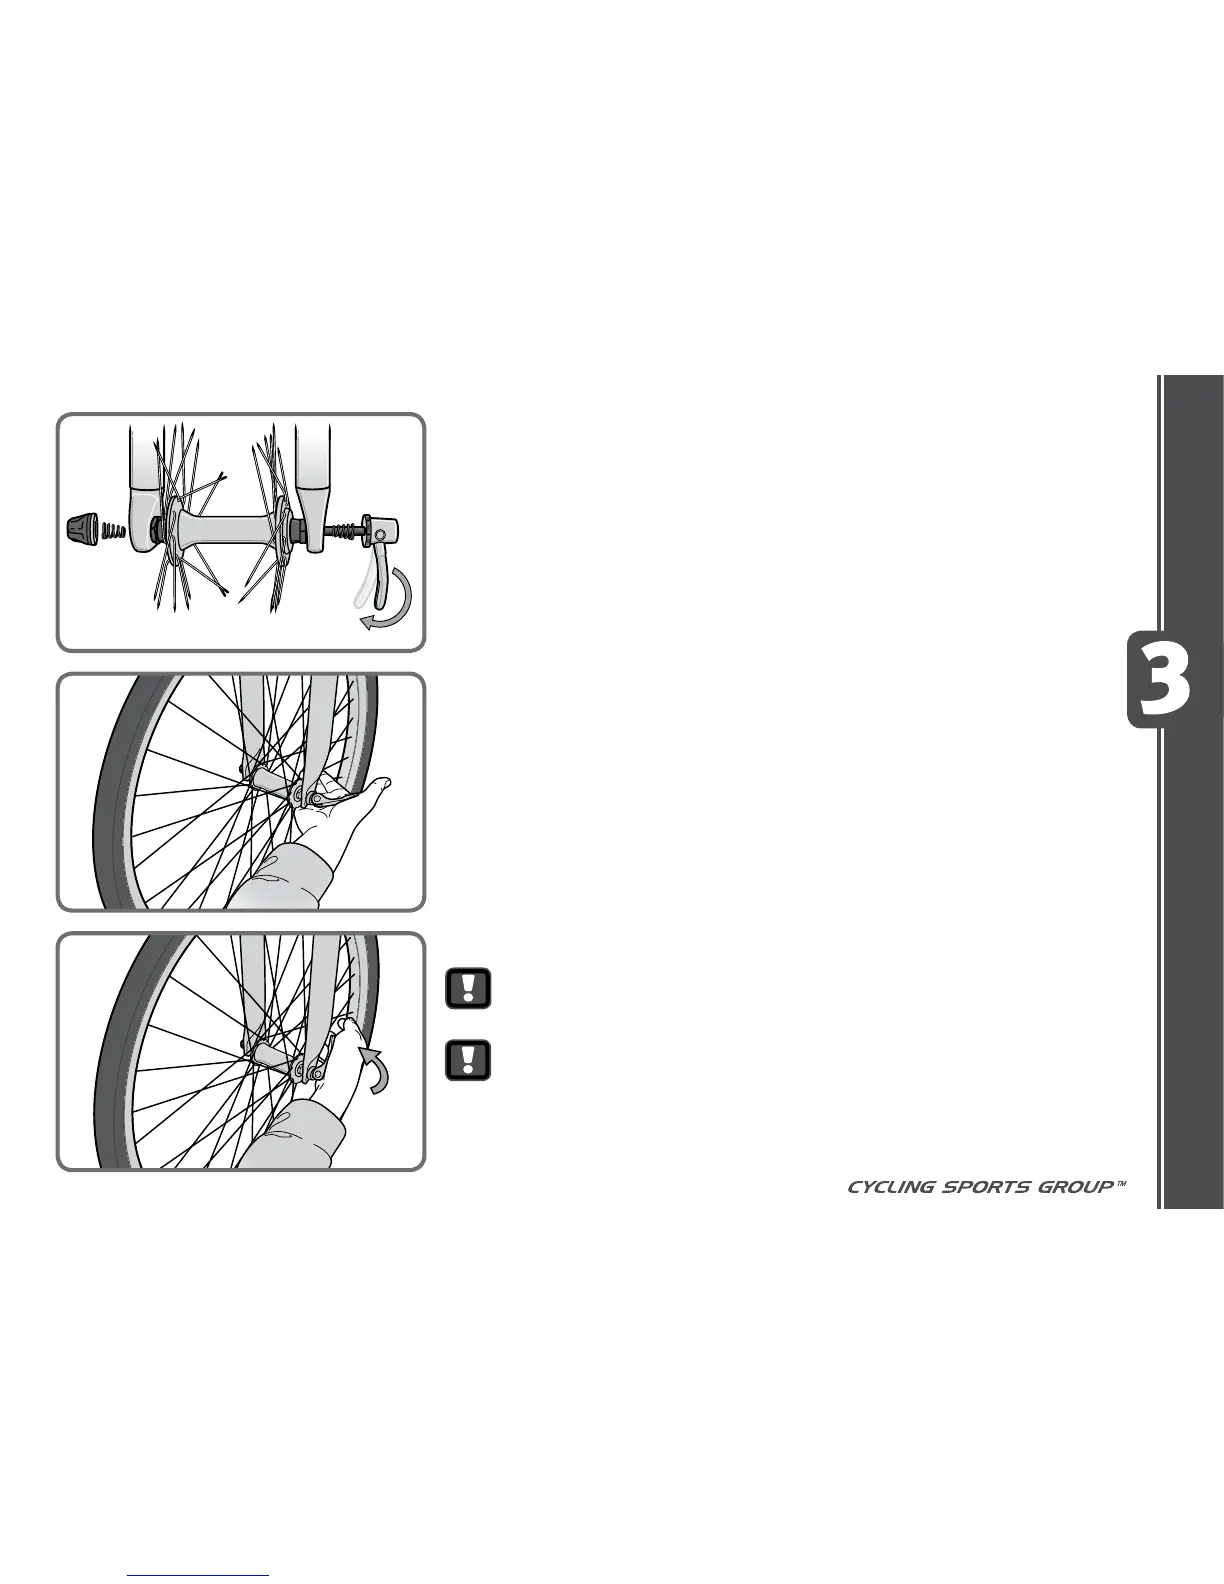
1. Locate the quick release skewer from the small parts carton of your bicycle. Some
re tread paerns have a direcon, so compare your front re and rear re of the
bicycle so that both tread paerns face the same way. (Fig. 3.10)
2. Unscrew the lock nut from the quick release skewer, remove outer spring and slide
the skewer through the front wheel axle so that the handle is on the le side of the
bike (the side opposite the chain). (Fig. 3.11)
3. Install spring and then start to thread the lock nut back onto the skewer, but do not
ghten too far.
4. Slide the wheel into the fork wheel slots and be sure that the wheel is centered.
5. Inspect the handle, note that there’s an “open” and a “closed” posion. Move the
handle so it is in the “open” posion. With one hand on the handle and one hand on
the lock nut, start to hand ghten the lock nut unl you start to feel some resistance
with the fork.
6. Try to close the handle. If it closes easily, open it up, and ghten the lock nut further.
If it is too dicult to close, open the handle up, and loosen the lock nut a lile and
try again.
7. The quick release handle should be dicult to push closed with your palm, but should
be possible. Pracce opening and closing the handle unl you feel comfortable. DO
NOT aempt to ghten the wheel by turning the handle to ghten; the handle is for
closing, the lock nut (opposite side) is for adjusng the tension. (Fig. 3.12)
Next go back and check that the handlebars are perpendicular to the front wheel,
go back to handlebar assembly and re-adjust if needed.
All quick release levers should be inspected before every ride to be sure
they are fully closed and secure. Failure to properly close a quick release
lever can cause loss of control of the bicycle resulng in injury or death.
Make sure the wheel is properly seated and the quick release is
properly closed.
ASSEMBLY
 Loading...