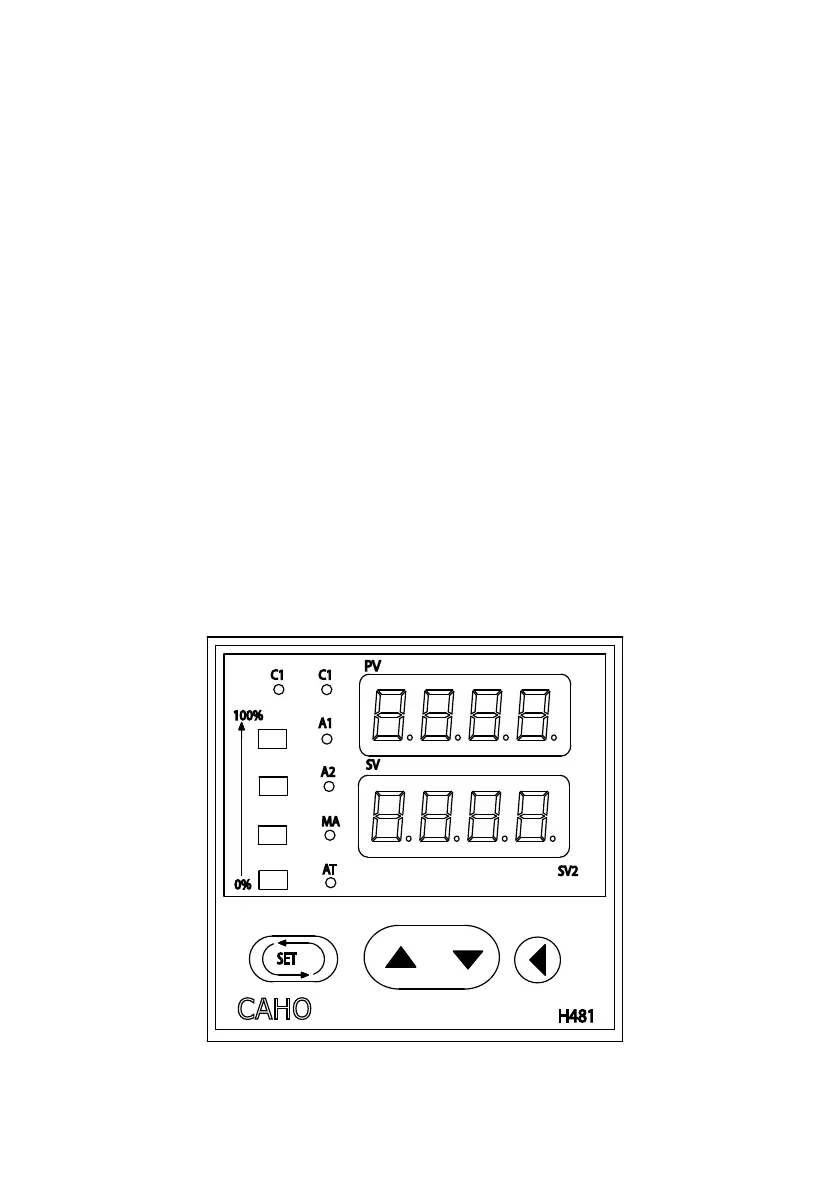
1. The temperature controller has four buttons on the front face.
These are used to set the required temperature, initiate Auto-
Tuning, and enter any adjustments to the program.
2. To set the required temperature, ensure that the unit is con-
nected and switched “ON” in the appropriate manner.
3. The top display (red) shows the actual temperature (PV) in the
unit, the bottom display (green) is the setting temperature
(SV) and must be adjusted to the required temperature. To
adjust the setting, press the button that points to the left.
This action will start one of the digits in the lower display ash-
ing. By touching this button again, the ashing will move to the
left. Once the ashing red display is on the number that needs to
change, use the UP/DOWN buttons to attain the required set-
tings.
4. By moving the ashing digit left or right the desired temperature
required can be set. Once the correct temperature has been en-
tered, press SET to enter the setting.
OPERATING INSTRUCTIONS OF ELECTRONIC TEMPERATURE
CONTROLLER
 Loading...