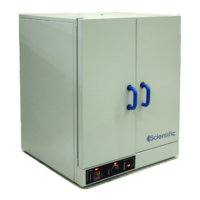
This document describes the Series 2000 Economy Ovens and Incubators, which are designed for general-purpose laboratory use. These units are available in both bench-top oven and incubator models, offering a range of temperature control and operational features.
Function Description
The units serve as either ovens or incubators for various laboratory applications. Oven models are designed for general-purpose heating with a working temperature range from ambient +7°C to 250°C. Incubator models provide a controlled environment for incubation with a working temperature range from ambient +7°C to 110°C. Both types of units are equipped with internal circulation fans to ensure uniform temperature distribution within the chamber.
Important Technical Specifications
The units are constructed with a mild steel body featuring a textured powder-coated finish. The interior chamber is made of 304 stainless steel, and mineral wool insulation separates the exterior shell from the interior, ensuring efficient thermal performance.
The manual provides a detailed list of models with their internal dimensions, net weight, and maximum shelf load ratings:
- 40L Models (220/275, 225/295):
- Approximate Internal Volume: 40 Liters
- Internal Dimensions (H x W x D): 370mm x 385mm x 375mm
- Nett Weight: 38 kg
- Max Shelf Load Rating: 26 kg
- Heating Elements-Oven: 5-1000W-OVEN
- Heating Elements-Incubator: 5-500W-OVEN
- 80L Models (221/226, 276/296):
- Approximate Internal Volume: 80 Liters
- Internal Dimensions (H x W x D): 400mm x 485mm x 455mm
- Nett Weight: 45 kg
- Max Shelf Load Rating: 26 kg
- Heating Elements-Oven: 5-1000W-OVEN
- Heating Elements-Incubator: 5-500W-OVEN
- 160L Models (222/227, 277/297):
- Approximate Internal Volume: 160 Liters
- Internal Dimensions (H x W x D): 580mm x 535mm x 535mm
- Nett Weight: 75 kg
- Max Shelf Load Rating: 26 kg
- Heating Elements-Oven: 5-1500W-OVEN
- Heating Elements-Incubator: 5-750W-OVEN
- 240L Models (223/228, 278/298, 223D/228D, 278D/298D):
- Approximate Internal Volume: 240 Liters (including "DD" for double door models)
- Internal Dimensions (H x W x D): 680mm x 625mm x 580mm
- Nett Weight: 88 kg
- Max Shelf Load Rating: 20 kg
- Heating Elements-Oven: 5-2000W-OVEN
- Heating Elements-Incubator: 5-1000W-OVEN
- 400L Models (224/229, 279/299, 224D/279D, 229D/299D):
- Approximate Internal Volume: 400 Liters (including "DD" for double door models)
- Internal Dimensions (H x W x D): 780mm x 725mm x 755mm
- Nett Weight: 132 kg
- Max Shelf Load Rating: 15 kg
- Heating Elements-Oven: 5-1500W-OVEN (fitted with two of each specified element)
- Heating Elements-Incubator: 5-750W-OVEN (fitted with two of each specified element)
Electrical Connection Information (230V/50Hz):
- 40LT OVEN: 1000 WATTS
- 80LT OVEN: 1000 WATTS
- 160LT OVEN: 1500 WATTS
- 240LT OVEN: 2000 WATTS
- 400LT OVEN: 3000 WATTS
- 40LT INCUBATOR: 500 WATTS
- 80LT INCUBATOR: 500 WATTS
- 160LT INCUBATOR: 750 WATTS
- 240LT INCUBATOR: 1000 WATTS
- 400LT INCUBATOR: 1500 WATTS
The units are equipped with a 15AMP fuse (M15 AMP 5 X 32MM) and fuse holder. Key components include an illuminated mains rocker switch, safety thermostat, control thermostat (either selector knob or digital electronic controller), pilot lights, circulation fan, and heating elements.
Usage Features
- Installation: Units should be placed on a stable bench, at least 100mm-200mm from a wall to ensure adequate exhaust air ventilation. All internal packaging and leaflets must be removed before operation.
- Door Operation: The oven door opens with a 90° anti-clockwise turn of the handle, then pulls open. Closing involves pushing the door slightly against the silicon frame seal and turning the handle clockwise through 90°.
- Shelving: Two chrome-plated steel wire shelves and four shelf runners are provided. Runners clip into recessed rails on the inner side walls, and shelves slide into the U-profile of the runners. Shelves should be uniformly loaded, adhering to maximum load ratings.
- Temperature Control (Economy Series 220-224 Ovens / 225-229 Incubators):
- Plug the unit into a mains power socket and ensure the door is closed.
- Switch on the mains power via the illuminated rocker switch, which will light up and activate the circulation fan.
- Set the desired control temperature using the "CONTROL" thermostat selector knob.
- Set the "SAFETY" cut-out temperature slightly above the control temperature using the "SAFETY" thermostat selector knob, after the unit has reached the set "CONTROL" temperature.
- Temperature Control (Digital Series 275-279 Ovens / 295-299 Incubators):
- Ensure the door is closed and switch on the mains power. The rocker switch will illuminate, and the circulation fan will operate.
- Set the desired control temperature using the "ELECTRONIC TEMPERATURE CONTROLLER."
- The controller features four buttons: a left arrow for digit selection, and UP/DOWN arrows for value adjustment, and a SET button to confirm. The top (red) display shows the actual temperature (PV), and the bottom (green) display shows the setting temperature (SV).
- To adjust the setting, press the left arrow button to make a digit flash, then move the flashing digit left or right. Use the UP/DOWN buttons to change the value, then press SET to confirm.
- Set the "SAFETY" cut-out temperature slightly above the "CONTROL" temperature using the "SAFETY" thermostat selector knob, after the unit has reached the set "CONTROL" temperature.
- Safety Precautions:
- Use on an individual 15A mains outlet; do not overload the circuit.
- Keep equipment and power cord away from hot surfaces.
- To be used by properly trained laboratory staff only.
- Damaged power cords must be replaced by a supplier's agent.
- Use only earthed outlets matching the serial plate voltage.
- Installation by qualified personnel is required.
- Use equipment in a flat, level position.
- Never leave the door open, as this can lead to overheating.
- Do not overload shelves.
- These ovens are not explosion-proof; avoid heating solvents or flammable substances.
- When opening the door, stand away to allow fumes to escape.
- Do not operate if damaged or malfunctioning.
- Designed for alternating current (A.C.) only; do not connect to direct current (D.C.).
- Burn Hazard: Do not touch hot, liquid, or heating surfaces while operating. Allow surfaces to cool before handling.
- Electric Shock Hazard: Prevent water or liquids from entering the equipment. Do not spray water or cleaning products directly on the unit. Do not use if the power cord is damaged or modified.
- Electrical Connection: Ensure incoming voltage matches the rated voltage on the serial plate. The serial plate is located at the rear, adjacent to the cable entry.
- Dangerous Voltages: The control compartment contains dangerous voltages. Maintenance and servicing requiring panel removal should only be performed by qualified service personnel.
Maintenance Features
- Routine Maintenance: The ovens/incubators are designed for continuous operation under normal conditions, and no periodic maintenance other than cleaning is required.
- Cleaning the Unit:
- Always disconnect the power plug from the mains socket before cleaning.
- Clean the outside of the unit with a damp cloth and soapy water.
- Clean the stainless steel inner chamber with a damp cloth immersed in soapy water.
- Do not use steel wool.
- Avoid aggressive acids, as they can discolour stainless steel.
- It is normal for stainless steel to develop a slight yellow discolouration with continuous high-temperature use.
- Clean steel parts with water and soap. Avoid detergents with abrasive substances. Rinse well and dry carefully. Do not use products containing aggressive chemicals, acids, or chlorine, as this will invalidate the warranty.
- Troubleshooting Guide:
- Mains switch fails to switch on convection fan: Possible faulty power supply, fuse, plug, or fan. Contact a service technician.
- "Control" pilot light fails to light up: Possible faulty pilot light, problem in the regulation circuit, or safety thermostat set below control temperature. Contact a service technician or turn the safety thermostat selector knob slightly clockwise.
- Control pilot light on but no heating: Possible faulty heating element. Contact a service technician.
- Warranty: The manufacturer guarantees the unit against defects in materials and workmanship for a period of one year from the date of original installation. The warranty is limited to repairing or replacing defective parts, provided the unit is sent carriage paid to an authorized dealer. The warranty is void if damage occurs due to accident, carelessness, improper installation, lack of proper set-up, or operation contrary to instructions. Repairs performed by unauthorized personnel also void the warranty.