8
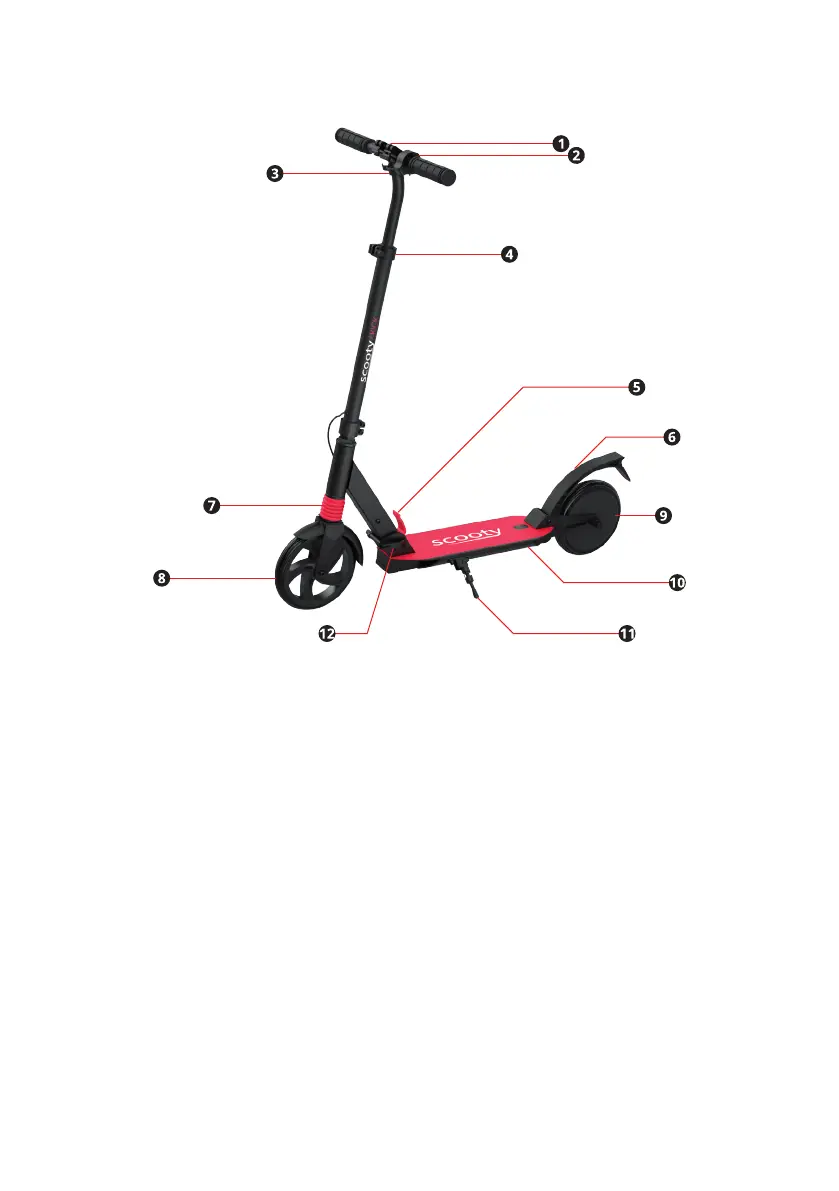
3. DEVICE OVERVIEW
(1). Handlebar clamp (2). Electronic brake (3). Handlebar support (4). Handlebar
height adjustment clamp (5). Unlock button
(6). Rear brake (7). Front suspension (8). Non-driven wheel (9). Drive wheel
(10). Charging port and on/o button under the scooter (11). Rear brake
(12). Locking lever�
4. USER GUIDE
4.1 CHARGING AND BATTERY INDICATOR
Charge the battery before rst use. To do this, use the charger provided to
charge the battery�
1� The charging port for this scooter (10) is found under the scooter�
Remove the cap and connect the low voltage charging cable to the
charging port (10) before connecting the other end to a power source.
2� The charger indicator light will turn red while charging.
3� The charger indicator light will turn green once the battery is fully
charged�
 Loading...