3
USING THE ARMBAND MONITOR
Initial Setup with Bluetooth Smart Fitness Apps
1. Set Bluetooth on the device to ON.
2. Find the Sensor Settings menu in the Bluetooth Smart
Fitness App.
3. Connect the RHYTHM+ 2.0 armband by turning it on.
Initial Setup with Bluetooth Smart devices
(Sports Watches & Fitness Equipment)
1. From the device settings menu select “Add HR sensor”
2. Connect the RHYTHM+ 2.0 armband by turning it on.
Initial Setup with ANT+ devices
(Sports Watches &
Fitness Equipment)
Turn on the armband and move within range of your
display device.
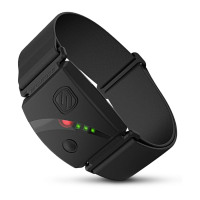
LED Indicators (Bluetooth Smart Operation)
1. Alternating RED/BLUE – the armband is waiting for a
connection.
2. Three (3) BLUE blinks – the armband has connected
successfully.
3. Slow blink – the HR monitor is on and in normal operation.
LED Indicators (ANT+ Mode)
Slow blink – the HR monitor is on and in normal operation.
Note: Heart Rate Monitoring will work with most Bluetooth
Smart Fitness Apps. For a list of compatible Apps, please
visit www.scosche.com/rhythm-plus
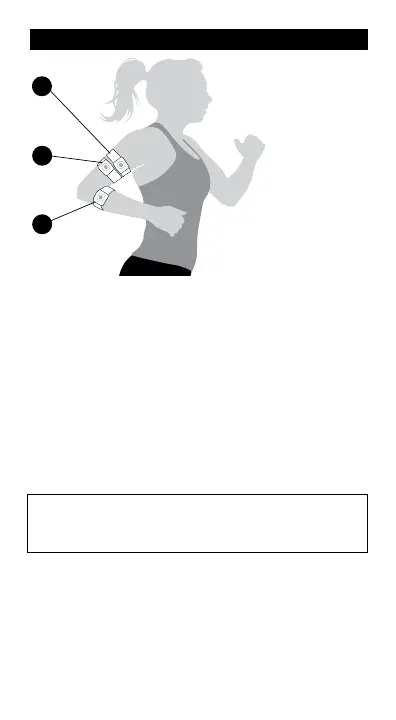
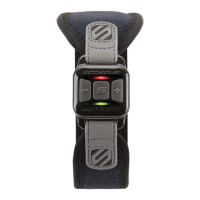
UPPER
FOREARM
(recommended
placement)
BAND PLACEMENT
For the most accurate
readings, wear the
RHYTHM+ 2.0 on the
upper forearm,
biceps, or triceps
snug enough to
not move on your
arm, but NOT so
tight that it restricts
circulation.
1
2
TRICEPS
3
BICEPS