EasyManua.ls Logo

Scotchman FI-8510-20M - User Manual

Scotchman FI-8510-20M
100 pages
Print Icon
To Next Page IconTo Next Page
Loading...
You have downloaded a manual for our
Model FI-8510-20M Ironworker.
This manual does not include all of the
optional tooling for this machine.
If you would like a tooling manual,
please download our #40 Tooling Manual.
4295
4758
10mm ss
10mm ss
10mm ss
10mm ss 10mm ss 10mm ss
10mm ss
10mm ss
12mm
12mm
15273
025182
25180
25083
6 mm ss
25070
25070
10mm10mm
10mm
10mm
12mm
12mm
12mm
15381
25083
201610 201610
25078
113017 113017
15377
WARNING
SAFETY GLASSES REQUIRED WHEN
OPERATING OR OBSERVING THIS MACHINE
NEVER-
NEVER-
NEVER-
NEVER-
NEVER-
NEVER-
NEVER-
TO PREVENT SERIOUS BODILY INJURY
Operate, install tooling, service or adjust machine without
operator's manual and safety film.
Service machine with electrical power connected.
Operate any station without the respective strippers or
Operate machine with protective guards removed.
Place any part of your body under blade, punch or moving
Operate punch station without checking the punch to die
alignment and tightness.
Punch half holes, punch or shear unknown materials, side load
DO NOT REMOVE THIS SIGN FROM THIS MACHINE
REV. 0310
FOR MORE INFORMATION CONTACT SCOTCHMAN INDUSTRIES INC.
1-800-843-8844
003100
proper instructions and without reading and understanding the
hold-downs in place.
members.
(Check alignment and tightness daily.)
press brakes.
AT
SERIAL
SCOTCHMAN INDUSTRIES, INC.
PHILIP, SOUTH DAKOTA, U.S.A.
MADE IN U.S.A.
MODEL
FLA
HZ
PH
H.P.
VOLT
BLADE LENGTH
PH. 605-859-2542
PSI
8510-20M
MACHINE CAPACITIES
SPEC. BASED ON MILD STEEL-65,000 PSI TENSILE
PUNCH
THROAT DEPTH
RECT. NOTCHER
85 TONS
Ø27 THRU 25MM
Ø1-1/16 THRU 1"
10" - 254MM
76X127X12MM
3"w X 5"d X 1/2"t
#015380 1,05
FLAT SHEAR
25X300 - 19X508MM
1X12 - 3/4X 20"
BLADE LENGTH 20" - 508MM
PUNCH STROKE
3.45" - 87MM
ANGLE SHEAR
150X150X12MM
6"X6"X 1/2"
ROD SHEAR
Ø1-1/2" ROUND Ø38MM
1-1/4 SQUARE 32 SQUARE
FULLY INTEGRATED
BEYOND THESE GUARDS
INJURY DO NOT PLACE FINGERS
TO PREVENT SERIOUS BODILY
003105
WARNING
1210
GUARD FACE TO SHEAR EDGE
ADD 5-5/8" (143MM)
GUARD FACE TO SHEAR EDGE
ADD 4-1/4" (108MM)
11893Raw 11898 Assy.
230 Volts
19121
OFF
EATON 11856
ELECTRICAL HAZARD
Turn off power
and lock out
before servicing.
DANGER
3122 1213
15788
STOP
START
START
SHEAR
PUNCH
JOG
JOG
PROBE
15600 Assy.
RUN

Table of Contents

Question and Answer IconNeed help?

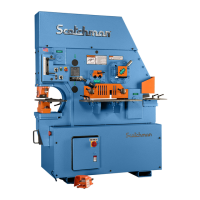
Do you have a question about the Scotchman FI-8510-20M and is the answer not in the manual?

Summary

1.0 INTRODUCTION

2.0 SAFETY PRECAUTIONS

2.1 WARRANTY

3.0 WARNING LABELS

4.0 INSTALLATION AND SET-UP

4.1 PHYSICAL DIMENSIONS

Lists machine dimensions in inches and centimeters for reference.

4.2 MACHINE MOVING PROCEDURES

Details safe methods for moving the ironworker using a forklift.

4.3 PHYSICAL INSPECTIONS

Outlines essential checks for shipping damage and machine components.

4.4 ELECTRICAL REQUIREMENTS

Specifies voltage, phase, and wire gauge requirements for safe operation.

4.5 MACHINE START-UP

Step-by-step guide for powering on the machine safely.

4.6 MACHINE STROKE INSPECTION & ADJUSTMENT

Details how to check and adjust the machine's stroke for proper function.

5.0 MAINTENANCE

5.1 LUBRICATION

Provides guidance on oiling and greasing points, recommended lubricants.

5.2 SCHEDULED MAINTENANCE

Outlines maintenance tasks based on operating hours or time intervals.

6.0 MACHINE OPERATION

6.1 PUNCH OPERATION

Details the procedure for changing and aligning punches and dies.

6.2 BAR SHEAR OPERATION

Explains how to use the bar shear, including hold-down and blade settings.

6.2 A HOLD-DOWN ADJUSTMENT

Describes how to properly adjust the hold-down device for shearing.

6.2 B SHEAR BLADE ADJUSTMENT

Instructions for adjusting the shear blades for optimal cutting.

6.3 TOOLING ARM ADJUSTMENT

Procedures for adjusting the tooling arm and its components.

6.4 ANGLE SHEAR OPERATION

How to operate the angle shear and its maximum capacity.

6.4 A ANGLE SHEAR BLADE ADJUSTMENT OR REPLACEMENT

Steps for adjusting or replacing angle shear blades.

6.5 ROD SHEAR OPERATION

Operation of the rod shear, including hold-down and lubrication.

6.5 A ROD SHEAR BLADE ADJUSTMENT OR REPLACEMENT

Steps for adjusting or replacing rod shear blades.

6.6 RECTANGLE NOTCHER OPERATION

How to operate the rectangle notcher and its capacity.

6.6 A NOTCHER BLADE ADJUSTMENT OR REPLACEMENT

Instructions for adjusting or replacing notcher blades.

6.7 JOG CONTROL

Explanation of the jog control feature and its use.

7.0 OPTIONAL TOOLS

7.1 PIPE NOTCHER

Details the pipe notcher tool, its application, and capacity.

7.1 A PIPE NOTCHER INSTALLATION

Steps for installing the pipe notcher onto the machine.

7.1 B PIPE NOTCHER OPERATION

How to operate the pipe notcher for best results.

7.2 6 X 6 NINETY DEGREE NOTCHER

Description of the 6x6 notcher for Vee notches in angle and flat stock.

7.2 A 6 X 6 NINETY DEGREE NOTCHER INSTALLATION

Procedure for mounting the 6x6 notcher in the punch station.

7.2 B 6 X 6 NINETY DEGREE NOTCHER OPERATION

How to operate the 6x6 notcher and lubrication recommendations.

7.3 12 & 24 INCH BRAKES

Information on benders designed to bend and form mild steel.

7.3 A 12 & 24 INCH BRAKE INSTALLATION

Steps for installing the 12 & 24 inch brakes onto the machine.

7.3 B 12 & 24 INCH BRAKE OPERATION

Proper operation of the 12 & 24 inch brakes, including safety.

7.4 ANGLE IRON BRAKE

Details the angle iron brake for forming box frames.

7.4 A ANGLE IRON BRAKE INSTALLATION

How to install the angle iron brake in the punch station.

7.4 B ANGLE IRON BRAKE OPERATION

Operation guidelines for the angle iron brake, including lubrication.

7.5 CHANNEL SHEAR

Information on the channel shear for cutting standard channel stock.

7.5 A CHANNEL SHEAR INSTALLATION

Steps to install the channel shear tool onto the punch bed.

7.5 B CHANNEL SHEAR OPERATION

Basic steps for shearing with the channel shear, including blade adjustment.

7.6 PICKET FENCE TOOL

Tool for creating picket fence points on square tubing.

7.6 A PICKET FENCE TOOL INSTALLATION

Procedure for installing the picket fence tool.

7.6 B PICKET FENCE TOOL OPERATION

How to operate the picket fence tool safely and effectively.

7.7 SQUARE TUBE SHEAR

Tool for shearing square tubing up to 2" with a max thickness of 16 gauge.

7.7 A SQUARE TUBE SHEAR INSTALLATION

Steps for mounting the square tube shear in the punch station.

7.7 B SQUARE TUBE SHEAR OPERATION

Operating instructions for the square tube shear.

7.8 OPTIONAL DIE HOLDERS AND PUNCH RETAINING NUTS

Details various die holders and punch retaining nuts for specialized punching.

7.8 A OFFSET DIE HOLDER OR FLANGE PUNCHING

Using the offset die holder for punching holes in flanges.

7.8 B 2-1;2 AND 3 INCH (63 AND 76 MM) DIE INSERTS

Die inserts for oversized punching applications.

7.8 C 6 X 6 DIE HOLDER

A 6x6 die holder for oversize punching up to 4 inches.

7.8 D #45 PUNCH RETAINING NUT

Punch retaining nut used in oversize punching applications.

7.8 E HEAVY DUTY SPLIT-RING RETAINING NUT

Heavy duty nut for oversize punching with 2-inch shank punches.

7.9 FORTY-EIGHT INCH BACK GAUGE

An optional adjustable gauge for positioning material on the machine.

8.0 TROUBLE SHOOTING GUIDE

8.1 ELECTRICAL TROUBLE SHOOTING - MOTOR

Diagnosing issues when the motor won't run or cycle properly.

8.2 LIMIT SWITCH INSPECTION PROCEDURE

How to check if limit switches are functioning correctly.

8.3 CONTROL VALVE INSPECTION

Procedures for inspecting the control valve for directional issues.

8.4 HYDRAULICS

Common hydraulic problems like low oil level, contamination, or low pressure.

8.5 SEAL REPLACEMENT - CYLINDER

Step-by-step guide for replacing seals in the hydraulic cylinder.

9.0 PARTS LISTS

9.1 TOOLING ARM ASSEMBLY

List of parts for the tooling arm assembly.

9.2 DRIVE ARM ASSEMBLY

List of parts for the drive arm assembly.

9.3 FLAT BAR SHEAR ASSEMBLY

List of parts for the flat bar shear assembly.

9.4 SIX INCH ANGLE SHEAR ASSEMBLY (SER.# 1057 & UP)

Parts list for the 6-inch angle shear assembly.

9.5 ROD SHEAR ASSEMBLY

List of parts for the rod shear assembly.

9.6 NOTCHER ASSEMBLY

Parts list for the notcher assembly.

9.7 UPPER PANEL

List of parts for the upper panel, including controls and switches.

9.8 STRIPPER ASSEMBLY

Parts list for the stripper assembly.

9.9 SHEET METAL & CYLINDER

Parts for sheet metal covers and the hydraulic cylinder.

9.10 POWER UNIT

Parts list for the power unit, including pump and filters.

9.11 PUNCH RETAINING NUTS

List of various punch retaining nuts and associated tools.

9.12 ELECTRICAL UNIT

List of electrical components like transformers, fuses, and contactors.

10.0 SUPPLEMENT FOR OLDER MODELS

10.1 SIX INCH ANGLE SHEAR ASSEMBLY (Ser. # 1060 & Prior)

Parts list for older models of the 6-inch angle shear assembly.

Scotchman FI-8510-20M Specifications

General IconGeneral
BrandScotchman
ModelFI-8510-20M
CategoryLathe
LanguageEnglish

Related product manuals