Do you have a question about the Scotsman MXG 327 and is the answer not in the manual?
Essential details for correct installation and operation of the ice machine in compliance with regulations.
This ice machine is not designed for outdoor use, requiring specific environmental conditions for operation.
Details on suitable placement, emphasizing cool, dry areas with sufficient air ventilation and avoiding hot air sources.
Defines optimal operating air and water temperatures, water pressure, and required machine clearances.
Step-by-step guide for unboxing, fitting components, connecting water supply and drain hoses, and sensor placement.
Guidelines for electrical hookups, emphasizing compliance with regulations and the need for qualified technicians.
Instructions for powering on the machine, initiating the startup cycle, and understanding the operational lights.
A 12-point verification list to ensure all installation and setup steps are correctly completed before operation.
Outlines recommended cleaning frequencies, including general weekly/monthly and major bi-annual professional cleaning.
Procedure for routine cleaning of air filters, sensors, and general machine upkeep.
Detailed instructions for a comprehensive clean and strip-down, requiring a qualified technician.
Explains the basic refrigeration cycle and heat transfer process involved in ice production.
Guides users to check common issues and a pre-checklist before contacting service for troubleshooting.
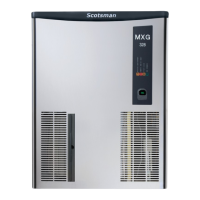
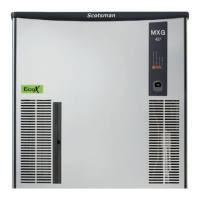
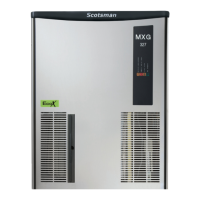
This document provides comprehensive installation, operation, and maintenance instructions for Scotsman MXG 327/437/638 ice systems. These machines are designed for indoor use and require specific environmental conditions to operate effectively and efficiently.
The primary function of this device is to produce ice cubes. It operates by transferring heat from water to a condenser through a refrigeration system. The condenser fan expels this heat, allowing the water to freeze into ice cubes within an evaporator mold. This heat transfer process is highly efficient, but it is sensitive to ambient conditions and airflow.
The installation process begins with unboxing and inspecting the machine for any damages. The ice machine head must be fitted securely to the ice storage bin using provided screws. Several panels—the black plastic trim, front, and top panels—need to be removed to access internal components during setup. Manuals, hoses, and packaging should also be removed from inside the machine.
Connecting the water supply is a critical step. The water supply hose connects to the water inlet valve at the back of the machine, while the water drain hose clips to the water outlet pipe, also at the back. The opposite end of the water supply hose attaches to a water filter outlet, and the opposite end of the water drain hose connects to a floor drain or tundish. A water filter system is essential for the ice machine, as it helps reduce and control the buildup of sediment, scale, minerals, and bacteria, ensuring cleaner ice and prolonging the machine's lifespan.
The ice bin sensor and its stainless-steel bracket, along with a black rubber bung, are located in the electrical area. The sensor needs to be threaded through a hole into the ice bin. The plastic ice chute, initially in the food zone, must be removed. The sensor is then brought through the ice chute hole and fixed to a bracket using plastic screw clips and screws. The excess sensor wire is gently pulled into the electrical panel area. A slot is cut in the rubber bung for the electrical sensor wire, and the bung is then re-fitted. Finally, the ice chute, front, and top panels are re-fitted, followed by the front plastic trim panel, and the protective plastic is removed from the machine's exterior.
Once installed, the machine needs to be maneuvered into its final position, ensuring the required side and rear ventilation clearances are met. Electrical connections must comply with all local, state, and national regulations. The ice maker requires a dedicated power point, and the serial plate should be checked to ensure voltage requirements and plug suitability for the local area's wall socket and power supply. All electrical connections and adjustments must be performed by a qualified technician.
Before starting the machine, a 12-point checklist is provided to ensure proper installation. This includes verifying the ice maker is level, ambient air temperature is within the specified range (10°C to 40°C, with 24°C ideal), and adequate side (150mm) and rear (100mm) clearances are maintained. It's crucial to ensure no other heat-discharging equipment is near the unit. Water connections must be checked for leaks, and water pressure should be between 1 and 5 bars. Incoming water temperature should be between 5°C and 35°C (18°C ideal, 15°C to 21°C optimum). The presence of a 3-stage water filter is also checked. Electrical requirements must be compliant, and all internal packaging must be removed. The ice bin shut-off components/system must be correctly fitted. The owner should be instructed on operation and maintenance, and the machine must be cleaned and sanitized before startup. Finally, the customer should have Moffat's service contact details.
To start the machine, the water supply is opened, and checked for leaks. The power is switched on at the wall socket, and the green light switch button on the front of the machine is pressed. The machine will enter a 5-minute startup cycle, filling the water trough. After this cycle, it enters the freezing cycle (indicated by a yellow light), during which the refrigeration system and condenser fan operate. Ice production takes 24 to 30 minutes, depending on ambient and water temperatures. Once ice is fully formed, the machine enters a harvest cycle, dropping cubes into the storage bin. When the bin is full, the bin shut-off sensor will block, shutting down the ice machine (yellow light). When ice is removed and the level drops, the machine restarts after a 3-minute delay. After four cycles, the freshly made ice cubes should be inspected for a small indentation at the bottom, as shown in the diagram.
Regular maintenance, cleaning, and sanitizing are crucial for the Scotsman ice machine's effective, efficient, and peak performance. As per Australian Health and Safety requirements, the owner is responsible for ensuring the machine is installed, maintained, and cleaned according to the manufacturer's specifications. Since ice is a food product, the machine must be regularly inspected and maintained to ensure it is clean, safe, and fit for human consumption.
Cleaning schedules recommend a general clean and sanitize procedure every two weeks to a month, depending on the machine's location. A major strip down, deep clean, and sanitizing procedure should be performed twice a year by a qualified technician, with more frequent cleaning possibly required depending on the location.
For a general weekly or monthly clean, the machine should be shut down. The air filter element needs to be removed, inspected, and cleaned with a soft bristle brush or washed with warm soapy water, then dried and replaced. The ice bin level sensors should also be regularly wiped down and cleaned.
Using a pin or pointed object, the spray nozzles and spray jets that spin the spray bar should be cleaned. The food zone components and water spray bar are then reassembled. A cleaning solution, consisting of 2 liters of water mixed with 200ml of Moffat's nickel-safe ice machine cleaner, is slowly poured over the top of the evaporator after removing the white plastic cover. The evaporator should be gently cleaned on both sides (inside and outside) with a soft bristle brush, avoiding abrasive materials that could damage the nickel plating. It's crucial to use only Moffat's Nickel Safe ice machine cleaner, as non-nickel safe cleaners can damage the evaporator's nickel-plating.
To initiate the clean mode, the machine is restarted, and the CLEAN button is pressed for more than 2 but less than 5 seconds. The machine will run for 20 minutes to clean the food zone and water system, then shut down. The cleaning solution is drained from the food zone/water trough through the insulated black pipe.
The inside of the ice bin should be thoroughly cleaned with a cleaner, then rinsed. The ice bin is then sanitized using Moffat ice machine sanitizer and rinsed with water. A mixture of 1 liter of warm water and Moffat ice machine sanitizer should be poured down the ice bin drain to keep the drain and hoses clean and free of bacteria (10 parts water to 1 part Moffat ice machine sanitizer). The outside of the ice machine cabinet and ice bin door should be wiped down and cleaned with disposable sanitizing wipes. The machine's clearances (150mm side, 100mm rear) should be checked for maximum air ventilation. The water filter should be checked to ensure it's not blocked, and the general area around the machine should be clean and tidy. After cleaning, the ice machine is turned back on, and the first two batches of ice are discarded. The quality of the ice should be inspected after two drops.
A six-month major strip down and deep clean should only be performed by a qualified technician. At the end of the harvest cycle, the ice machine is shut down, and all ice is removed from the storage bin. The air filter element, top, front, and both side panels are removed. The air filter element is inspected and cleaned with a soft bristle brush or washed with warm soapy water, rinsed, and dried. The condenser area and condenser are inspected and cleaned with a soft brush or vacuum. The water spray bar and washer are lifted and removed from the food zone. A solution of warm water and Moffat nickel-safe cleaner is used to thoroughly wash all components, which are then rinsed and sanitized. All parts are thoroughly rinsed with water and dried.
Two to three liters of fresh water are poured over the top of the evaporator to rinse it into the food zone. The machine is restarted and allowed to run for 10 minutes to rinse the food zone. This rinsing step is repeated two more times to ensure the machine is clean and free of the cleaning solution.
The sanitizing process is repeated using a mixture of warm water and sanitizer. The machine is restarted, and the CLEAN button is pressed for more than 2 but less than 5 seconds. The machine will run for 10 minutes to sanitize the food zone and water system, then shut down. The sanitizing solution is drained from the food zone. The water trough, food zone, and ice storage bin are rinsed with fresh water. The ice bin level sensors are wiped down and cleaned. The ice machine and all double-checked parts are re-fitted correctly.
Moffat's Sanitizer mixture is 1 liter of water to 100 ml sanitizer (10 parts to 1). The outside of the machine cabinet and storage bin are wiped down with disposable cleaning wipes. The remaining water/sanitizer mixture is poured down the ice bin drain to keep the drain and drain hose clean and free of bacteria. The machine is allowed to make two batches of ice, and the ice cubes are inspected. The first two drops of ice are discarded to ensure the ice is clean and free of any cleaner or sanitizer.
Troubleshooting tips are also provided. For slow production, checks include verifying the water tap is on full, the water filter strainer is clean, and the presence of any heat-generating equipment nearby. For deformed ice cubes, checks include verifying the water spray system is fitted correctly, spray nozzles are clean and not blocked, and if the machine has had regular cleaning and sanitizing. For water leaks, checks include verifying the machine has been sanitized regularly, the water filter, water hoses, and drain hoses. Ice machine error codes are located inside the front door panel.
Warranty issues are subject to Moffat Pty Ltd.'s standard terms and conditions, which can be viewed on their website.
| Condenser Type | Air-Cooled |
|---|---|
| Width | 30 inches |
| Depth | 24 inches |
| Refrigerant | R-404A |
| Dimensions (W x D) | 30 x 24 inches |
| Type | Modular |
| Ice Production Capacity | 327 lbs/24 hours |
| Ice Type | Cube |
| Power Supply | 115V/60Hz |
| Weight | 150 lb |