ENGLISHENGLISH
25 |
ROAD BIKE | OWNER’S MANUAL 2017OWNER’S MANUAL 2017 | ROAD BIKE
| 24
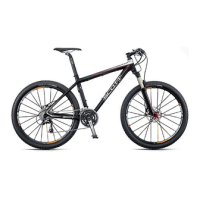
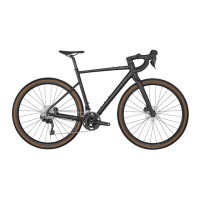
DT Swiss RWS quick-release system
The RWS system from DT Swiss (a-c) for road racing and cyclo-cross racing
bikes is a special type of quick-release for front and rear wheels. The RWS sys-
tem is compatible with all standard drop-outs.
Make sure during the assembly that the axles, the hubs, the drop-outs of the
fork and the rear frame are clean. Clean the components with an absorbent
cloth, if necessary, by using water and a little detergent.
In case you do not succeed in adjusting and fixing the wheel, as described, con-
tact your SCOTT dealer.
Wheel mounting
Put the front wheel into the fork and mount the rotor simultaneously, if neces-
sary, in the brake calliper. Make sure that in the area of the rear wheel the chain
runs over the sprockets and over both pulleys of the rear derailleur.
Bring the front or the rear wheel into the correct position between the drop-
outs and the fork or rear frame and slide the RWS quick-release axle from the
left side through the drop-outs and the hub. Mount the lock nut on the right
side.
Hold the lock nut on the right side of the hub tight. Turn the RWS quick-release
lever clockwise to pre-tighten the RWS system. Depending on the fork mounted
or the frame model, the number of turns you need varies. You need at least six,
in most cases however more turns. During the first turns you should be able to
turn the RWS quick-release lever nearly without resistance.
Turn the quick-release lever subsequently forcefully clockwise until the axle is
hand-tight.
Make sure the RWS quick-release lever does not stand out to the front (d). Open
the RWS quick-release lever a little (e, position 1) to bring it into a favourable
position. Turn the quick-release lever then into the desired position (e, position 2)
and re-close it towards the hub (e, position 3).
Close the release lever of the brake or hook in the cable. Actuate the brake lever
to make the brake work. The brake pads of rim brakes must hit the rim evenly
with their entire surface without touching the tyre during braking, in open con-
dition or in between.
Lift the wheel and give it a strong tap from above. The wheel must be securely
fixed and must not rattle.
Wheel removal
To open the RWS system turn the quick-release lever anticlockwise (f) by hold-
ing the lock nut tight on the other side of the hub. Typically, you need not open
the RWS system completely. Open it only so far until the wheel slides off the
drop-outs. Open it fully only in exceptional cases and remove the axle com-
pletely from the hub.
DANGER!
G
Improperly mounted wheels may throw you off your bike or result in
serious accidents! Therefore, if you have the slightest doubt, contact your
SCOTT dealer and ask him to explain the system of your SCOTT bike to you.
DANGER!
G
After wheel mounting test the brakes in stationary. You should reach the
pressure point of the brake before the brake lever reaches the handlebars.
In the case of hydraulic brakes pump them, if necessary, until you reach a pre-
cise pressure point.
DANGER!
G
Do not open the red screw to open or close the RWS system.
NOTE!
I
Before mounting or replacing a fork/wheel combination with thru-axle
system, be sure to read first the manuals of the respective fork or wheel
manufacturer on this SCOTT info CD. More information are provided at
www.dtswiss.com
b ca e fd