ENGLISHENGLISH
55 |
ROAD BIKE | OWNER’S MANUAL 2017OWNER’S MANUAL 2017 | ROAD BIKE
| 54
NOTE!
I
Read in any case the manual of the brake manufacturer on this SCOTT info
CD carefully before removing the wheel or doing any maintenance work.
Improper operation can lead to brake failure.
GEARS
DERAILLEUR GEARS
The gears (d+e) of your SCOTT bike serve to adjust the gear ratio to the terrain
you are riding on and the desired speed.
A low gear (where in the case of derailleur gears the chain runs on the small
chainring and a large sprocket (f)) allows you to climb steep hills with moderate
pedalling force. You must, however, pedal at a faster pace or higher frequency.
High gears (large chainring, small sprocket) are for riding downhill. Every turn of
the pedals takes you many metres forward at correspondingly high speed.
In general, your pedalling speed, also referred to as cadence, should be higher
than 60 strokes a minute. Racing cyclists pedal at a rate between 90 and 110
strokes a minute on level ground. When climbing uphill, your cadence will natu-
rally fall off somewhat. Your pedalling should, however, always continue to flow.
Continue pedalling during gear shifting, however, at clearly reduced pedalling
force. In particular when shifting through the chainrings continue pedalling
slowly and without force.
CAUTION!
A
Practise switching gears in a place free of traffic until you are familiar with
the functioning of the brake lever/shifter unit or the shifter of your SCOTT
bike.
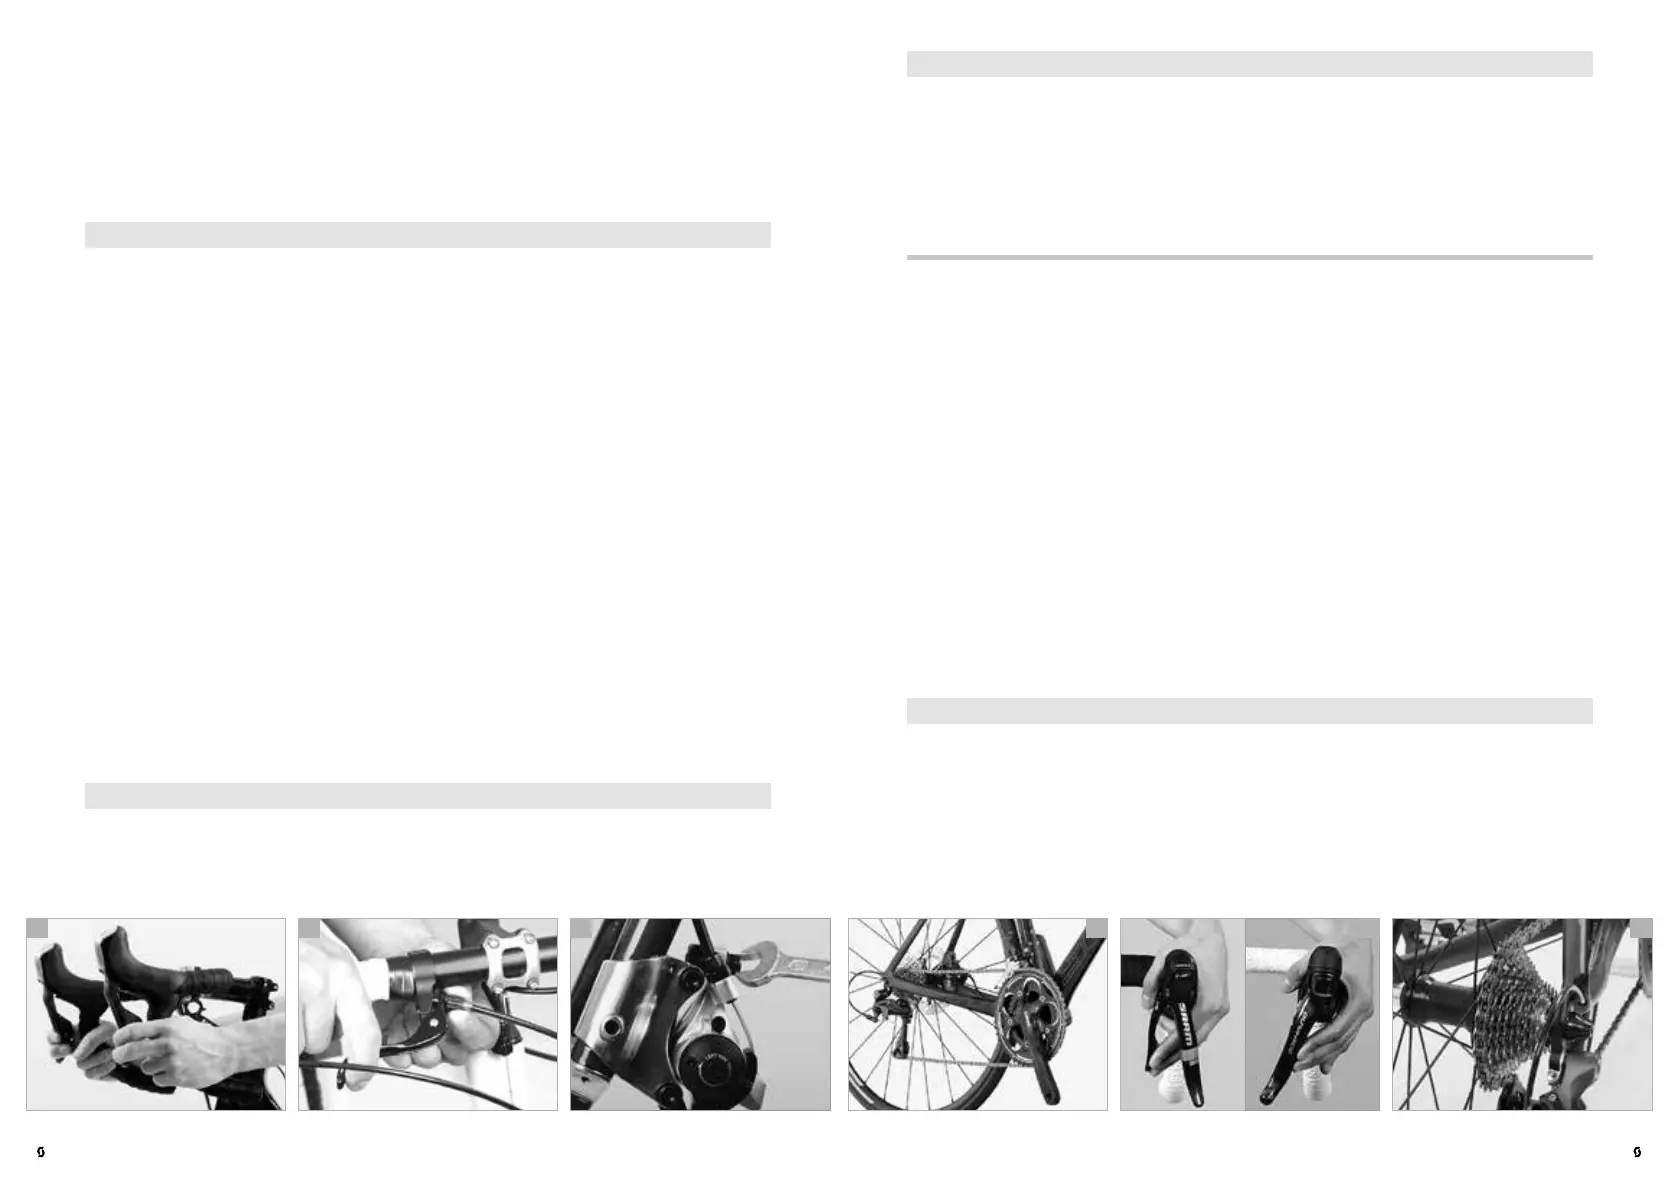
Mechanical disc brakes
Functional check
The more brake pads of mechanical disc brakes wear down, the longer is the
brake lever travel. Regularly check whether you get a positive braking response
before the lever touches the handlebars (a). Make sure the brake cables are in
sound condition!
DANGER!
G
Damaged cables should be replaced immediately, as they can snap. Risk of
accident!
Wear and maintenance
To a certain extent, wear of the brake pads can be compensated directly at the
additional brake lever, if mounted. Unscrew the knurled lock nut on the bolt
through which the cable enters the grip and then unscrew the bolt (b) until the
lever has the desired travel. Retighten the lock nut by taking care that the slot of
the bolt does not face upward or forward, as this would permit an unnecessarily
high amount of water or dirt to enter.
As an alternative, the cable can be retightened directly at the brake in the same
way.
After readjusting check the functioning and make sure the brake pads do not
drag when releasing the brake lever and spinning the wheel.
Repeated readjustment at the brake lever makes the arm on the brake calliper
change its position. This can reduce braking power and result in a complete
brake failure in an extreme case. Risk of accident!
Some models offer further ways of adjusting the brakes directly at the brake
calliper, though this requires a certain amount of skill (c). Read the manual of the
brake manufacturer on this SCOTT info CD carefully before adjusting the brake.
If you are in doubt or if you have any questions, contact your SCOTT dealer.
DANGER!
G
Repeated readjustment at the brake cable can drastically reduce the maxi-
mum braking performance.
b ca e fd