ENGLISHENGLISH
39 |
ROAD BIKE | OWNER’S MANUAL 2017OWNER’S MANUAL 2017 | ROAD BIKE
| 38
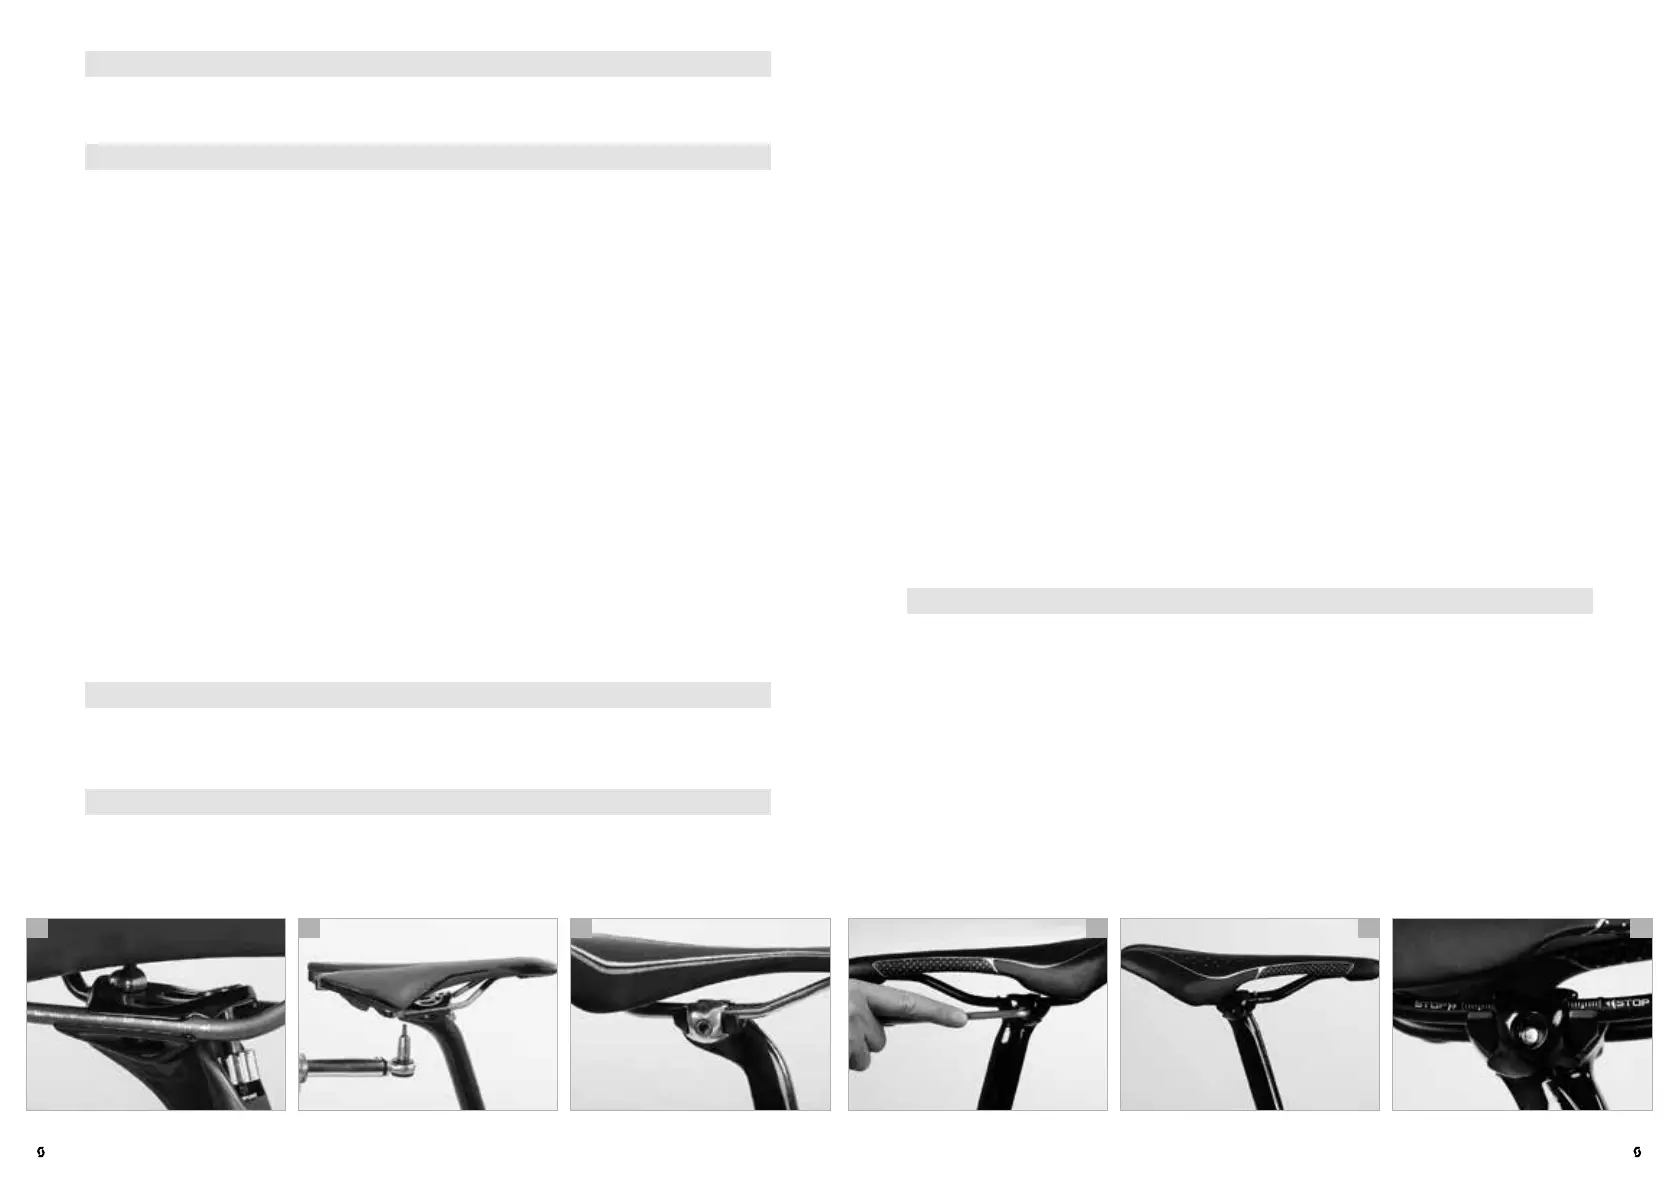
If you have a single bolt system (c), the seat post for most of the sports saddles
is designed for a saddle rail diameter of 7 mm.
Replacement outer clamps for ovalized saddle rails of 8 mm x 8.5 mm (W x H)
as well as for carbon saddle rails bigger than 8 x 8.5 mm are also available. If
you are not sure which saddle rail type you have or if you need further informa-
tion, contact your SCOTT dealer.
To mount the saddle unscrew the transversal fixing bolt (d) as far as possible
without loosening the lock nut on the outer side of the clamping device. In gen-
eral, it is not necessary to take the mechanism completely apart, if it is already
equipped with the correct outer clamps for your saddle.
If you do find it necessary to unscrew the single fixing bolt completely, remove
it from the clamping device. This releases the outer clamping parts. The inner
clamping parts are typically held in position with a rubber retention plate.
Mount the saddle rails into the inner clamping parts, add the outer parts and
re-insert the fixing bolt. If the width of the saddle rails does not fit exactly into
the clamp grooves, do not try to force them in. The clamping mechanism or the
saddle rails could break and result in an accident and/or injuries to the rider.
Use a different saddle model (e) or contact your SCOTT dealer.
DANGER!
G
When choosing another saddle, observe that there are round and ovalized
rails. Replace the fitting pieces of the clamp accordingly.
If the saddle rails fit into the clamp grooves, slide the saddle on the seat post
and ensure that the clamp is positioned midway along the total length of the
rails (f).
DANGER!
G
Poorly tightened or loosening bolts can fail. Risk of accident!
DANGER!
G
Check the bolts by using a torque wrench once a month according to the
values indicated directly on the components and/or in the manuals of the
component manufacturers on this SCOTT info CD.
Clamping with two bolts in line (a): Release both bolts two to three turns
anticlockwise, otherwise the whole assembly can come apart. Move the saddle
forward or backward as desired to adjust the horizontal position. You may have
to give the saddle a light blow to make it move. Please observe the markings on
the saddle rail.
Having found your preferred position, make sure both clamp halves fit snugly
around the saddle rails before tightening the bolt(s) to the correct torque value
as prescribed by the seat post manufacturer.
Tighten both bolts evenly (b) so the saddle remains at the same angle. If you
wish to lower the nose of the saddle a little, tighten the front bolt clockwise. You
might have to loosen the rear bolt a little as well. To lower the rear part of the
saddle, the rear bolt has to be tightened clockwise and the front bolt has to be
released, if necessary.
After fastening the saddle, check whether it resists tilting by bringing your
weight to bear on it once with your hands at either end of the saddle.
DANGER!
G
Check the bolts by using a torque wrench once a month according to the
values indicated directly on the components and/or in the manuals of the
component manufacturers on this SCOTT info CD.
DANGER!
G
Poorly tightened or loosening bolts can fail. Risk of accident!
b ca e fd