ENGLISHENGLISH
83 |
ROAD BIKE | OWNER’S MANUAL 2017OWNER’S MANUAL 2017 | ROAD BIKE
| 82
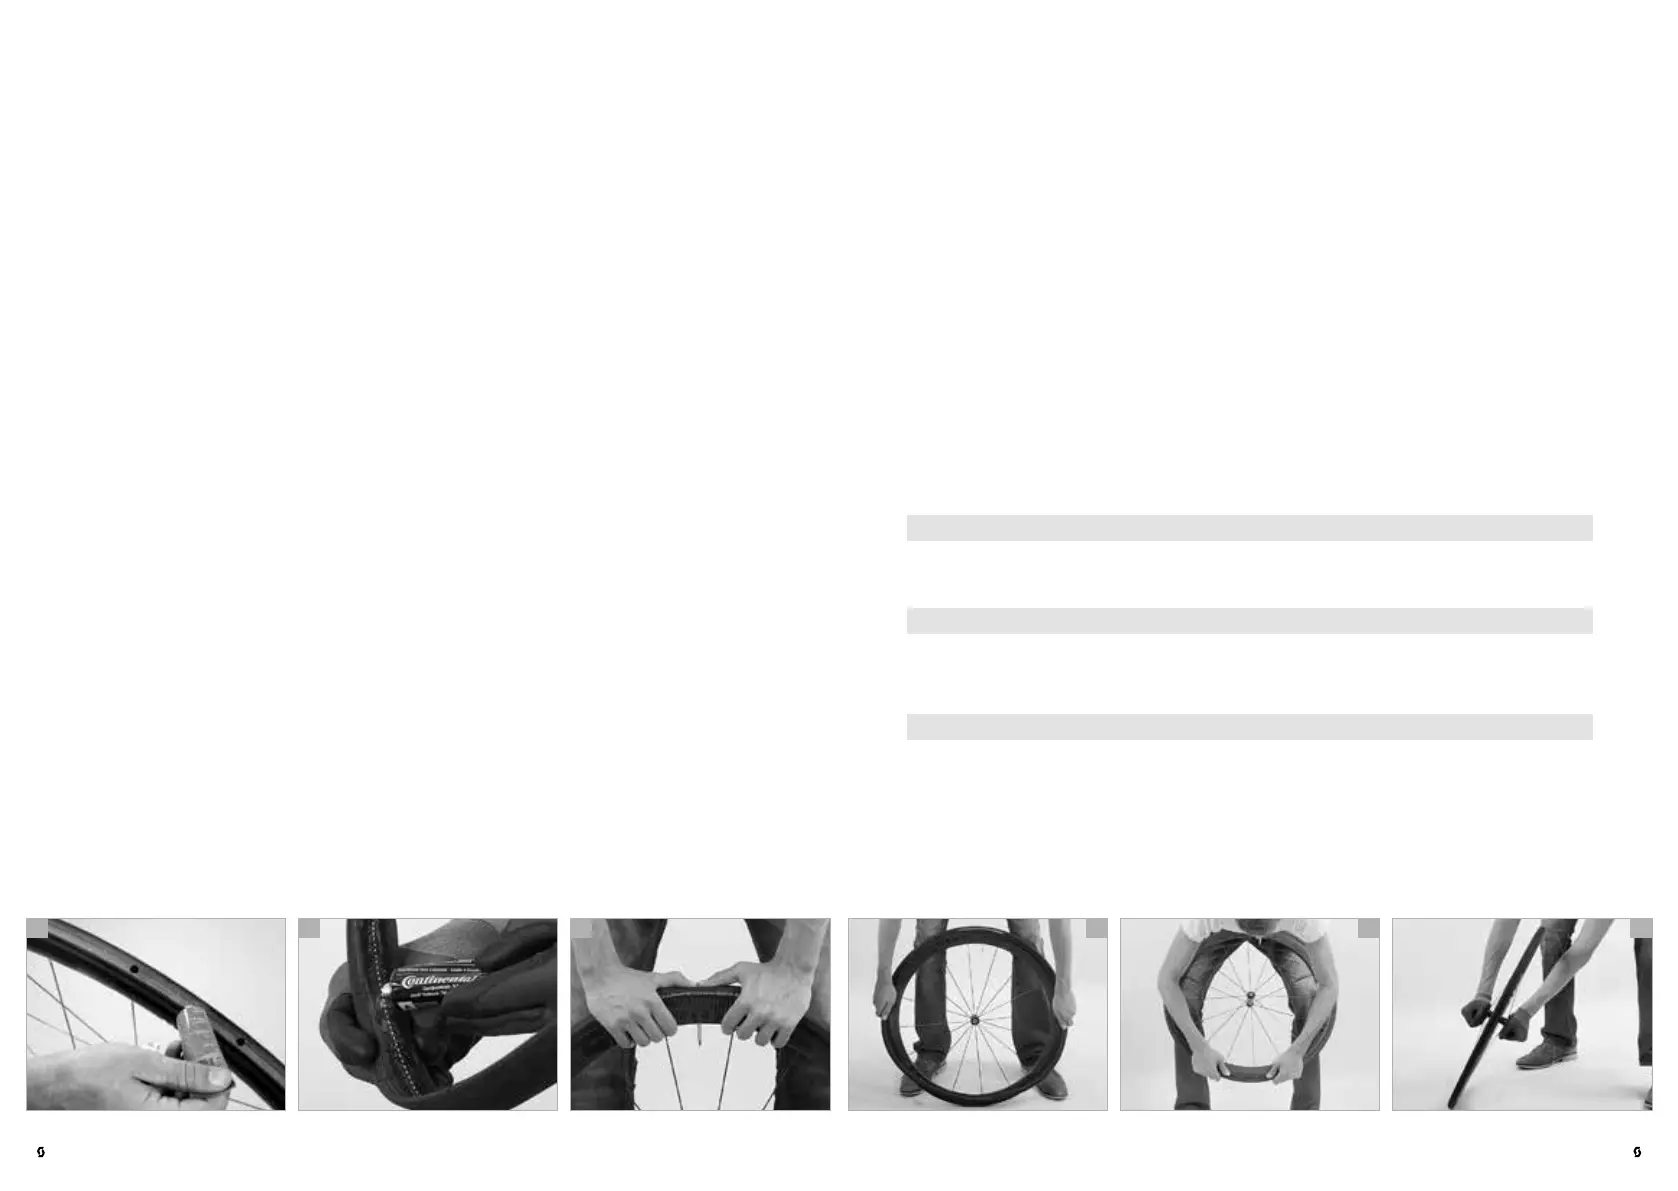
Keeping the tyre tight by holding your fingers against the rim and your thumbs
on the tyre, brace the wheel against your hips. Heave the tyre with both thumbs
into the base of the rim (e).
When the tyre is seated in the base, it has to be cantered, as it will rarely run
true right away. Clamp the wheel in the mounting stand again and spin it. If the
tread does not run exactly in the centre or if it swerves to the side at any place,
lift it up at that place, twist it a little into true and let it go again.
When the tyre runs smoothly in the centre, take the wheel off the mounting
stand and inflate the tyre to approximately half its nominal pressure. Lean your
hands on the ends of the axle and quick-release skewers and roll the wheel a
few metres on the ground (f). As you roll the wheel, vary between pressing it
vertically downward and at a slant to either side.
If the tyre still runs true during the final check, inflate it to its maximum pressure,
deflate until you have reached two thirds of the pressure and wait 8 hours at
least or even better a whole day, before setting off for the first time. Beforehand
adjust the pressure of the newly mounted tyre according to the manufacturer’s
recommendations and to your own needs.
DANGER!
G
A poorly glued tubular tyre can come off the rim. Risk of accident!
DANGER!
G
Benzine and tyre glue should only be used in a well aired place, since both
materials are highly flammable. Keep them in a safe place out of children’s
reach.
CAUTION!
A
Tyre glues do not only stick on rims and tyres, they also cling quite stub-
bornly to fingers and clothes. This makes it advisable to wear old clothes
when mounting tubulars.
With a little practice you will be able to apply the glue straight from the tube (a).
If this does not work at first you might find it easier to use a stiff brush. If you are
using tyre glue from a can you will need a brush in any case. Let the tyre glue
dry until it loses its sticky liquid touch. This can take up to a few hours. In the
same way add another two thin films of glue and let them dry. Also apply a film
of glue to the base tape. Leave the rim and the wheel as they are at least until
the next day.
Before mounting the tyre also apply a film of glue to the base tape (b). To com-
plete the adhesive bed add one last film of glue. If necessary, you can leave a
section of five to ten centimetres without glue at a place just opposite the valve
to make it easier to remove the tyre again at a later date.
Let the topmost layer dry for a short time and, while it still feels syrupy, place
the rim on the ground with the valve hole facing upward. Inflate the tyre until
it starts to round and then stick the valve through the valve hole and press it
firmly against the rim (c).
Make sure the sides of the tyre do not touch the adhesive bed, since your tyre
will otherwise look smudgy right away.
If you have left the section opposite the valve hole free of glue, you need not
be concerned about glue smearing on the ground or dirt getting into the glue
when you place the rim on the ground.
Take hold of the tyre right and left of the valve with both hands, pull it vigor-
ously downward and work it bit by bit into the base of the rim (d) until you have
about 20 centimetres left to go.
Starting from the top again on either side of the valve pull the tyre down with
your hands, letting them gradually slip down to the not yet mounted section.
b ca e fd