Do you have a question about the Scythe Mugen-3 and is the answer not in the manual?
Attach the metal mounting bracket to the motherboard using the provided screws.
Gently position the heatsink onto the CPU core, ensuring it is parallel.
Use screws to diagonally secure the heatsink to the motherboard for stability.
Apply thermal grease to the CPU heat spreader before mounting the heatsink.
Attach the metal clips to the motherboard using the correct screws for the socket.
Carefully place the heatsink onto the CPU core, aligning it correctly.
Fasten the heatsink using the provided screws, tightening them diagonally.
Ensure thermal compound is applied to the CPU for optimal heat transfer.
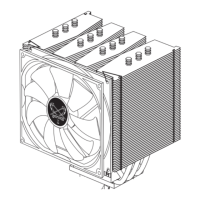
Illustrates different ways to mount the fan onto the heatsink assembly.
Shows the correct direction for mounting the fan for airflow.
Secure the metal assembly clip to the motherboard using the provided screw.
Gently position the heatsink onto the CPU's heat spreader for proper contact.
Insert and tighten the 2011-screws in a diagonal pattern to secure the heatsink.
Apply thermal grease to the CPU heat spreader before mounting the heatsink.
| Type | CPU Air Cooler |
|---|---|
| Heatpipes | 6 |
| Fan Included | Yes |
| Fan Dimensions | 120 x 120 x 25 mm |
| Fan Bearing | Sleeve Bearing |
| Fan Connector | 4-pin PWM |
| Model | Mugen 3 |
| Socket Compatibility | Intel LGA1150/1151/1155/1156/1366/2011/2011-3, AMD AM2/AM2+/AM3/AM3+/FM1/FM2/FM2+ |
| Heatsink Material | Aluminum fins, copper heatpipes |
| Fan Speed | 300 - 1200 RPM |
| Fan Noise | 4.0 - 28.0 dBA |