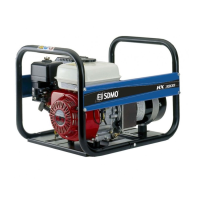
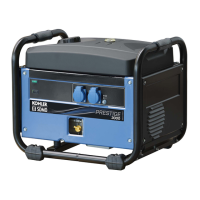
This device is a portable generator designed for various power needs, offering a range of models with different power outputs. It is equipped with a Kohler engine and is designed for stationary operation, though it can be used in mobile applications after a specific study of installation and usage conditions.
Technical Specifications
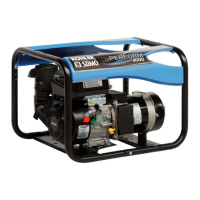
The generator comes in several models: PERFORM 3000 C5, PERFORM 4500 C5, PERFORM 5500 T C5, PERFORM 6500 C5, and PERFORM 7500 T C5.
- Maximum Power: Ranges from 2800 W (PERFORM 3000 C5) to 6500 W (PERFORM 7500 T C5).
- Rated Power: Ranges from 2400 W (PERFORM 3000 C5) to 5200 W (PERFORM 7500 T C5).
- Acoustic Pressure at 1m: 81 dB(A) for PERFORM 3000 C5, and 83 dB(A) for all other models.
- Acoustic Measurement Uncertainty: Ranges from 0.35 dB(A) to 0.47 dB(A).
- Engine Type: CH270_C5 for PERFORM 3000 C5, CH395_C5 for PERFORM 4500 C5 and PERFORM 5500 T C5, and CH440_C5 for PERFORM 6500 C5 and PERFORM 7500 T C5.
- Recommended Fuel: Unleaded petrol.
- Fuel Tank Capacity: Ranges from 4.09 L (PERFORM 3000 C5) to 7.30 L (all other models).
- Recommended Oil: 10W30 for all models.
- Oil Sump Capacity: Ranges from 0.60 L (PERFORM 3000 C5) to 1.29 L (PERFORM 6500 C5 and PERFORM 7500 T C5).
- Oil Cut-out: All models are equipped with an oil cut-out safety feature that automatically stops the unit if oil level or pressure is too low.
- Alternating Current:
- PERFORM 3000 C5: 230V - 10.4A
- PERFORM 4500 C5: 230V - 13.9A
- PERFORM 5500 T C5: 400V - 4.6A
- PERFORM 6500 C5: 230V - 22.6A
- PERFORM 7500 T C5: 400V - 7.5A
- Circuit Breaker(s): All models are equipped with circuit breakers for electrical protection.
- Socket Types:
- PERFORM 3000 C5 and PERFORM 4500 C5: 2x2P+T 230V 10/16A
- PERFORM 5500 T C5 and PERFORM 7500 T C5: 1x2P+T 230V 10/16A - 1x3P+N+T 400V 16A
- PERFORM 6500 C5: 1x2P+T 230V 10/16A - 1x2P+T 230V 32A
- Spark Plug Type: 330830012 for all models.
- Dimensions (L x W x H):
- PERFORM 3000 C5: 65 x 51 x 46 cm
- PERFORM 4500 C5 and PERFORM 5500 T C5: 71 x 55.5 x 49 cm
- PERFORM 6500 C5 and PERFORM 7500 T C5: 81 x 55.5 x 59 cm
- Weight (without fuel): Ranges from 45 kg (PERFORM 3000 C5) to 93.5 kg (PERFORM 7500 T C5).
The performance values are obtained under ISO 8528-1(2005) reference conditions (100 kPa total barometric pressure, 25°C ambient air temperature, 30% relative humidity). Performance is reduced by approximately 4% for every 10°C increase in temperature and/or 1% for every 100m increase in altitude.
Usage Features
The generator is designed for ease of use with clear instructions for starting and stopping.
- Starting: Before starting, users must ensure the unit is clean, all hoses and connections are in good condition, and oil and fuel levels are checked. The starting procedure varies slightly based on ambient temperature (above or below 0°C), involving the fuel tap, air filter position, choke control, and starter-recoil reel handle.
- Electrical Connection: Once the unit has stabilized its speed and warmed up (3-5 minutes), electrical equipment can be connected to the sockets. For France, specific earthing requirements are noted, with adapters recommended for pin-earthed equipment.
- Stopping: To stop the unit, disconnect all electrical equipment, let the engine run idle for 1-2 minutes, set the switch to "OFF" or "O", and close the fuel tap. Adequate ventilation is required for cooling before covering and storing.
- Generator Smart Care (Optional): The unit can be equipped with a Bluetooth GSC101 module (A16) that transmits useful information to a mobile application. This includes maintenance schedules, maintenance assistance, and a map of approved resellers for spare parts. Batteries for this module need to be replaced approximately every two years.
Maintenance Features
Regular and conscientious maintenance is crucial for safety and performance. The manual provides a detailed maintenance schedule.
- Oil Change: Engine oil should be changed when warm. This involves placing a container under the oil drain screw (A11-B5), removing the oil dipstick/filler plug (A2-B1), draining the oil, and refilling with new oil according to specifications, ensuring the level is between the min and max marks.
- Fuel System Cleaning:
- Screen Filter (A4): If fitted, close the fuel tap, unscrew the fuel tank cap (A3), remove the screen filter, blow air through it from outside to inside, rinse with clean fuel, dry, and replace if damaged.
- Sediment Bowl (A12-C6): Close the fuel tap (A5), remove the cover (C1) by unscrewing the bolts (C2) and nuts (C3), unscrew the sediment bowl, clean it with clean fuel, dry, and check the cover (C4) and seal (C5) for good condition before reassembly.
- Air Filter (A6) Maintenance: Remove the air filter cover (D4) and fasteners (D3), inspect filter elements (D5 & D6). Foam elements should be washed with soapy water, rinsed, dried, and soaked in a small amount of clean engine oil (without wringing). Paper elements should be replaced.
- Spark Plug (A14-F2) Replacement: Disconnect the spark plug cap (F1), clean the spark plug well, unscrew and discard the old spark plug, and install a new one, tightening it by hand and then an additional 1/2 turn with a spanner.
- Spark Arrester (E1) Cleaning: Unscrew the mounting bolt (E2) from the exhaust silencer, remove the spark arrester, clean carbon deposits with a wire brush, check for damage, and replace if necessary before reassembling.
- General Cleaning: The unit should be cleaned regularly, especially if used outdoors. Use a brush for air intakes/outlets and spark arrester. Clean the unit with a sponge, water, and mild detergent, then rinse with clean water. High-pressure cleaning is prohibited.
The manual highlights several safety risks:
- Carbon Monoxide Poisoning: Always operate the unit in a well-ventilated area to prevent accumulation of toxic exhaust gases.
- Fire Hazard: Keep flammable materials away from the unit and ensure it is not covered during operation or until it has cooled down (at least 30 minutes).
- Burn Hazard: Hot oil, engine, and exhaust silencer can cause burns during operation and immediately after stopping.
- Electrocution Risk: The unit generates electricity; follow all applicable legislation and installation guidelines. Do not connect directly to other power sources, use a source changeover panel, and avoid contact with bare wires or wet hands/feet. Earthing procedures are detailed for temporary and fixed installations.
The device identification plate, located on one of the side panels or the chassis, provides essential information including model, CE/EAC marking, acoustic power level, maximum and rated power, engine type, and serial number. These serial numbers are important for troubleshooting and ordering spare parts.