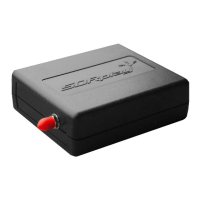
The SDRplay RSP1A is a powerful wideband Software Defined Radio (SDR) receiver designed to cover a vast RF spectrum from 1 kHz to 2 GHz. Unlike traditional radio receivers where much of the processing is done in hardware, the RSP1A offloads a significant portion of this work to software running on a personal computer. This design philosophy allows for greater flexibility, advanced features, and easier updates through software enhancements.
Function Description
At its core, the SDRplay RSP1A acts as an interface between the radio waves in the air and the digital processing capabilities of a computer. The hardware unit performs the initial, critical steps of radio reception:
- Up-front Filtering: This stage helps to select the desired frequency range and reject unwanted signals, preventing overloading of subsequent stages.
- Amplifying: Weak radio signals are boosted to a usable level for further processing.
- Mixing: The incoming radio frequency (RF) signal is converted to an intermediate frequency (IF) or directly to a baseband signal, a common step in radio receivers.
- Analog to Digital (A/D) Conversion: This is a crucial step where the continuous analog radio signal is transformed into a discrete digital stream that a computer can understand and process.
Once the signal is digitized, the RSP1A sends this digital data to the connected PC via a USB cable. The accompanying software, SDRuno, then takes over to perform the rest of the processing chain. This includes demodulation, decoding, spectral analysis, and various other signal processing tasks that define the receiver's functionality.
Usage Features
The SDRplay RSP1A is designed for ease of use, requiring only a PC and an antenna to provide excellent communications receiver functionality.
Getting Started:
- Software Download and Installation: Before connecting the RSP1A, users must visit the SDRplay website (www.sdrplay.com) and navigate to the "Start Here" section. This guides them through a registration process where they select their country, purchase location, operating system (Windows, Linux, Mac, Raspberry Pi, Android), and the specific SDRplay device (RSP1A in this case). It's crucial to temporarily disable any anti-virus software during installation, as it might interfere with driver installation. After registration, users download the SDRuno software.
- SDRuno Installation: The SDRuno installer will guide the user through accepting a license agreement and selecting an installation directory. Users are prompted to allow Windows to install necessary drivers.
- Connecting the RSP1A: After the SDRuno software is installed and the driver installation is complete, users are instructed to wait approximately 30 seconds before plugging in their RSP1A to the PC using a USB2 Type B cable (commonly used for printers). This allows the system to properly recognize and configure the device.
- Launching SDRuno: Once the RSP1A is connected and recognized, SDRuno can be launched. It will automatically arrange multiple windows on the PC screen, presenting the user with the various controls and displays of the software-defined radio.
Antenna Setup:
- Basic Shortwave Antenna: For shortwave reception, a simple wire antenna is recommended. A length of 10 meters or more of PVC-coated thin multistrand wire is suggested. Ideally, this antenna should be placed outdoors and at least 4 meters above the ground, away from strong sources of electrical noise.
- Connecting the Antenna: To connect the wire antenna, users strip away the plastic coating from the end of the wire and insert 2 or 3 strands into the center hole of the coax socket on the RSP1A. Care must be taken to avoid shorting against the outer part of the coax socket.
- Grounding (Counterpoise): To further improve signal strength, another length of wire can be connected to the outer part of the coax socket. This wire acts as a "counterpoise" and can be connected to a house-wiring ground, a metal radiator system, a grounding rod, or even a metal window frame. For a more permanent solution, buying connectors or lengths of coax cable to connect to a convenient point near the outside world is recommended.
- Antenna Placement: The wire antenna should be spread out and as high above ground as possible. Cable ties can be used for support, and it's important to keep the wire away from metal objects to minimize interference. Even with this simple setup, users should start receiving shortwave signals.
Listening with SDRuno:
- Starting the Receiver: Users press the green "Play" button within the SDRuno interface to start the receiver.
- Tuning: A mouse with a roller wheel is recommended for tuning, as it acts like a traditional tuning knob. By hovering the mouse over the frequency display, users can roll the wheel to tune individual digits (0.1 kHz is a good increment for fine-tuning).
- Band Selection: Users can find the "Bands" button in SDRuno and select "Broadcast," then choose the "49-meter band." The software should default to 6050 kHz, and signals should be visible in the main Spectrum display.
- Default Settings: The default settings for AM mode, 8 kHz audio bandwidth, and gain are generally suitable for initial listening.
- Further Learning: For advanced usage and to explore the full capabilities of SDRuno, users are encouraged to watch video guides and read the comprehensive manual.
Maintenance Features
The SDRplay RSP1A itself is a robust hardware unit with minimal maintenance requirements. The primary "maintenance" aspect revolves around the software and continuous learning:
- Software Updates: SDRplay regularly releases updates for the SDRuno software. Users should periodically check the SDRplay website's "Downloads" section for the latest versions to benefit from new features, performance improvements, and bug fixes.
- Documentation and Guides: The SDRplay website provides extensive documentation, including the SDRuno User Manual, video guides, and community guides. These resources are invaluable for understanding the software's functionalities, troubleshooting issues, and exploring advanced techniques.
- Community Support: SDRplay fosters an active community. Users can join the Facebook group (https://www.facebook.com/groups/sdrplay) to connect with other SDRplay users, share experiences, ask questions, and get advice.
- Direct Support: SDRplay offers direct support through a "Support Centre" accessible via their website. This is available whether the RSP1A was purchased directly or through a local distributor.
- Exploring Antennas: While the basic wire antenna is a good starting point, users are encouraged to explore different antenna types, especially for restricted spaces or indoor use. "Mag Loop" antennas are recommended for shortwave, and searching online for "mag loop antennas for shortwave" will yield a wealth of information.
- Expanding Horizons: The SDRplay RSP1A opens up a world of radio exploration beyond just shortwave listening. Users can delve into weather maps, satellite images, TV images, numerous message systems, air-traffic control, plane transponders, and much more. The SDRplay YouTube channel provides many examples and tutorials for these diverse applications.
In summary, the SDRplay RSP1A is a user-friendly and versatile SDR receiver that leverages software to deliver a powerful and adaptable radio listening experience. Its ease of setup, combined with extensive software features and community support, makes it an excellent choice for both beginners and experienced radio enthusiasts looking to explore the vast RF spectrum.