Do you have a question about the Sea Breeze 420-0075 and is the answer not in the manual?
This symbol alerts you to potential hazards that can kill or hurt you and others.
Explains the meaning of DANGER (serious injury) and WARNING (bodily injury or property damage) in safety messages.
Ensures proper grounding for protection against shock hazards, requiring a qualified electrician for two-prong outlets.
Specifies minimum wire gauge (12 or 10 gauge) based on unit's power requirements (amps).
Describes power cords with current interrupter devices and their test/reset button.
Turn fan control OFF and unplug unit before inspecting or performing maintenance.
Suggests yearly inspection by a dealer or technician for cleaning and maintenance.
Clean grill and cabinet with warm water and mild soap; avoid cleaning compounds.
Clean filter weekly by vacuuming or washing; dry thoroughly before replacing.
The fan motor is permanently lubricated and requires no oiling.
CAUTION: Use sufficient help when moving; units weigh 70-240 lbs.
Plug into grounded outlet, do not remove prong, avoid adapters/extension cords, unplug before servicing.
Read instructions, observe codes, leave instructions with consumer, ensure proper installation.
Details voltage, amperage, and circuit breaker/fuse ratings for power supply cords.
Explains the function of the TEST/RESET button on the power cord.
Diagram showing parts like accordion panels, mounting rails, and V-supports.
Lists tools needed: adjustable wrench, screwdrivers, pencil, ruler, level, scissors/knife.
Instructions for double-hung windows; requires firm mounting surfaces and accessible outlet.
Attach wood to stool to adjust for storm window frame height and ensure proper drainage.
Remove shipping screws, locking bracket, and ground screw before sliding unit out.
Cut and attach window sash seal to the underside of the window sash for sealing.
Install top rail, insert accordion panel frames, and attach panels using screws.
Attach V-supports to the bottom of the case using screws for stability.
Slide case into window, align, and secure to sill with screws.
Use leveling bolts and nuts to create a slight outward tilt for drainage.
Use wood blocks for wall support, attach support brackets, and seal the top window gasket.
Extend and attach accordion panels to vertical window sashes with screws.
Slide the air conditioner chassis into the installed case, ensuring it is firmly seated.
Reconnect the ground wire securely for proper grounding.
Remove front grill, unhook hinges, pull filter out for access.
Pull power cord from storage and connect it.
Attach front grill frame and secure with screws.
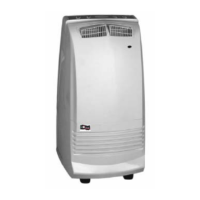
Guidelines for installing compact AC units through an outside wall.
Diagrams showing outside dimensions of the unit and outer case.
Key points for thru-wall installation including opening size and outlet proximity.
Specific steps for masonry and brick veneer/frame wall installations.
Place case flush, ensure level side-to-side and 3/8" front-to-back slope for drainage.
Chamfer opening sides for walls over 9 3/8" thick to ensure airflow to side louvers.
How to use unit for general air circulation and cooling.
Adjusting baffles for left/right airflow and tilting louvers for up/down.
Avoid blocking airflow to prevent rapid compressor cycling and damage.
Install drain cup and optional hose to manage excess condensate water.
Explanation of OFF, LOW COOL, HIGH COOL, LOW HEAT, HIGH HEAT, and FAN ONLY modes.
Adjusting the control to set the desired room temperature.
EXHAUST and CLOSED settings for managing air exhaust and circulation.
Controls the oscillating louvers for distributing air throughout the room.
Checks for power, fan control setting, outlet connection, fuses, and circuit breakers.
Verify vent setting, check for obstructions, clean filter, or confirm unit capacity.
Tighten parts, add support, or manage humidity-related noise.
Clean filter and adjust temperature control to warmer settings.
Details cooling/heating BTU, EER, airflow, voltage, amperage, and wattage.
Includes plug type, cord length, refrigerant, sound levels, and cabinet dimensions.
Lists UL/CUL certifications for the unit.
Covers defects in material/workmanship for one year (five years for compressor).
Excludes labor, service calls, normal wear, incidental/consequential damages.
Contact information for International Refrigeration Products Inc.
| Brand | Sea Breeze |
|---|---|
| Model | 420-0075 |
| Category | Air Conditioner |
| Language | English |