5K
70
70
Step 6: Assemble the front door (continued)
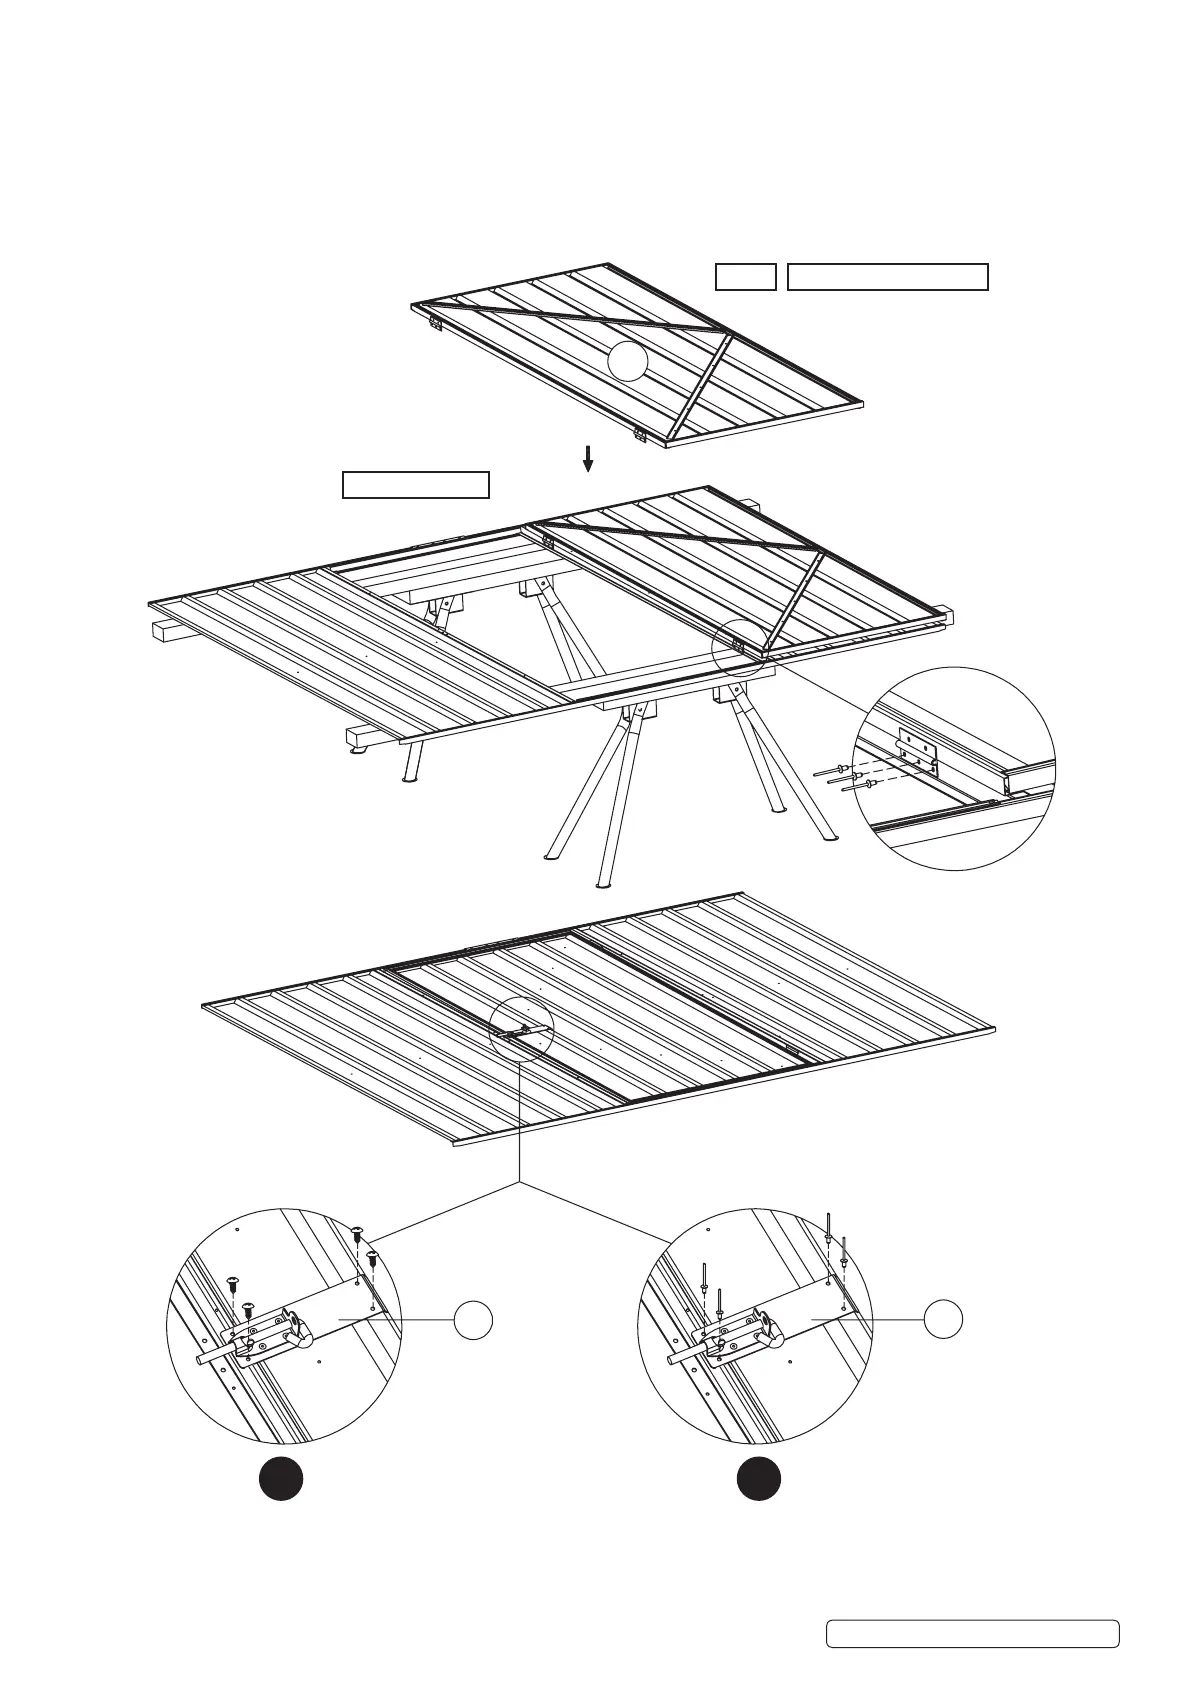
Fit part 5K (assembled door) to the front wall panel as per the diagram below. Use a rivet gun to fix the door using the pre-drilled
holes. Fix the pad bolt (but NOT its keeper at this stage) using the pre-drilled holes with the self-tapping screws or the rivets provided
(see diagram A and B below).
ROOF TOP EDGE
BACK RIDGES FACING DOWN
A
B
FIX PAD BOLT WITH
3.0 X 10MM RIVETS
FIX DOOR HINGES
4.0 X 10MM RIVETS
GSS2323/G | Issue:2(SP) 13/04/17
Original Language Version
© Jack Sealey Limited
Step 6: Assemble the front door continued
Fit part 5K (assembled door) to the front wall panel as per the diagram below. Use a rivet gun to x to the door using the pre-drilled holes. Fix
the pad bolt (but NOT its keeper at this stage) using the pre-drilled holes with self tapping screws or the rivets provided (see diagram A and B
below).