9F
9F
9F
Step 2:
Assemble the rear wall panels
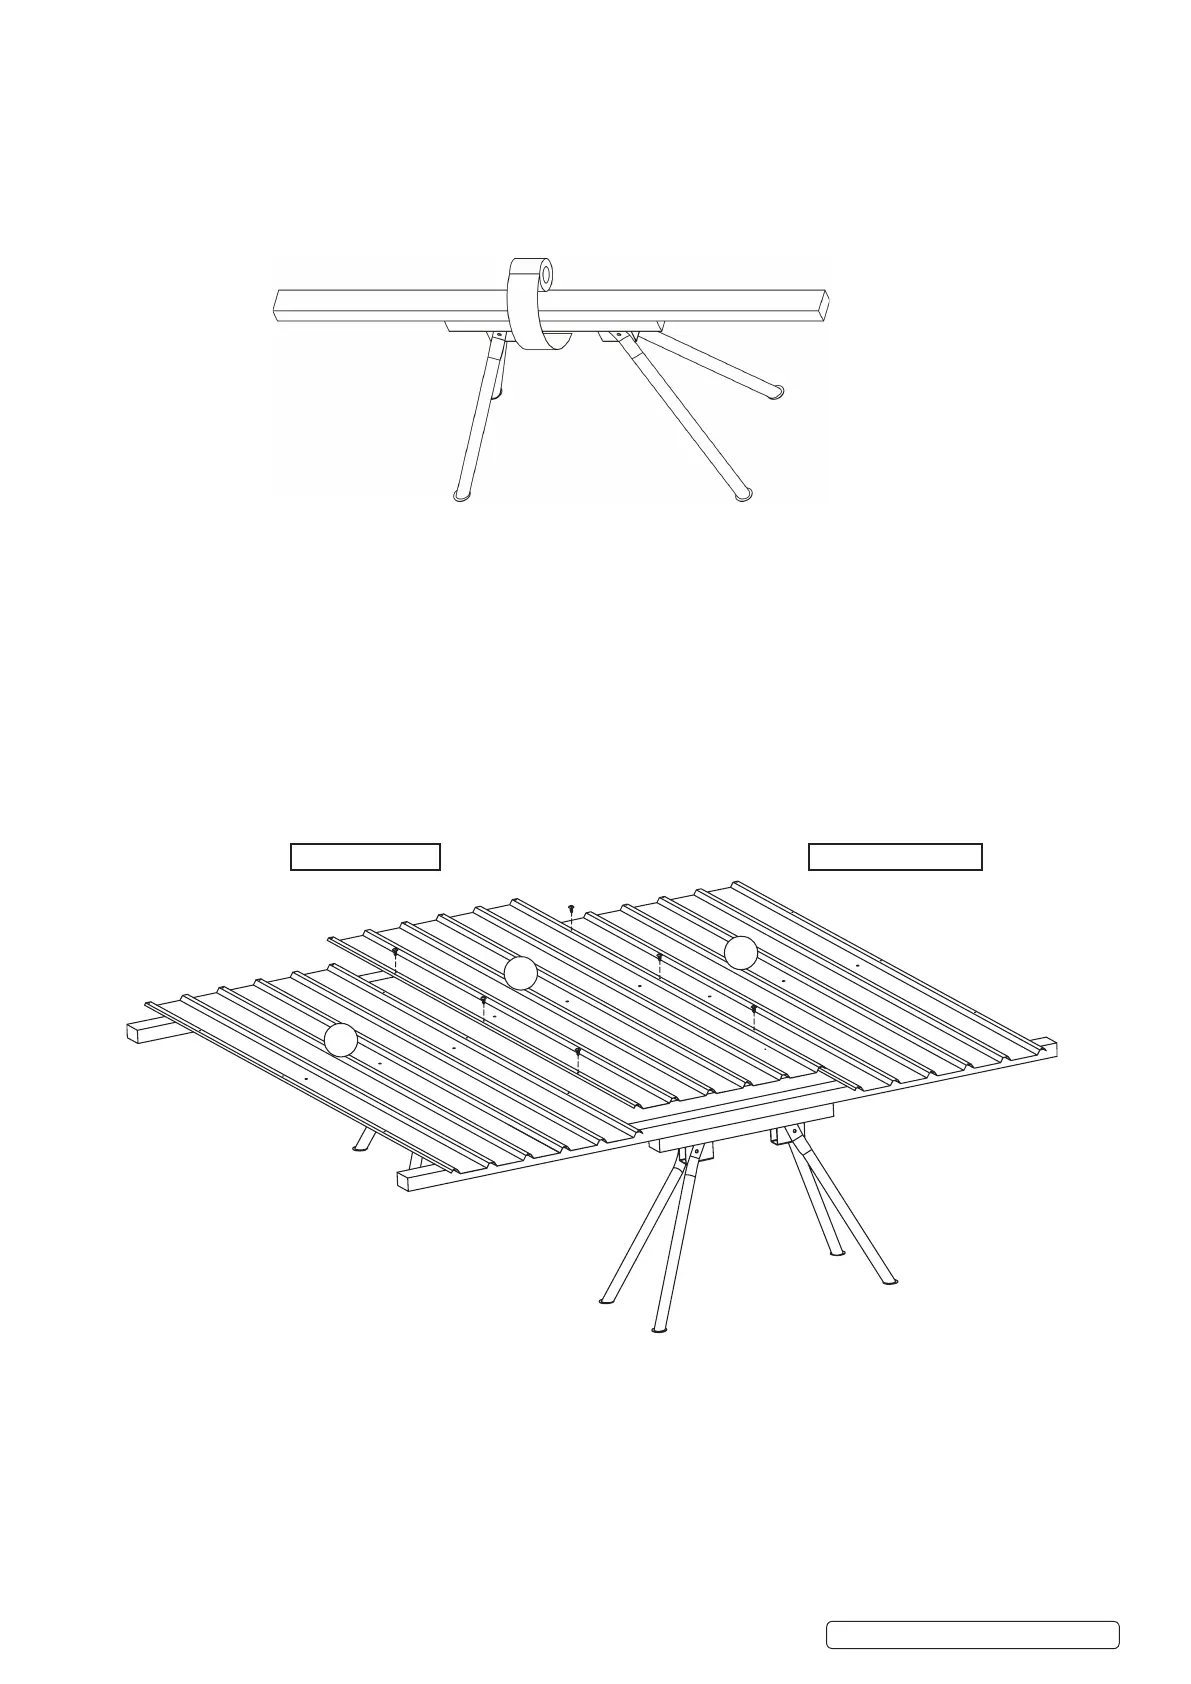
You will find it easier to assemble your shed using sawhorses with timber studs attached (timber needs to be the same length as the
shed (2.3m)) or alternatively, a trestle table.
Place 3 x part 9F (sheeting) on your worktable and join together with self-tapping screws as per the diagram below ensuring the
ridges are facing up.
ROOF TOP EDGE
RIDGES FACING UP
Tip: If panel and screw holes do not line up, try pulling panel to match up holes.
GSS2323/G | Issue:2(SP) 13/04/17
Original Language Version
© Jack Sealey Limited
Step 2: Assemble the rear wall panels
You will nd it easier to assemble your shed using saw horses with timber studs attached (the timber needs to be the same length as the
Shed (2.3m) or alternatively a trestle table.
Place 3 x part 9F (sheeting) on your work table and join together with self tapping screws as per the diagram below ensuring the ridges are
facing up.
Tip: If panel and screw holes do not line up, try pulling panel to match up holes.
 Loading...