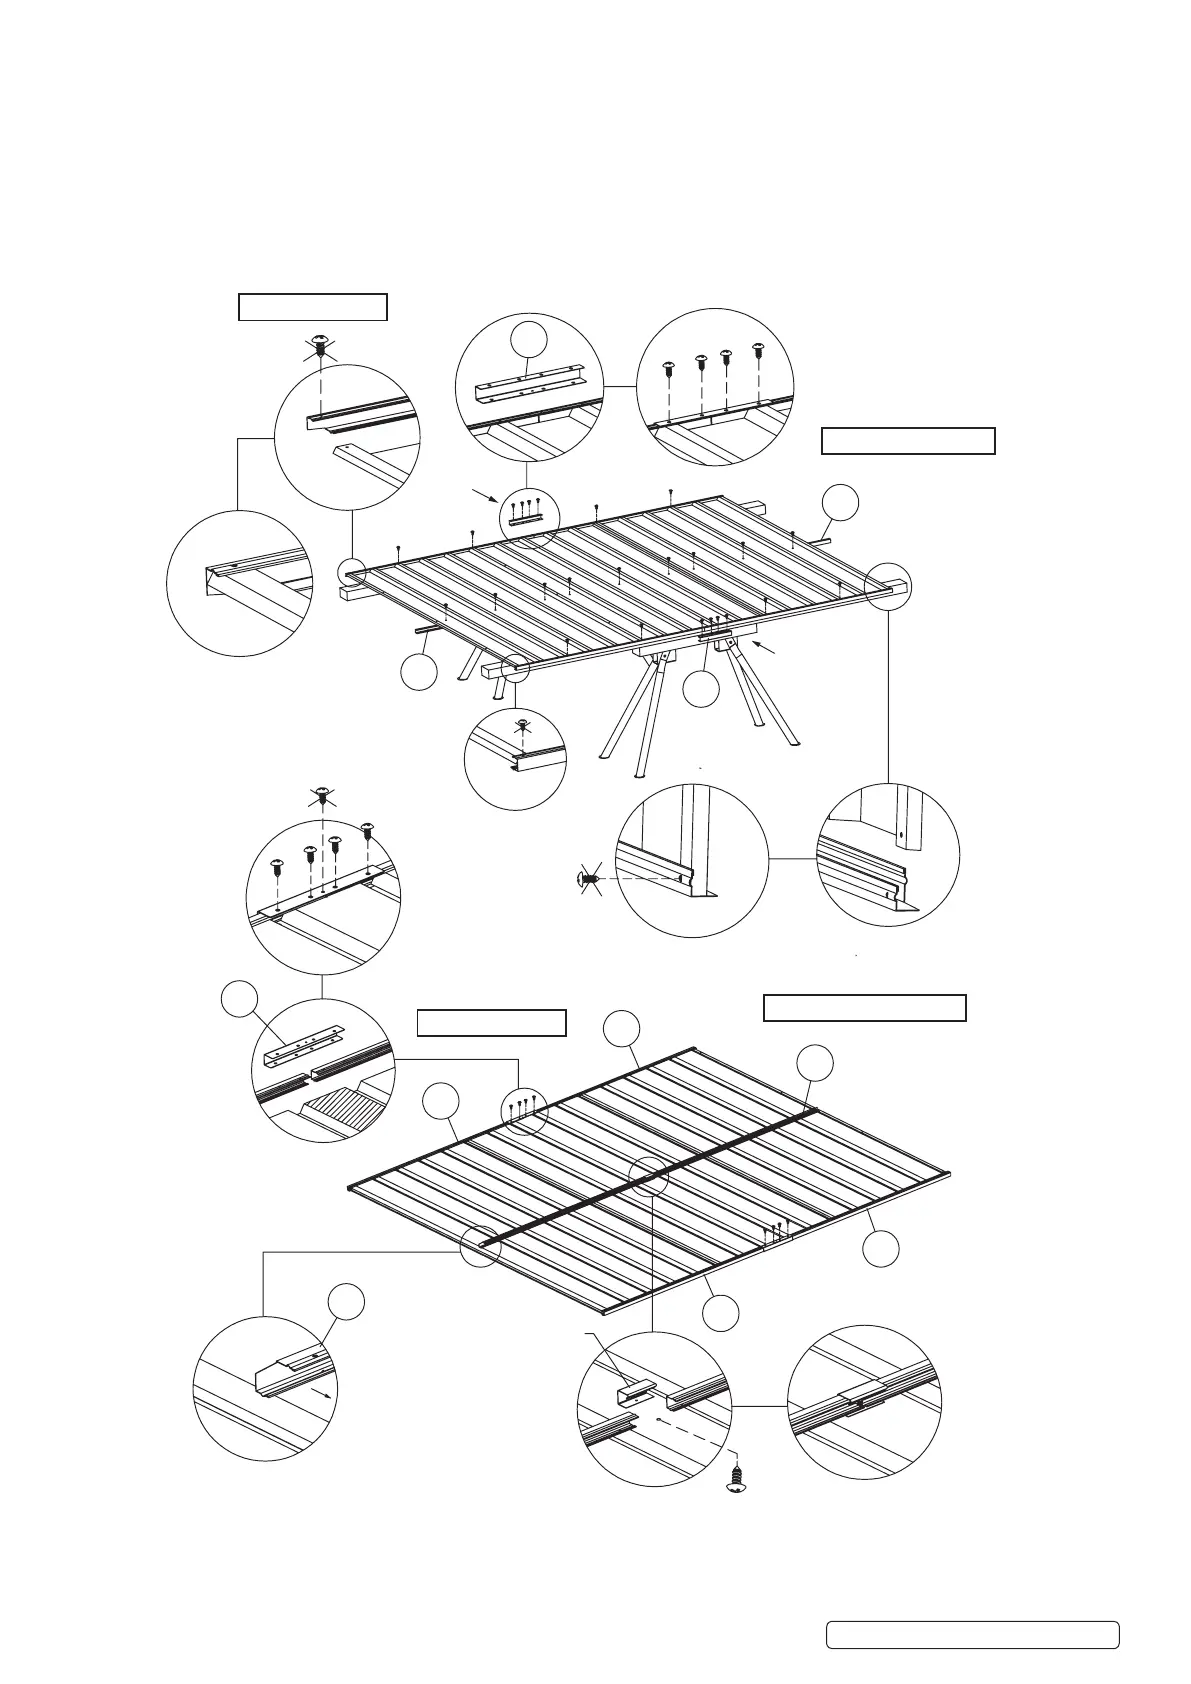
Assemble the rear wall panels (continued)
Now fix parts 34R and 34L (mid wall channels) joined by mid wall channel connector to the sheeting with self-tapping screws. Please
note that the groove should face downwards. Fix other channels with self-tapping screws. Apply part 66 (channel connector) on top
and bottom channels to enhance the strength. NOTE: Screws are applied to both sides of the connectors. All screws marked with a
cross should not be fixed at this stage.
lc
34L
34R
66
34R
34L
26H
26I
26D
26C
66
66
Mid wal lchannel
connector
RIDGES FACING UP
ROOF TOP EDGE
Note:
should face down.
ROOF TOP EDGE
RIDGES FACING DOWN
Channel 34R and 34L
GSS2323/G | Issue:2(SP) 13/04/17
Original Language Version
© Jack Sealey Limited
Step 2: Assemble the rear wall panels (continued)
Now x parts 34R and 34L (mid wall channels) joined by mid wall connector to the sheeting with self tapping screws. Please note that the groove
should face downwards. Fix other channels with self tapping screws. Apply part 66 (channel connector) on top and bottom channels to enhance
the strength. Note: screws are applied to both sides of the connectors. All screws marked with a cross should not be xed at this stage.
Note: Channel 34R and 34L
should face down.
Mid wall channel
connector
 Loading...