5.4. ADJUSTABLELOGHOLDER(g.5)
5.4.1. Use locking knobs and associated washers to mount the log holders (g.1.3) in place.
5.4.2. Use M6 x 16 bolts, washers and nuts to x retainers (g.1.4) in place. Ensure that the retainers form an all-round gure when control
levers are brought together.
6. OPERATION
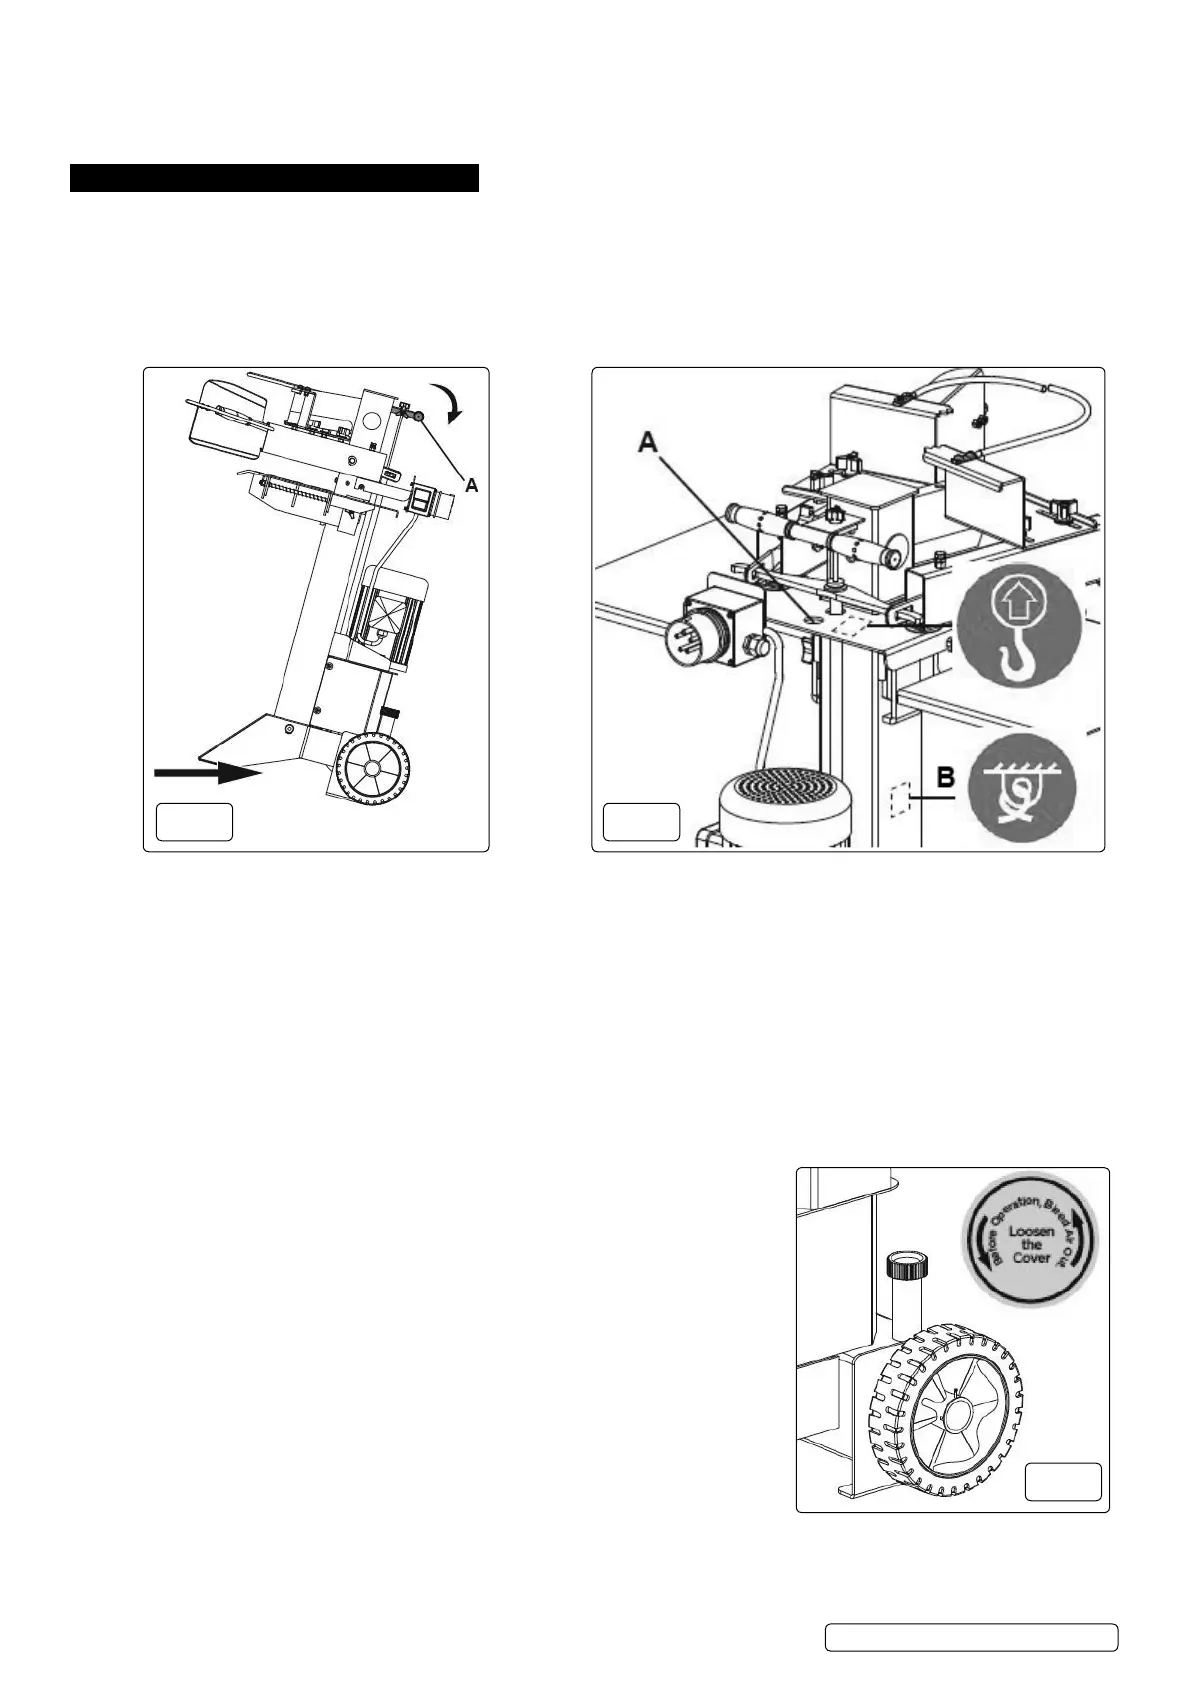
6.1. TRANSPORT(g.6,g.7)
WARNING! The item is very heavy. Always get help to move it.
WARNING! Disconnect from power supply before attempting to move splitter.
6.1.1. To move the splitter small distances it has two wheels and a hand grip at its top.
6.1.2. Tilt the splitter slightly backward after making sure that the oil tank cap is rmly tted to prevent any spillage.
6.1.3. If using a crane to move the splitter, lay hoist sling at the lifting point (g.7A).
6.1.4. If transporting over distance, fasten the log splitter at fastening point (g.7B) to prevent free movement during transportation.
6.1.5. Before starting splitting ensure the machine is on at level ground and rmly xed down i.e. use anchor bolts or similar (not supplied).
6.2. SPLITTER OPERATION
WARNING! Ensure you read, understand and apply the safety instructions before use.
WARNING! This system has been designed to prevent the operator from handling the log during the splitting process. For
safety reasons the operator must not ask a second person to place or handle the log. The system is designed to be operated by
one person only.
WARNING! Always split a log along its grain. Never attempt to split a log laid across the machine as this could be dangerous for
the operator and could seriously damage the machine.
WARNING! Never attempt to split a log if it is sitting at an angle.
6.2.1. Ensure that the power supply cable to the log splitter is routed so as not to be a tripping hazard or be positioned in such a way as to be
prone to damage or pulling.
6.2.2. In low temperature conditions preheat the hydraulic oil by running the motor under no load for 15 minutes prior to commencing work.
6.2.3. Before starting the motor, open the Air Bleed (fig.8), loosen the oil tank cap a few turns. Re-tighten cap when machine is not being
used to avoid spillage.
6.2.4. Before splitting any logs you must check that the safety feature of two handed operation of
the control levers functions properly by doing the following tests:
6.2.4.1. Turn on the motor. Push down on both control levers. The splitting wedge should lower
to approximately 5cm above the highest table position.
6.2.4.2. If either of the control levers is released the splitting wedge should remain in the
original position.
6.2.4.3. When both levers are released the ram should rise to its highest position automatically.
6.3. STROKEADJUSTMENT(fig.9)
6.3.1. When many logs of approximately the same length are to be split, the ram stroke can be
set to avoid having to wait for the ram to operate through its full stroke every time. See fig.9.
6.3.2. Hold down both control levers and move the splitting wedge down to the desired starting
position being 3 to 5cm above the log to be split.
6.3.3. Release one of the control levers and switch the motor off. The splitting wedge should
remain where it is.
6.3.4. Release the locking knob (fig.9.A) and raise the adjusting rod (fig.9.B) using the knob on its
end until spring resistance is felt. Tighten the locking knob (fig.9.A).
6.3.5. Release both levers and turn on motor. Check height setting is as required.
6.4. LOGSPLITTING(fig.10,fig.11)
6.4.1. Place log vertically onto the support table. It is essential that the wedge and support table contact the log square on.
NOTE: Never attempt to split a log if it is sitting at an angle.
6.4.2. Adjust the log holders (fig.10.A) to suit the diameter of the log. This will allow the user to obtain the most comfortable angle for levers.
g.8
g.9
g.10
g.11
g.12
Original Language Version
© Jack Sealey Limited
fig.
6
fig.
7
fig.
8
LS550V Issue 2 (2) 02/10/19
 Loading...