7.2.2. If the lter frame and lter mesh are clogged with dust, the function of the air-conditioner may decrease.
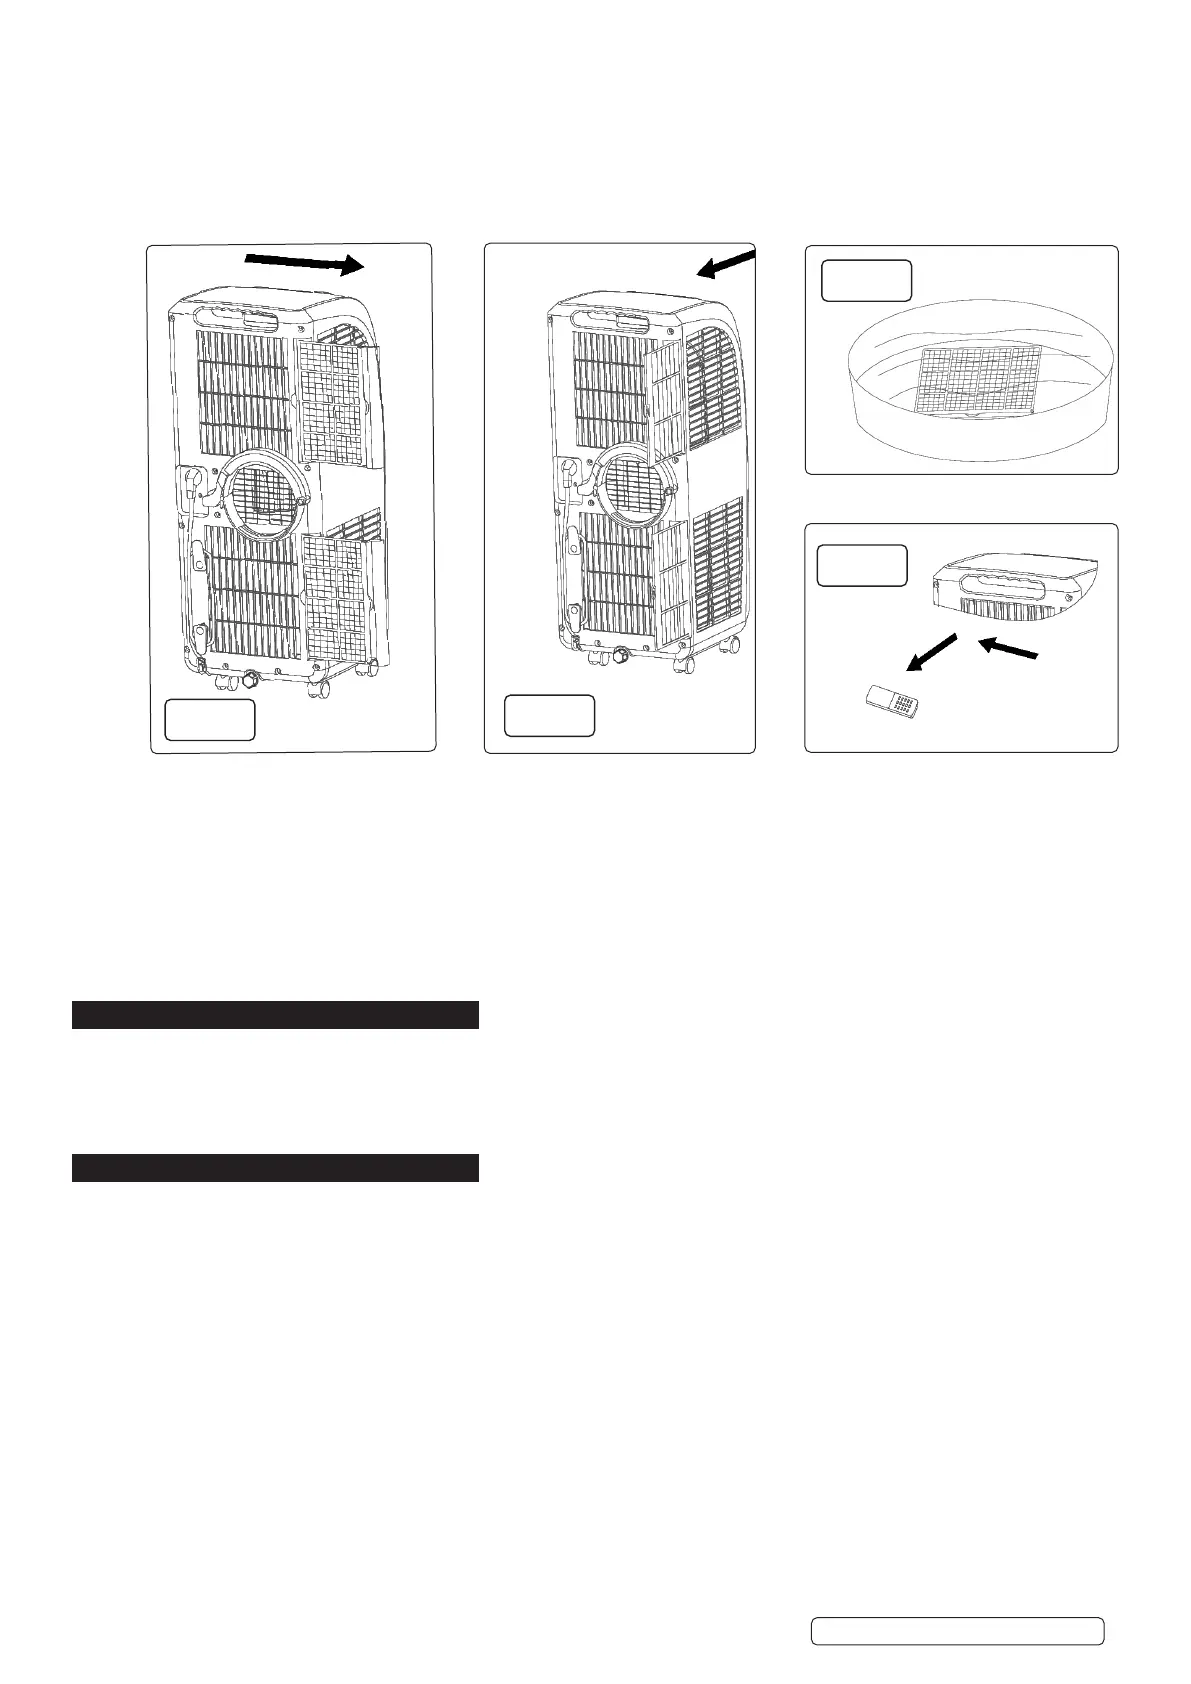
7.2.3. Remove the evaporator lter frame and the condenser lter frame gently in the direction shown by the arrow (as shown in g 9).
7.2.4. Remove the evaporator lter mesh and condenser lter mesh gently in the direction shown by the arrow (as shown in g 8).
7.2.5. Remove the lter frame rst and then take out the lter mesh.
NOTE: when taking out the lter frame or lter mesh, the force shall be applied evenly to avoid twisting or damage of the lter frame or
lter mesh.
7.2.6. Place the evaporator lter frame, condenser lter frame, evaporator lter mesh, and condenser lter mesh into warm water (about
40°C). Use neutral cleaner. Dry in the shade. (Fig 10)
NOTE: DO NOT damage the mesh fabric on the lter frame and lter mesh.
7.3. INSTALLATION OF THE FILTER FRAME AND FILTER MESH (g.8, 9, 10)
7.3.1. Install the lter mesh rst and then install the lter frame.
7.3.2. To install the evaporator lter mesh and condenser lter mesh, point the back end of the lter mesh toward the socket and then push
the lter mesh evenly and gently into the socket.
NOTE: Install the lter mesh in the reverse order of removal. The lter mesh must be installed into place; otherwise, the lter frame
may not be installed into place.
7.4. CLEANING OF THE HANDLE POSITION AND REMOTE CONTROL STORAGE AREA
7.4.1. Remove the remote control from its storage place in the handle (g.11).
7.4.2. Clean the handle position and remote control storage area with damp soft cloth only. DO NOT allow water to drip into the unit. DO
NOT soak the cleaning cloth.
8. MOVING THE UNIT
8.1. To move the unit, hold the top of the air outlet on the front of the unit with one hand and the handle position at the top of the back of
the unit with another hand. Ensure that the unit remains upright. DO NOT hold the horizontal louvre by hand.
8.2. Leave the unit in the upright position when handling or moving it.
8.3. To handle or move the unit, drain the water in the unit rst to prevent the water in the unit from owing onto the ground or carpet.
8.4. If the remote control is currently stored in the handle recess, remove it temporarily (g.11).
9. STORAGE
9.1. Unscrew the drain cap, unplug the water plug and drain the water in the water tray to a suitable vessel.
NOTE: DO NOT tilt the unit any further than 30° from vertical.
9.2. Start the unit, adjust mode to the low fan speed setting, keep the unit in this state for half a day in order to dry the interior of the unit to
prevent mould.
9.3. Turn o the unit, unplug the power plug, wrap the power cord around the wire-winding post, insert the plug into the storage point on the
rear of the unit; install the water plug and drain cap.
9.4. Remove the exhaust hose assembly and store appropriately to prevent damage.
NOTE: to remove the exhaust hose assembly, hold the handle of the exhaust hose retaining clamp, pull the retaining clamp outward
evenly, rotate the retaining clamp clockwise to open. Remove the exhaust hose assembly.
9.5. Pack the air-conditioner in a soft plastic bag. Store the unit in a dry and dust proof place. Keep the unit out of the reach of children.
9.6. Remove batteries from the remote control. Store remote control in an appropriate place.
9.7. Ensure that the unit is stored in a dry place.
Original Language Version
© Jack Sealey Limited
SAC9002 Issue 1 19/03/20
fig.8
fig.9
fig.11
fig.10
 Loading...