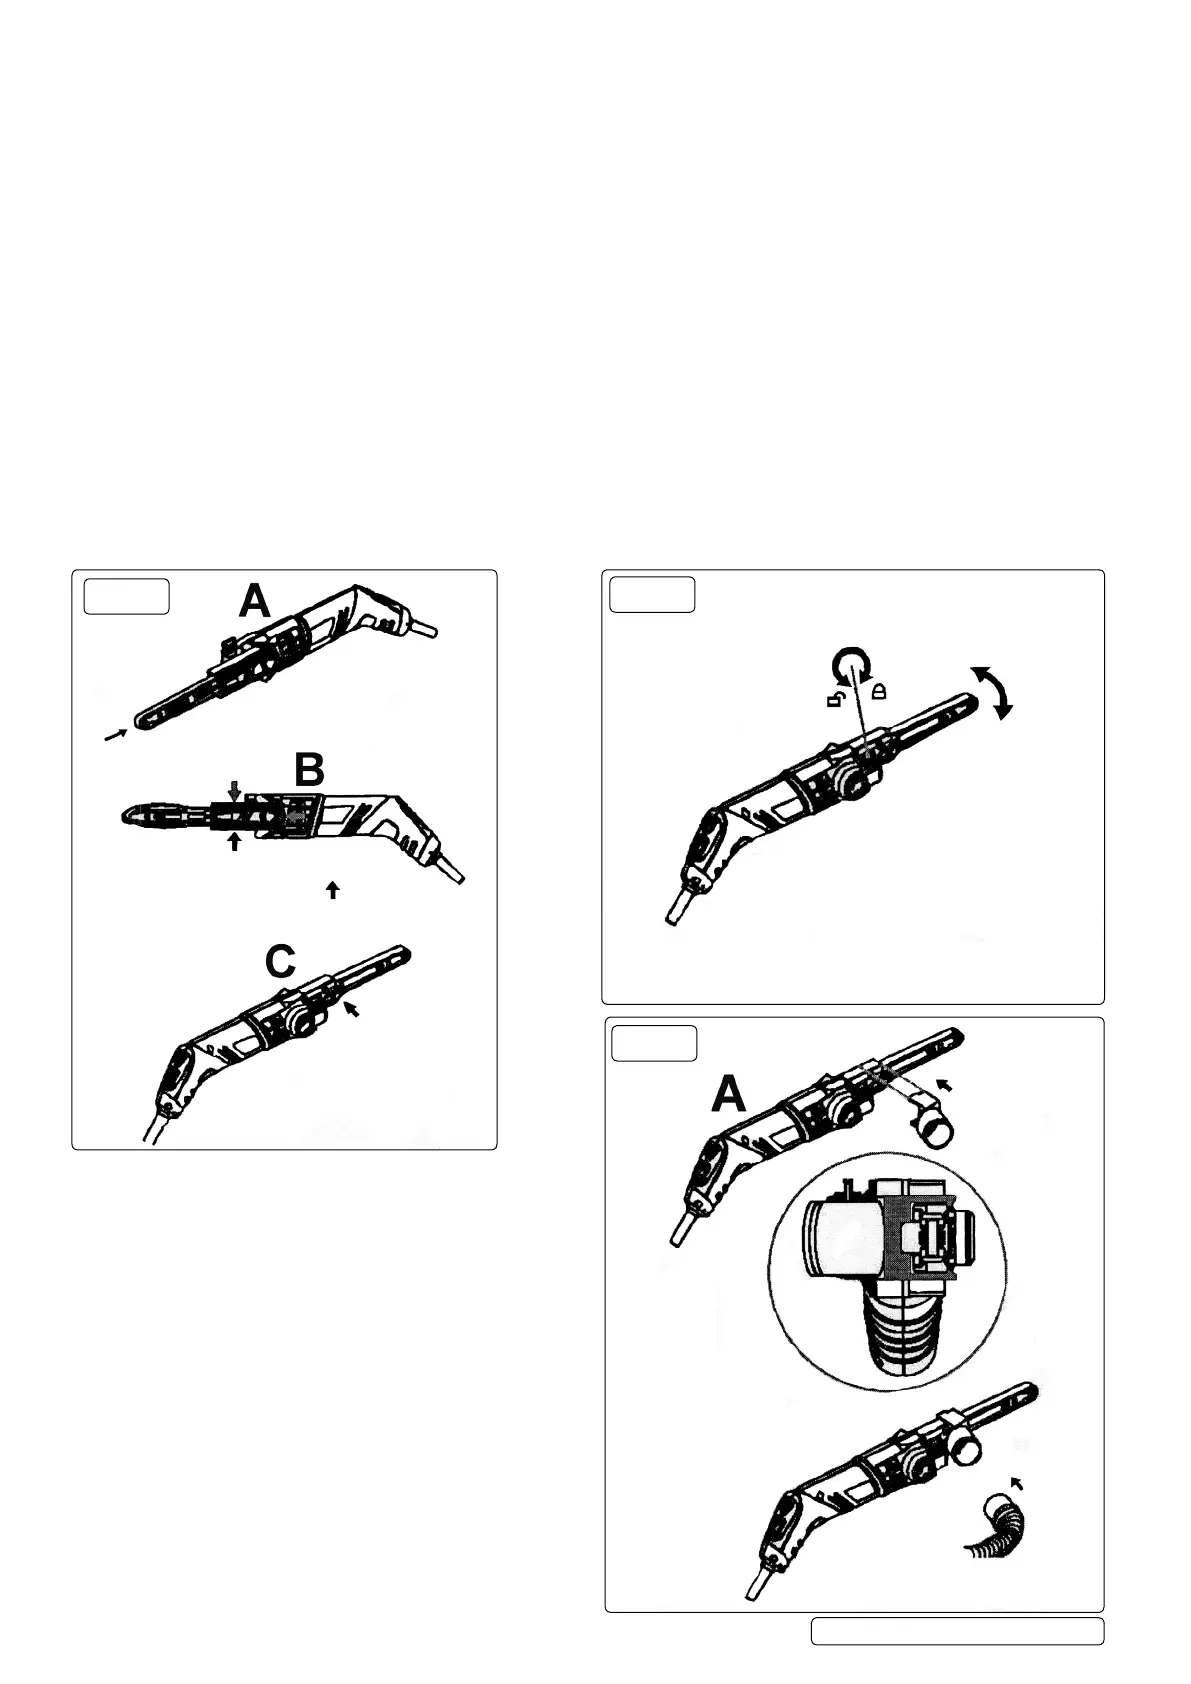
4.4. Belt arm angle adjustment
4.4.1. Unplug the power lead. Loosen the angle lock screw, see g.1-4 by
turning it anticlockwise, see g.3.
4.4.2. Pivot the belt arm, see g.1-6, to the desired angle.
4.4.3. Tighten the angle lock screw, by turning it clockwise, see g.3.
4.5. Connecting to a vacuum cleaner or dust collector
4.5.1. Remove the dust extraction port, see g.1-8 when a dust collector or
vacuum cleaner is not connected to the sander.
WARNING! Never insert your nger into the nozzle.
4.5.2. Install the dust extraction port, see g.1-8, onto the sander,
see g.4A. Make sure the extraction port has a rm grip on the
sander.
4.5.3. Connect the hose of the vacuum/dust collector onto the dust extraction port. Note: the I/D of the hose is 32mm (1.25”).
4.6. Belt Preparation
To ensure full exibility, and to prolong working life, the belt must be “bedded in”
4.6.1. Fit new belt ensuring the direction of travel is correct, and the belt join is NOT on the nose roller. Tension belt.
4.6.2. Operate the tool without a load applied at half speed for around 10 seconds, then increase to full speed for a further 10 seconds.
4.6.3. Finally, at a slow operating speed, using a piece of scrap material, apply light pressure to the belt where it runs over the “shoe”.
Increase the operating speed steadily to maximum for a few seconds, then stop.
4.7. Sanding
4.7.1. Make sure the sander is not already touching the work piece when the sander is turned on or off, otherwise a poor sanding
nish, damage to the belt or loss of control of the tool may result.
g.2
g.3
g.4
SBS260 | Issue 3 05/04/17
Original Language Version
© Jack Sealey Limited