Declaration of Conformity W
e, the sole importer into the UK, declare that the products listed here
are in conformity with the following standards and directives
For Jack Sealey Ltd. Sole importer into the UK
of Sealey Power Products.
27th June 2002
Signed by Mark Sweetman
The construction files for these products are held by the Manufacturer and may be inspected, by a
national authority, upon request to Jack Sealey Ltd.
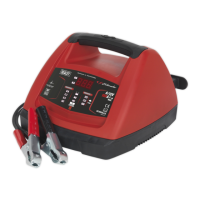
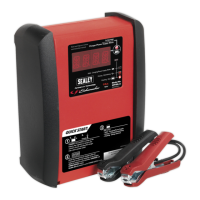
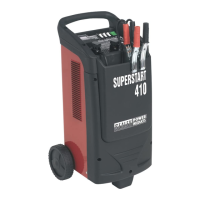
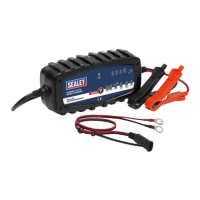
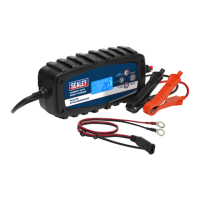
BATTERY STARTER/CHARGER Models:
Superstart 520/1.V3, 620/1, 1020
89/336/EEC EMC Directive
73/23/EEC LV Directive
4. FUSES
Your starter/charger is equipped with a safety fuse, or fuses, which will cut the power to the unit in the following circumstances:
a) Overload - too high a current to the battery.
b) Short circuit - clamps touch, or cross-connection to battery.
c) Prolonged starting attempts.
Should the fuse blow take the following action:
4.1. Turn the unit off and disconnect from the mains power supply.
4.2. Allow the unit to cool down, establish the reason for failure and correct.
4.3. Replace the fuse (for some models remove small panel at rear of starter/charger). Use only Sealey replacement fuse. DO NOT use a
fuse with copper bridges or similar as these will damage your equipment. Refer to Section 2 Specifications for fuse information and part
numbers. We recommend you hold 2 or 3 spare fuses with the starter/charger.
Note: The use of an incorrect fuse will invalidate your warranty.
Sole UK Distributor,
Sealey Group,
Bury St. Edmunds, Suffolk.
01284 757500
E-mail:
sales@sealey.co.uk
01284 703534
NOTE: It is our policy to continually improve products and as such we reserve the r
ight to alter data, specifications an
d component parts without prior notice
.
IMPORTANT: No liability is accepted for incorrect use of the product. WARRANTY: Guarantee is 12 months from purchase date, proof of which will be required
for any claim. INFORMATION: For a copy of our latest catalogue and promotions call us on 01284 757525 and leave your full name and address, including postcode.
Superstart 520/1.V3, 620/1.V3,1020.V2 - 0051 - (3) - 24/06/02
3.5.4. Check that the charger clamps and battery terminals are clean and free from oxidation.
3.5.5. Without removing the power leads that connect the battery to the vehicle, connect the charger POSITIVE (red) lead to
the POSITIVE (+) terminal on battery and the NEGATIVE (black) lead to NEGATIVE (-) terminal on the battery.
3.5.6. Plug starter/charger into mains power supply, select a low rate of charge and turn on. Allow the battery to charge for 2-3 minutes.
3.5.7. Superstart 520/1.V3 & 620/1.V3
Turn the appropriate switch to the Start position (indicated by the
symbol seen in fig 2) and wait for approximately 25 seconds (to allow charge to build). Turn the vehicle
ignition on and crank the engine for a MAXIMUM of 10 seconds. If the vehicle does not start, wait 30
seconds and then try again.
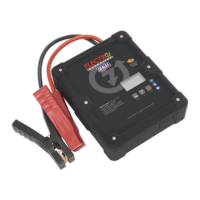
Superstart 1020.V2 remote start button.
The Superstart 1020 has a remote start button on an
extended lead. When the rotary switch on the unit is turned to the Start position the boost charge is not initiated until the button on
the remote is pressed. The charge will continue as long as the button is held down and cease when the button is released. This
facility is particularly useful when working on commercial vehicles where the button can be taken into the cab. Turn the ignition on
and crank the engine followed immediately by the operation of the remote start button. If the vehicle does not start within 10
seconds release the button and turn off the ignition. Wait 30 seconds and then try again.
p WARNING! If the vehicle does not start after two attempts, DO NOT continue as vehicle battery and electrical circuits may
be damaged, and the fuse in the charger will blow. Disconnect the charger and investigate for vehicle faults
3.5.8. When the vehicle is running successfully, switch the starter/charger off, unplug from the mains power and disconnect the power
terminals from the battery. DO NOT attempt to start engine with starter/charger if the battery is disconnected from the vehicle.
fig 2
 Loading...