Do you have a question about the Sears Craftsman 113.213850 and is the answer not in the manual?
Read and understand the owner's manual and labels affixed to the tool.
This tool is equipped with an approved 3-conductor cord and a 3-prong grounding type plug.
Ensure guards are in working order, proper adjustment, and alignment.
Form a habit of checking to see that keys and wrenches are removed before turning tool on.
Cluttered areas and benches invite accidents. Ensure floor is not slippery.
Don't use power tools in damp/wet locations or expose to rain. Keep work area well lighted.
All visitors should be kept a safe distance from work area.
Secure workshop with padlocks, master switches, or by removing starter keys.
It will do the job better and safer at the rate for which it was designed.
Don't force tool or attachment to do a job it was not designed for.
Do not wear loose clothing, gloves, neckties, or jewelry. Wear protective hair covering.
Wear Safety goggles (must comply with ANSI Z87.1) at all times. Use face/dust mask and ear protectors.
Use clamps or a vise to hold work when practical. It's safer than using your hand.
Keep proper footing and balance at all times.
Keep tools sharp and clean for best performance. Follow instructions for lubrication.
Disconnect tools before servicing or changing accessories.
Make sure switch is in 'OFF' position before plugging in.
Consult owner's manual for recommended accessories. Improper accessories may cause hazards.
Serious injury could occur if the tool is tipped or if the cutting tool is accidentally contacted.
Before further use, a guard or other part that is damaged should be carefully checked.
Feed work into a blade or cutter against the direction of rotation of the blade or cutter only.
Turn power off. Don't leave tool until it comes to a complete stop.
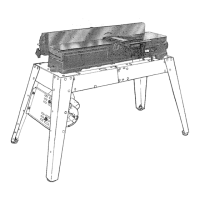
Learn about the components and layout of your drill press.
Follow instructions for operating your drill press for best results and safety.
Details on making necessary adjustments to the drill press components.
Information on keeping the drill press in good working order.
The drill press should be bolted to the floor or secured to prevent movement.
Position the drill press so the operator is not in line with potential kickback.
Understand what kickback is and its common causes to avoid serious injury.
Do not wear gloves, neckties, or loose clothing. Tie back long hair. Wear safety goggles.
Use only accessories designed for this drill press; note specific limitations for holesaws and drum sanders.
Follow the safety warnings and instructions located on the panel on the left side of the head.
Safety is a combination of operator common sense and alertness at all times.
List of tools required for assembling the drill press.
Inventory list of all parts included with the drill press.
Details on the RPM and voltage requirements for the drill press motor.
Instructions for safely connecting the drill press to a power outlet, including grounding.
Step-by-step instructions for assembling the column and table hardware.
Instructions for mounting and securing the drill press table.
Instructions for carefully lifting and mounting the drill press head assembly.
Steps for attaching the feed and tension handles to the drill press.
Detailed steps for properly tensioning the drive belt for optimal performance.
Instructions for installing a light bulb into the drill press head.
Steps to ensure the table is perfectly square to the drill press head for precise work.
Procedure for adjusting the depth pointer to the '0' position on the scale.
Instructions on how to safely remove the drill chuck from the spindle nose.
Two methods are described for drilling holes to a specific, predetermined depth.
Steps for inserting and centering drill bits into the chuck for secure operation.
How to position the table and workpiece correctly for safe and effective drilling.
Instructions for tilting the table to achieve bevel angles for specific operations.
Detailed steps for adjusting the tension of the quill return spring.
Information on lubricating the drill press mechanisms for smooth operation.
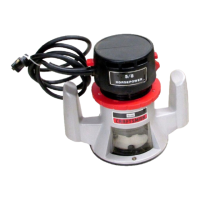
List of recommended accessories available for the drill press.
Identifies common causes of noisy operation and their remedies.
Addresses issues like drill speed, chip removal, sharpness, and lubrication causing drill bit burning.
Troubleshooting for inaccurate hole drilling due to grain or lip angles.
Solution for wood splinters is to use back-up material.
Ensures workpiece is supported or clamped properly to prevent it from being torn loose.
Addresses causes like workpiece pinching or improper belt tension leading to drill binding.
Troubleshooting bent drills, bearings, or improper chuck installation causing wobble.
Diagnosing and adjusting quill return spring tension.
| Category | Power Tool |
|---|---|
| Type | Table Saw |
| Blade Diameter | 10 inches |
| Voltage | 120V |
| Arbor Size | 5/8 inches |