This document provides installation instructions for Seasons dishwashers, specifically models SDW2FCMB, SDW2FCMS, and SDW2FCMW. It emphasizes safety, proper installation techniques, and necessary tools and materials.
Function Description:
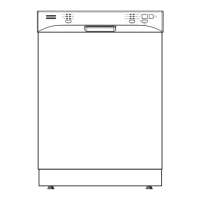
The Seasons dishwasher is designed for residential kitchen use, intended to be enclosed within a standard cabinet unit. It features a heating element to heat water for washing. The installation process covers preparing the enclosure, connecting water and drain lines, and electrical hookup, ensuring proper operation and drainage.
Important Technical Specifications:
- Dimensions: The installation enclosure must be at least 24 inches (61 cm) wide, 25 inches (63.5 cm) deep, and 34 inches (86.4 cm) high. For the front door to be flush with the countertop, the countertop must be 25 inches (63.5 cm) deep.
- Corner Installation Clearance: If installing into a corner, allow a minimum of 2 inches (5.08 cm) clearance between the dishwasher and adjacent cabinet, wall, or other appliances. A minimum of 25.63 inches (65.1 cm) clearance from the front of the dishwasher is required for door opening.
- Drain Hose Length: The drain hose must be no more than 10 feet (3.01 m) in length for proper drainage. If an extension is needed, up to 42 inches (1.1 m) can be added, using 5/8" or 7/8" inside diameter hose and a coupler, secured with screw-type hose clamps. The total drain hose length must not exceed 10 ft (3.01 m).
- Drain Connection Height: The dishwasher must be connected to a waste line with an air gap (not provided) or a minimum 32-inch (81.28 cm) high drain loop to prevent backflow. An air gap is mandatory if the waste tee or garbage disposal connection is less than 18 inches (45.72 cm) above the floor to prevent siphoning.
- Electrical Requirements: The appliance requires a 120V, 60 Hz, dedicated, properly grounded branch circuit, protected by a 15 or 20 ampere circuit breaker or time delay fuse. Wiring must be two-wire with ground. If using a power cord, it should be a 3-prong grounding type receptacle, with a recommended length of 54 inches (1.4 m) minimum and 64 inches (1.6 m) maximum. Direct wire cable must extend a minimum of 24 inches (60.96 cm) from the rear wall and be flexible, armored, or nonmetallic sheathed copper wire with grounding wire, using a UL Listed/CSA Approved strain relief.
- Water Temperature: Incoming hot water temperature must be between 120°F and 150°F (49°C to 65°C) for best wash performance.
- Water Pressure: The hot water pressure must be between 20 and 120 psi (138 and 827 kPa).
Usage Features:
- Door Balance Adjustment: The dishwasher door's spring tension can be adjusted to ensure it stays open or closed as desired, preventing it from dropping or closing unexpectedly. This is crucial for safe loading and unloading.
- Leveling Legs: Four adjustable leveling legs allow the installer to precisely level the dishwasher, which is essential for proper dish rack operation and wash performance. Adjustments can be made individually to achieve side-to-side and front-to-back level.
- Countertop Securing Methods: Two methods are provided for securing the dishwasher to the countertop:
- Method 1 (Top Mounting Clips): For wood or drillable countertops, long top mounting clips are inserted into slots, bent to secure to the tub, and then screwed into the underside of the countertop.
- Method 2 (Side Mounting Screws): For granite, marble, or other breakable materials, or if the gap between the control panel and cabinet is less than 0.4 inches (10 mm), wood screws are driven through holes in the side of the dishwasher tub into the cabinet frame. Plastic tub caps are used to cover the screw holes.
- Drain Plug Removal: If connecting to a garbage disposal, the drain plug must be removed from the disposal unit to ensure proper drainage.
Maintenance Features (Installation-related):
- Pre-test Check: A comprehensive pre-test checklist is provided to ensure all installation steps are correctly completed before initial operation. This includes verifying power, door balance, wiring security, door alignment, rack movement, water and drain line connections, water temperature, and pump seal lubrication.
- Wet Testing: After installation, a wet test is performed by running a "Rinse only" cycle to check for water entry, leaks under and around the dishwasher, and proper drainage. This helps identify and correct any plumbing issues before regular use.
- Toekick Replacement: The toekick is designed for easy removal and replacement, allowing access to the leveling legs and junction box during installation and for future maintenance. It should be aligned correctly with the junction box and touch the floor.
- Troubleshooting: The manual includes warnings and cautions throughout, guiding the installer to avoid common mistakes that could lead to product failure or safety hazards. For instance, it warns against pushing on the front panel with knees, overtightening the water supply elbow, and cutting the corrugated portion of the drain hose. It also advises calling a licensed electrician if electrical supply requirements are not met.