Do you have a question about the SEI LANGSTON and is the answer not in the manual?
Provides contact details for customer service and assembly assistance.
Details and quantities of all hardware components required for assembly.
Guidance on maintaining the desk's finish and appearance.
Specifies the type of screwdriver needed for assembly.
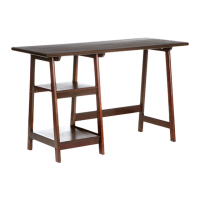
Attach top stretcher (G) to wood top (A) using bolts (6) and dowel (4).
Attach short stretcher (H) to top shelf (F) using screw (3) and dowel (4).
Attach short stretcher (H) to bottom shelf (E) using screw (3) and dowel (4).
Attach left side panel (B) to shelves (E) & (F) using bolts (1), dowel (4) and barrel nut (2).
Attach central panel (C) to shelves (E) & (F) using bolts (1), dowel (4) and barrel nut (2).
Attach long stretcher (I) to right side panel (D) using bolt (1), dowel (4) and barrel nut (2).
Attach long stretcher (I) to central panel (C) using bolt (1), dowel (4) and barrel nut (2).
Attach wood top (A) to panels (B), (C), (D) using bolt (6).
Form for requesting replacement parts and customer service contact details.
| Brand | SEI |
|---|---|
| Model | LANGSTON |
| Category | Indoor Furnishing |
| Language | English |