Do you have a question about the Seiki SK1350T and is the answer not in the manual?
Welcome and overview of the Seiki T Series vinyl cutter, encouraging manual review.
Safety warnings and precautions to mitigate fire or electric shock risks during operation.
Inventory list of all included items to ensure package completeness before operation.
Step-by-step instructions for assembling the vinyl cutter stand.
Guide on how to install and use a pen for plotting, including force and speed adjustments.
Details on installing the cutting blade, including its compatibility, diameter, and adjustment.
Procedures for correctly mounting the pen or blade holder in the machine's V-bracket.
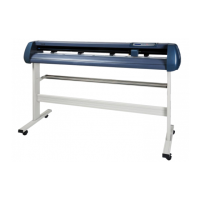
Diagram and identification of the key physical parts of the cutting plotter.
Explanation of the control panel's buttons, display, and their respective functions.
Instructions for properly positioning and loading vinyl or paper onto the plotter's guide rail.
Steps for conducting initial tests to verify machine functionality after setup and installation.
Details on how the plotter's core functions like plotting, speed, and force control operate.
Description of local control features including Reset, Offline, Setup, Test/Stop, and Origin modes.
Diagnoses issues with pattern deformation, incompleteness, output, and abnormal operation.
Covers causes and solutions for pattern deviation, lost steps, and paper deflection.
Troubleshoots inconsistent cutting depth, vinyl tear-off, and origin point adjustments.
Provides guidance on adjusting settings for optimal cutting of small and large signs.
The Seiki Vinyl Cutter Plotter, specifically the T Series, is a specialized machine designed for cutting professional custom design signs from vinyl and other media. It connects to a computer, allowing users to create designs using sign editing software and then precisely cut them with the plotter. This device is engineered for superior quality and reliable performance in the realm of electrical machines, offering users the freedom to bring their designs to life with accuracy and efficiency.
The primary function of the Seiki Vinyl Cutter Plotter is to accurately cut designs from various media, typically vinyl. It operates by receiving graphical data from a connected computer and translating that data into physical cuts on the material. The plotter utilizes a blade or a pen, depending on the desired outcome (cutting or plotting). When cutting, the blade precisely follows the design contours, separating the desired shape from the backing material. For plotting, a pen is used to draw the design on paper, which can be useful for proofing or creating patterns without cutting.
The machine features a tool carriage that moves along a top beam, while pinch rollers hold and advance the media across a metal roller. This coordinated movement ensures precise positioning and cutting across the entire working area. The control panel provides an interface for managing various operational parameters, including setting the origin, adjusting speed and down force, and initiating self-tests. The plotter is designed to handle different media widths, accommodating a range of project sizes.
The Seiki Vinyl Cutter Plotter offers several features to enhance its usability and the quality of its output:
Media Loading: The plotter is equipped with adjustable pinch rollers that can be moved along a guide rail to accommodate different media widths. Proper placement of the media is crucial to prevent deviation during cutting. Users are advised to lift the pinch roller handle before moving them and to avoid placing them over the joints of the main metal rollers. After loading, the media should be run back and forth a few times to ensure it is aligned vertically and securely held, minimizing deviation.
Blade and Pen Installation: The device supports both blade and pen holders. For cutting, three Roland-compatible blades with a 2mm diameter are included. The blade's extension beyond the holder is adjustable, typically set to 3-4 mils (less than 5 mils) to prevent damage to the protection strip and ensure optimal cut quality. For plotting, a ballpoint pen can be inserted into the pen holder, with its tip extended to a proper length. The down force for plotting should be reduced to avoid damaging the paper.
Control Panel Operation: The control panel is central to operating the plotter. It features a two-line LCD display, power, off-line, and setting indicator lights, and several function keys.
Speed and Down Force Regulation: The cutting speed and down force can be adjusted directly from the control panel using the direction keys. Speed can be changed grade-by-grade with the "up" and "down" keys, while down force is adjusted with the "left" and "right" keys. These adjustments can even be made while the machine is actively cutting, offering flexibility during operation.
Offline Status Functionality: When in offline status, users can precisely position the tool carriage and media using the direction keys. This is particularly useful for setting a specific starting point for a job. Pressing "Origin" in this state will set the current position as the new origin.
Small and Large Sign Cutting: For small characters (below 20mm), it is advised to use the slowest speed and consider using the compensating function with a figure between 0.2-0.4mm for better results. The knife tip length should also be shorter than normal for smoother small cuts. For large signs, if the design exceeds the plotter's width, the software can automatically separate it, or users can manually divide it. Speed can be increased for large signs, and the compensating function should be eliminated, with seamless connection chosen for continuous designs.
While the manual primarily focuses on operation, several points touch upon maintenance and troubleshooting:
By adhering to these guidelines, users can ensure the longevity and optimal performance of their Seiki Vinyl Cutter Plotter.