Do you have a question about the Seiko ASTRON 8X82 GPS SOLAR and is the answer not in the manual?
Important safety warnings regarding severe injury risks.
Cautions regarding light injuries or material damages.
Details on receiving GPS signals for precise local time setting.
Explains operation and charging via solar power.
Automatic time synchronization based on GPS signals and user activity.
Explanation of the Global Positioning System and its satellites.
Description of the GPS satellite's role and characteristics.
How the watch uses GPS signals to set time and date.
Explanation of time zones based on UTC and their division.
Explanation of Daylight Saving Time and its adoption.
Definition and purpose of UTC as a standard time.
How to adjust time when changing region or time zone.
How to set only the time using manual adjustment.
Using the case back number to identify watch type.
Steps to display correct time after official time zone changes.
Shows the stages of GPS signal reception.
Indicates the watch's status in airplane mode.
Shows the current battery charge level.
Indicates the status of Daylight Saving Time.
Shows the outcome of the last GPS signal reception.
Move to an open sky location for GPS signal reception.
Initiate reception by pressing Button B for 6 seconds.
Wait for GPS signal reception and processing.
Verify the outcome of the GPS signal reception.
Manually activate Daylight Saving Time setting.
Manually deactivate Daylight Saving Time setting.
Access time zone display by pulling the crown.
Return to normal display after checking settings.
Activate in-flight mode to prevent GPS signal interference.
Deactivate in-flight mode to restore GPS functions.
Prepare for manual time zone setting.
Adjust the time zone using the crown.
Finalize manual time zone adjustment.
Ensure good reception conditions for manual time adjustment.
Initiate manual time adjustment process.
Allow the watch to receive GPS signals for adjustment.
Verify the outcome of the manual time adjustment.
Details on time adjustment, zone ID, and leap second reception.
Answers common questions about time zone and DST updates.
Compensation for time deviations using leap seconds.
Automatic updates for leap second data from GPS signals.
Initiate display of reception result.
Interpret second and indicator hand displays for reception outcome.
Understand the meaning of "Y" (success) and "N" (failure) results.
Initiate display of leap second reception result.
Observe second and indicator hands for leap second status.
Understand "Y" (successful) and "N" (failed) for leap second data.
Overview of stopwatch measurement capabilities.
Basic stopwatch operation for timing.
Measure total elapsed time with restart capability.
Record split times during a measurement.
Measure and compare times for two competitors.
Steps to stop and reset the stopwatch while counting.
Procedures for resetting after standard or accumulated measurements.
Resetting the stopwatch after split times are displayed.
Resetting the stopwatch after competitor times are recorded.
Use tachymeter to calculate speed based on time.
Use tachymeter to calculate production rate.
Indicates low energy; reception and stopwatch functions limited.
Indicates critically low energy; hands and functions stop.
Second hand stops at 15s; hour/minute/date stop; auto-adjust off.
Second hand stops at 45s; critical functions stop; low charge state.
Proper cleaning methods for the watch body and crown.
Regular turning of crown and pressing of buttons.
Care instructions for metallic watch bands.
Care instructions for leather watch bands.
Care instructions for polyurethane watch bands.
Care instructions for silicone watch bands.
Notes on band fit and potential skin reactions.
Instructions for using the three-fold clasp to wear/remove the watch.
Steps to adjust the watch band length using the clasp.
Information on the special secondary battery and its replacement.
Guidelines and warnings for charging the watch.
Procedures for warranty service and repairs.
Details on availability and specifications of replacement parts.
Recommendation for periodic professional servicing.
Common issues and checks when GPS signals cannot be received.
How to manually set time when GPS reception fails.
Initiate manual time setting by pulling the crown.
Use Button A to activate manual time setting.
Adjust the hour and minute hands using the crown.
Finalize manual time adjustment.
Reasons for time/date/hand misalignment and checks.
Understanding the initial or default hand positions.
How the watch automatically corrects hand positions.
Procedure for manually adjusting hand positions.
Start manual adjustment by pulling the crown.
Enter mode to adjust stopwatch 1/5-second hand.
Adjust the 1/5-second hand to the 0-second position.
Enter mode to adjust stopwatch minute hand.
Adjust the stopwatch minute hand to the 0-minute position.
Enter mode to adjust the date position.
Adjust the date to the correct preliminary position.
Enter mode to adjust the indicator hand position.
Set the indicator hand to its correct preliminary position.
Enter mode to adjust hour/minute hands.
Move hour/minute hands to 12:00 position.
Exit adjustment mode.
Finalize time setting by receiving GPS signals.
Initiate light detection setting change.
Choose to enable or disable light detection.
Return to time display mode.
Solutions for 2-second or 5-second interval movement.
Troubleshooting for reception failures or incorrect results.
Addressing reception failures, incorrect time/date, and automatic adjustment issues.
Solutions for time discrepancies due to external factors or DST.
Correcting misalignment of small second hand, time, and hands.
Resolving 1-hour time gain/loss and DST setting issues.
Solutions for watches not resuming normal movement after charging.
Correcting misaligned date and stopwatch hands after reset.
Adjusting the position of the indicator hand.
Resolving problems with crown/button operation and interrupted procedures.
Addressing persistent blur on the dial glass.
Details on hands, date, and world time.
Specifies the frequency of the crystal oscillator.
Monthly time accuracy rate under specific conditions.
Specifies the operating temperature limits.
Describes the motor and hand movement mechanism.
Information on the secondary battery used.
Battery life estimates with and without power save.
Features related to GPS time and zone adjustments.
Details about the watch's internal circuitry.
| Caliber | 8X82 |
|---|---|
| Movement Type | GPS Solar |
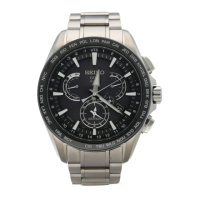
| Case Material | Titanium |
| Band Material | Titanium |
| Dial Color | Black |
| Water Resistance | 10 bar (100 meters) |
| Power Reserve | 6 months |
| Functions | GPS, Solar, World Time, Alarm |
| Crystal | Sapphire |