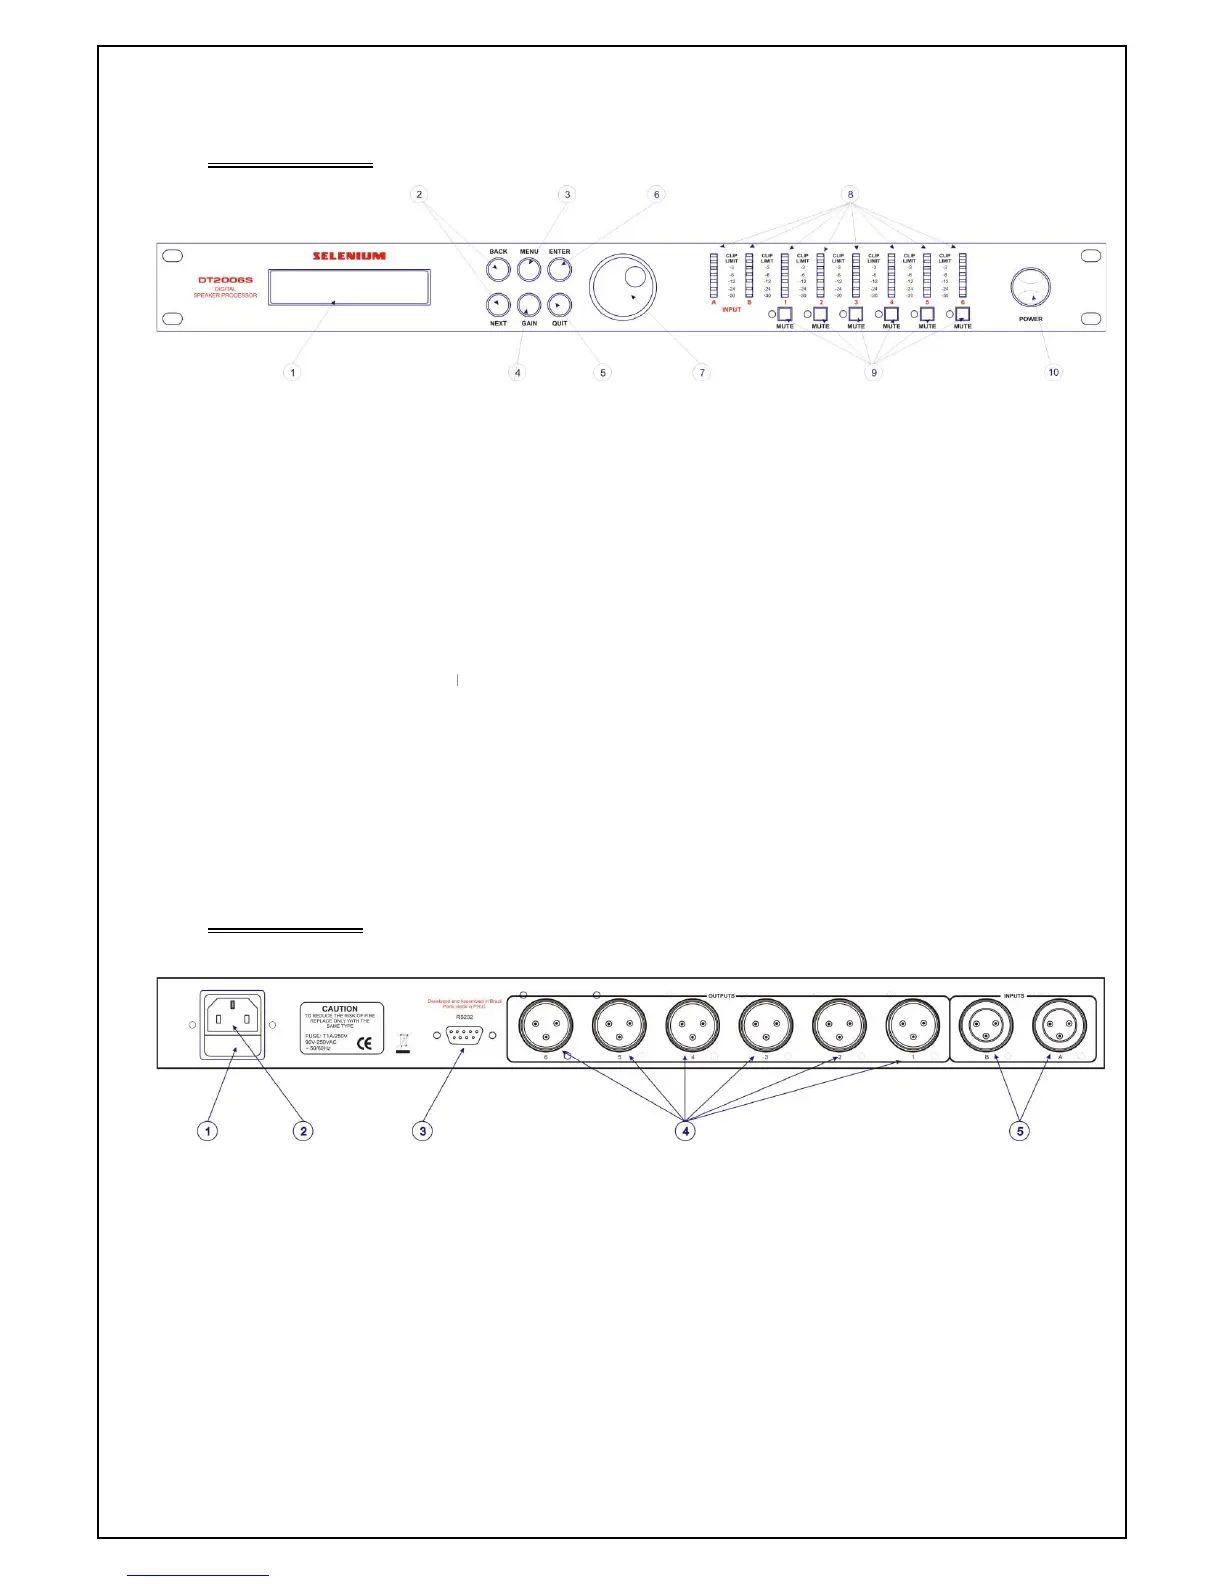
LCD PANEL: displays the menu and the parameters configured in the equipment
BACK/NEXT: used to scroll through the menus
MENU: provides access to the equipment's configurations, limiters, crossovers, etc.
GAIN: gain adjustment button
QUIT: button to leave the menu
ENTER: confirmation button
PARAMETER: button to adjust and change
INPUT/OUTPUT LED: LED indicator of input and output signal
MUTE: button to mute the outputs
10. POWER: on/off button
4.2 Rear Panel
Figure
1. EXTRA FUSE
2.
POWER PLUG, AUTOMATIC Voltage Selector
3. PC LINK CONNECTOR
4. SIGNAL OUTPUTS
XLR cable connection
LCD PANEL: displays the menu and the parameters configured in the equipment
BACK/NEXT: used to scroll through the menus
MENU: provides access to the equipment's configurations, limiters, crossovers, etc.
GAIN: gain adjustment button
QUIT: button to leave the menu
ENTER: confirmation button
PARAMETER: button to adjust and change
INPUT/OUTPUT LED: LED indicator of input and output signal
MUTE: button to mute the outputs
POWER PLUG, AUTOMATIC Voltage Selector
LCD PANEL: displays the menu and the parameters configured in the equipment
MENU: provides access to the equipment's configurations, limiters, crossovers, etc.