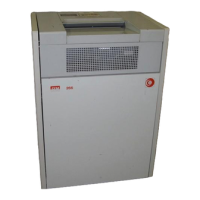
The Model 266 must be installed in a room equipped with 120V/1/60HZ, dedicated electrical service.
The shredder is equipped with a (3) three prong plug on the power cord. The shredder must be
operated on a dedicated 20 Amp circuit to assure adequate power for the shredder controls.
Open the cabinet door by pulling the handle on the upper right comer. Pull the waste container
forward and out of the cabinet. Place a plastic waste bag inside the container, folding the excess
over the sides. Remove shipping tabs as described in this manual. Slide the container back into
the cabinet. Lubricate the cutters as described in the lubrication section of this manual. You are
now ready to start shredding.
The Model 266 Shredder features automatic on/off for simple and convenient operation. Simply insert
paper into feed opening, the electronic sensor turns shredder on. Once paper has passed through the
cutting head, there will be a 3-4 second waiting period, the machine will then shut itself off.
The shredder can also be operated manually using the 'start', 'stop' and 'reverse' pushbutton controls.
1. Green 'start' pushbutton - when this is pressed, the shredder is turned on and ready to
shred. A green light will come on to indicate that the shredder is running in the forward mode.
2. Red 'stop' pushbutton - when this is pressed, the shredding unit stops.
3. Yellow 'reverse' pushbutton - when this is pressed and held down, the cutting head will run
in reverse. The reverse is used when cleaning the cutting unit, and also to clear jammed
material should the machine be over fed.
FEEDING
To start shredding, simply insert paper into the feed slot or press the 'start' pushbutton. Begin by feed-
ing one or two sheets of paper into the cutting unit. Gradually increase amount of paper up to a maxi-
mum of 11 sheets at a time. This procedure allows the operator to become familiar with basic opera-
tion techniques, and will insure uninterrupted, efficient shredding. Be sure to remove staples and
paper clips from the materials to be destroyed.
Should too much material be fed into the shredder, it will switch off automatically. Following a brief
pause, it will automatically run in reverse for a short time after which the material can be easily
removed. Thin out the quantity of material that caused the jam, proceed shredding with smaller
amounts.
3
 Loading...